Here's a basic explanation of Adobe Fresco's tools - TechnW3

Like many of the best drawing apps, Adobe Fresco is super simple and easy to use, but there's still a small curve for novices.
If you've just downloaded Adobe Fresco for your tablet and are curious to know how to use it, we've got you covered. Although this is a very simplified drawing app, there's still a learning curve, especially if you aren't already familiar with drawing programs. Here are all of Adobe Fresco's fundamental tools and what they do.
A guide to Adobe Fresco's basic tools
- Layers
- Gestures and Shortcuts
- Color tools
- Brushes and the eraser
- Selection tools
- Saving, importing, exporting, and sharing
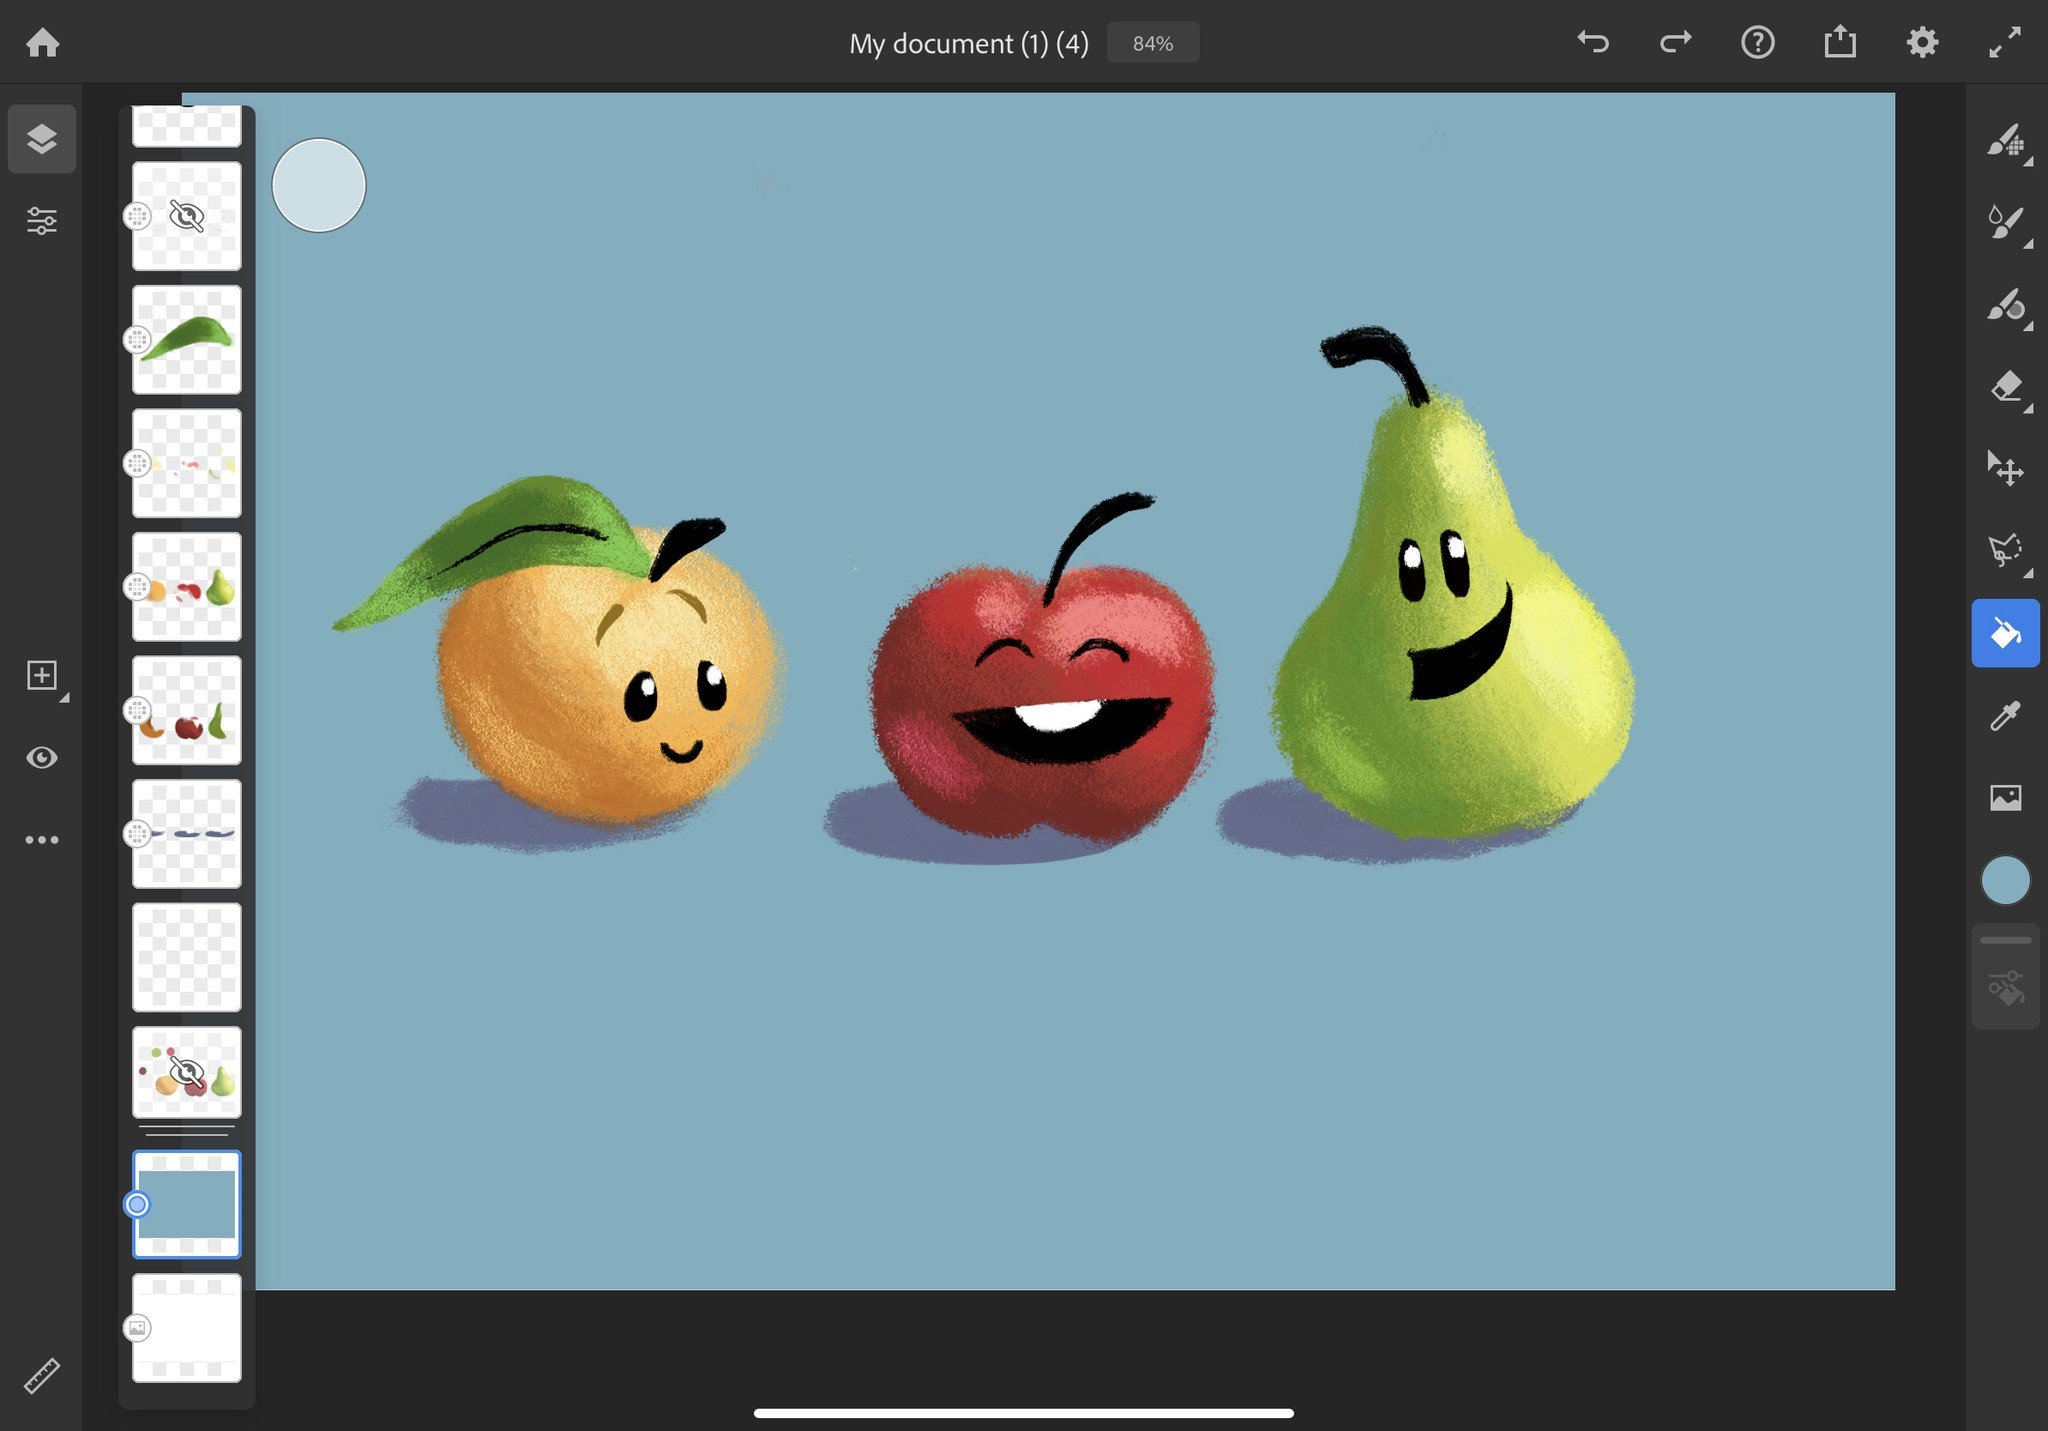
Layers
Working in layers allows you to make changes to one section of your work without affecting the others. This gives you plenty of control to get your projects looking just the way you want them to.
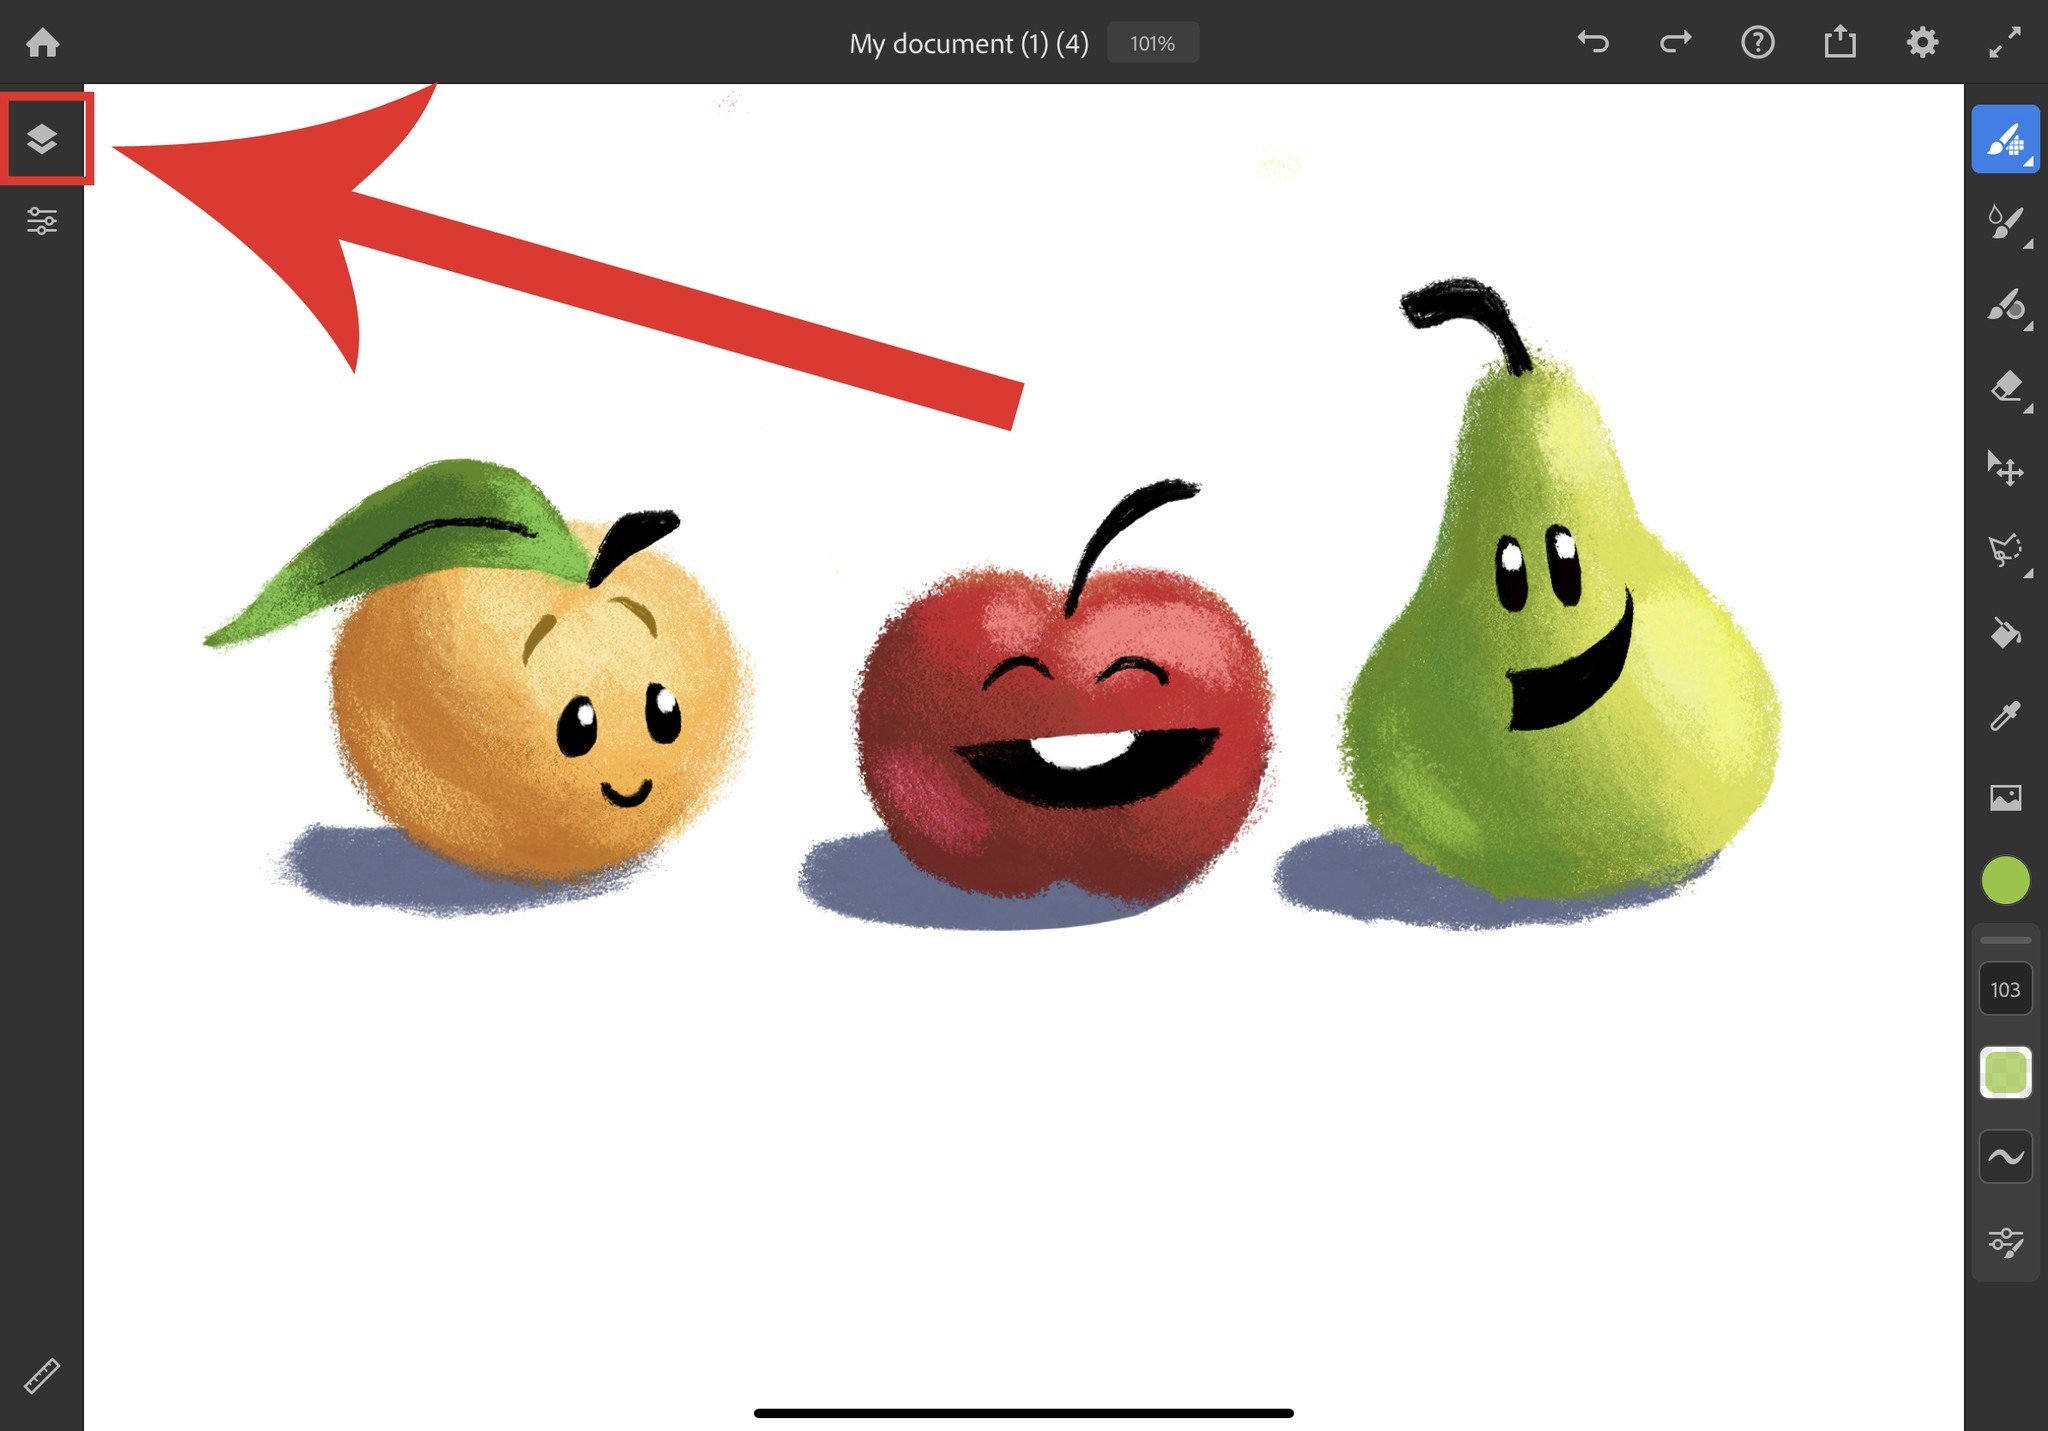
- This layer button opens and closes the layer tab.
-
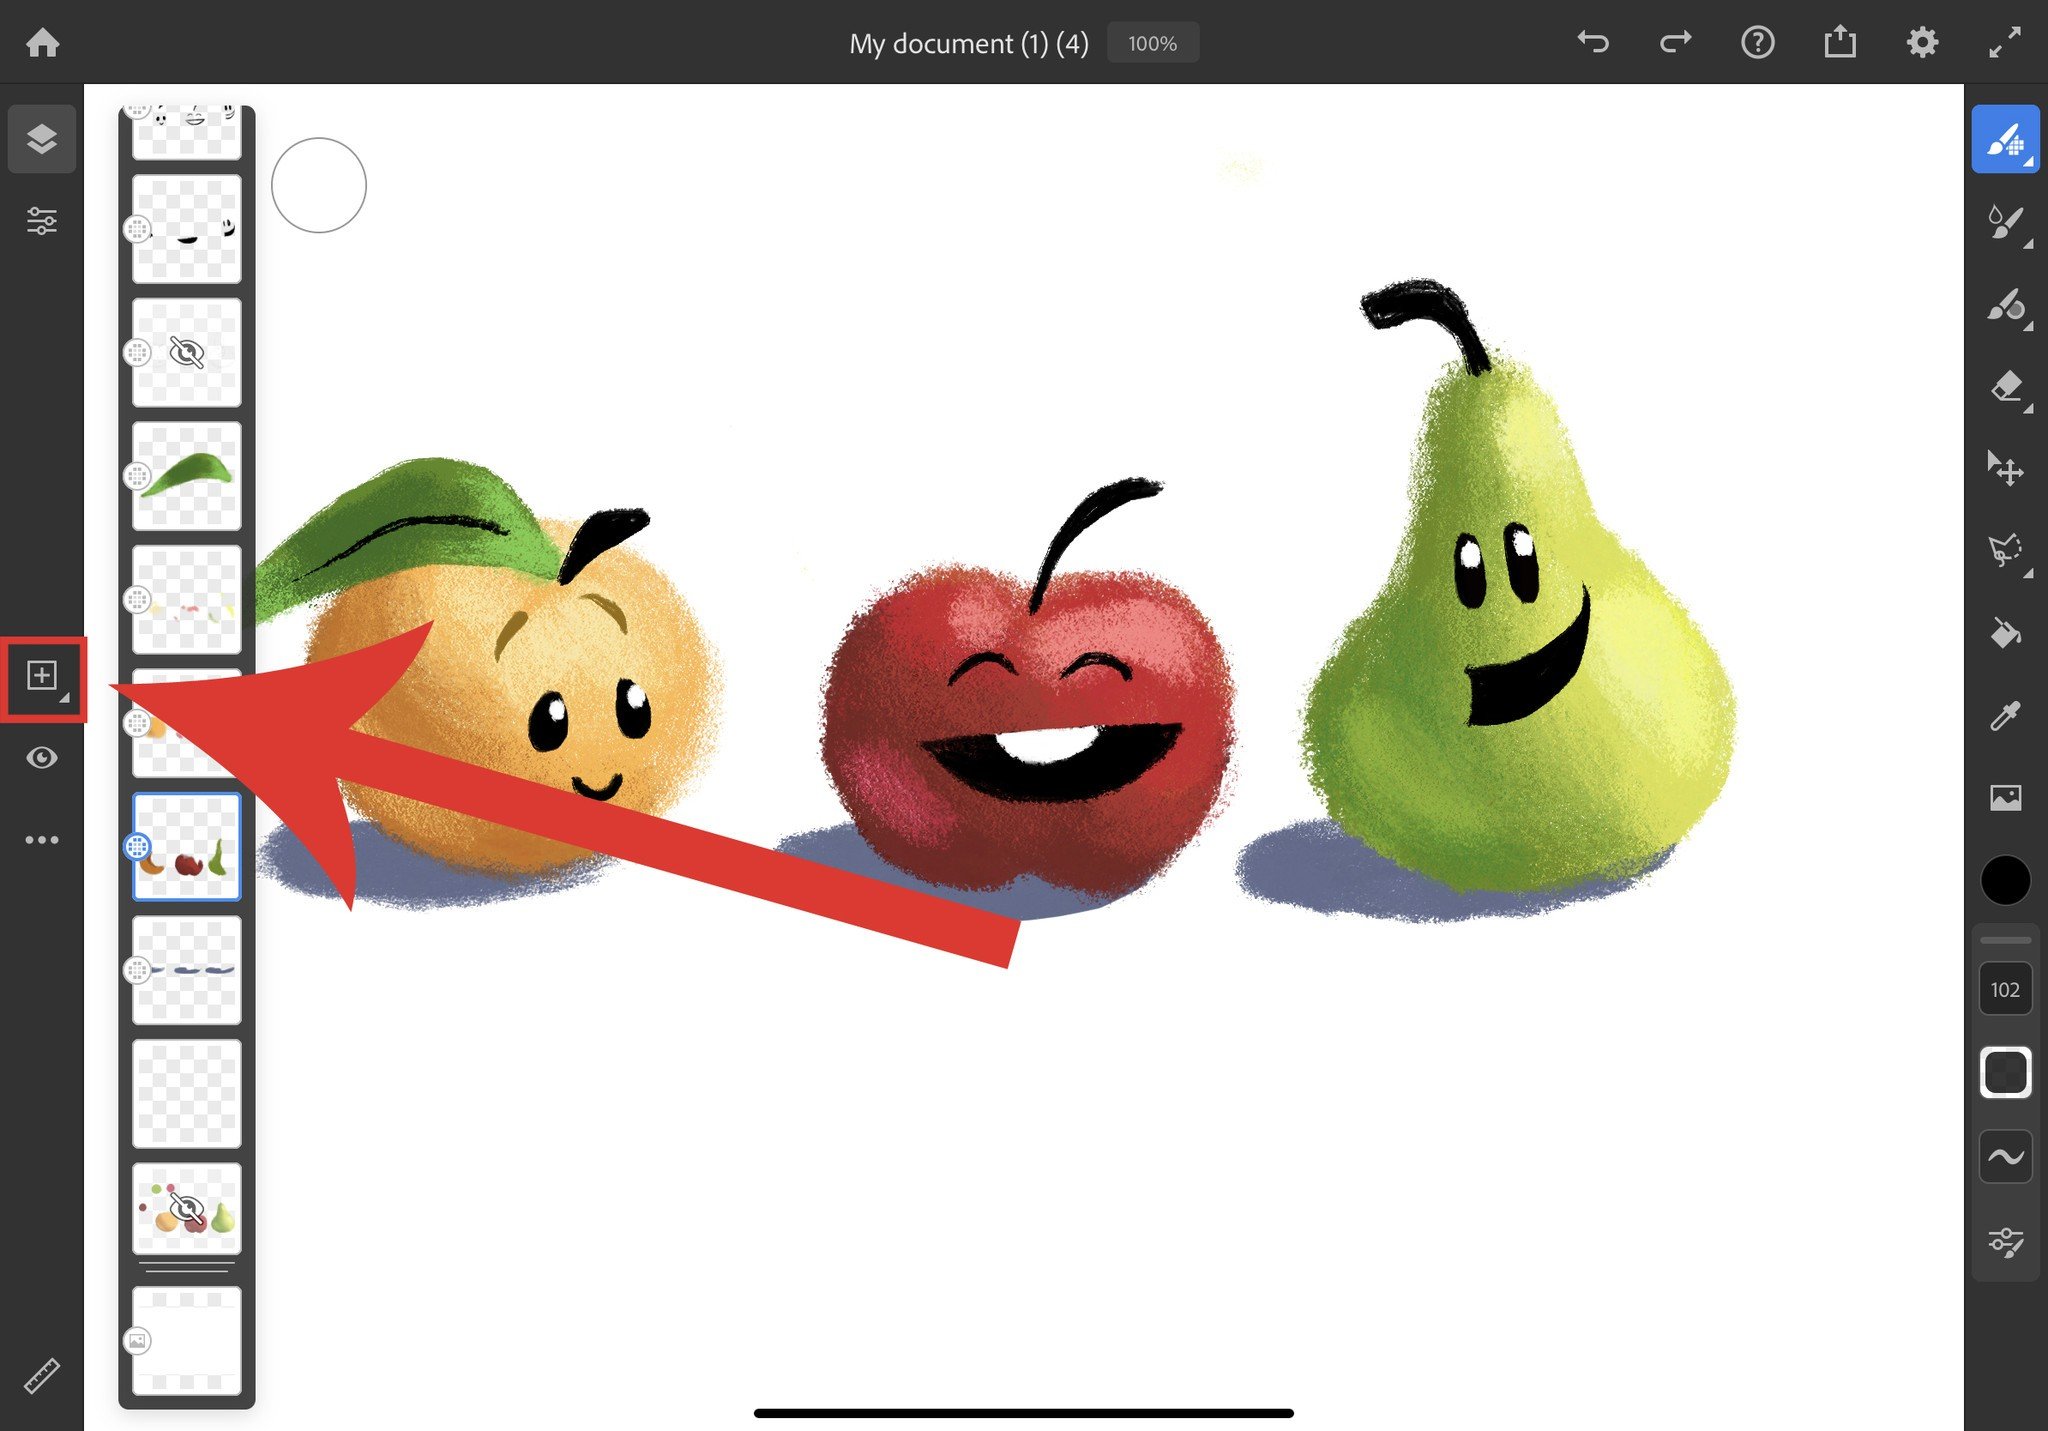
The + icon allows you to add new layers to your project.
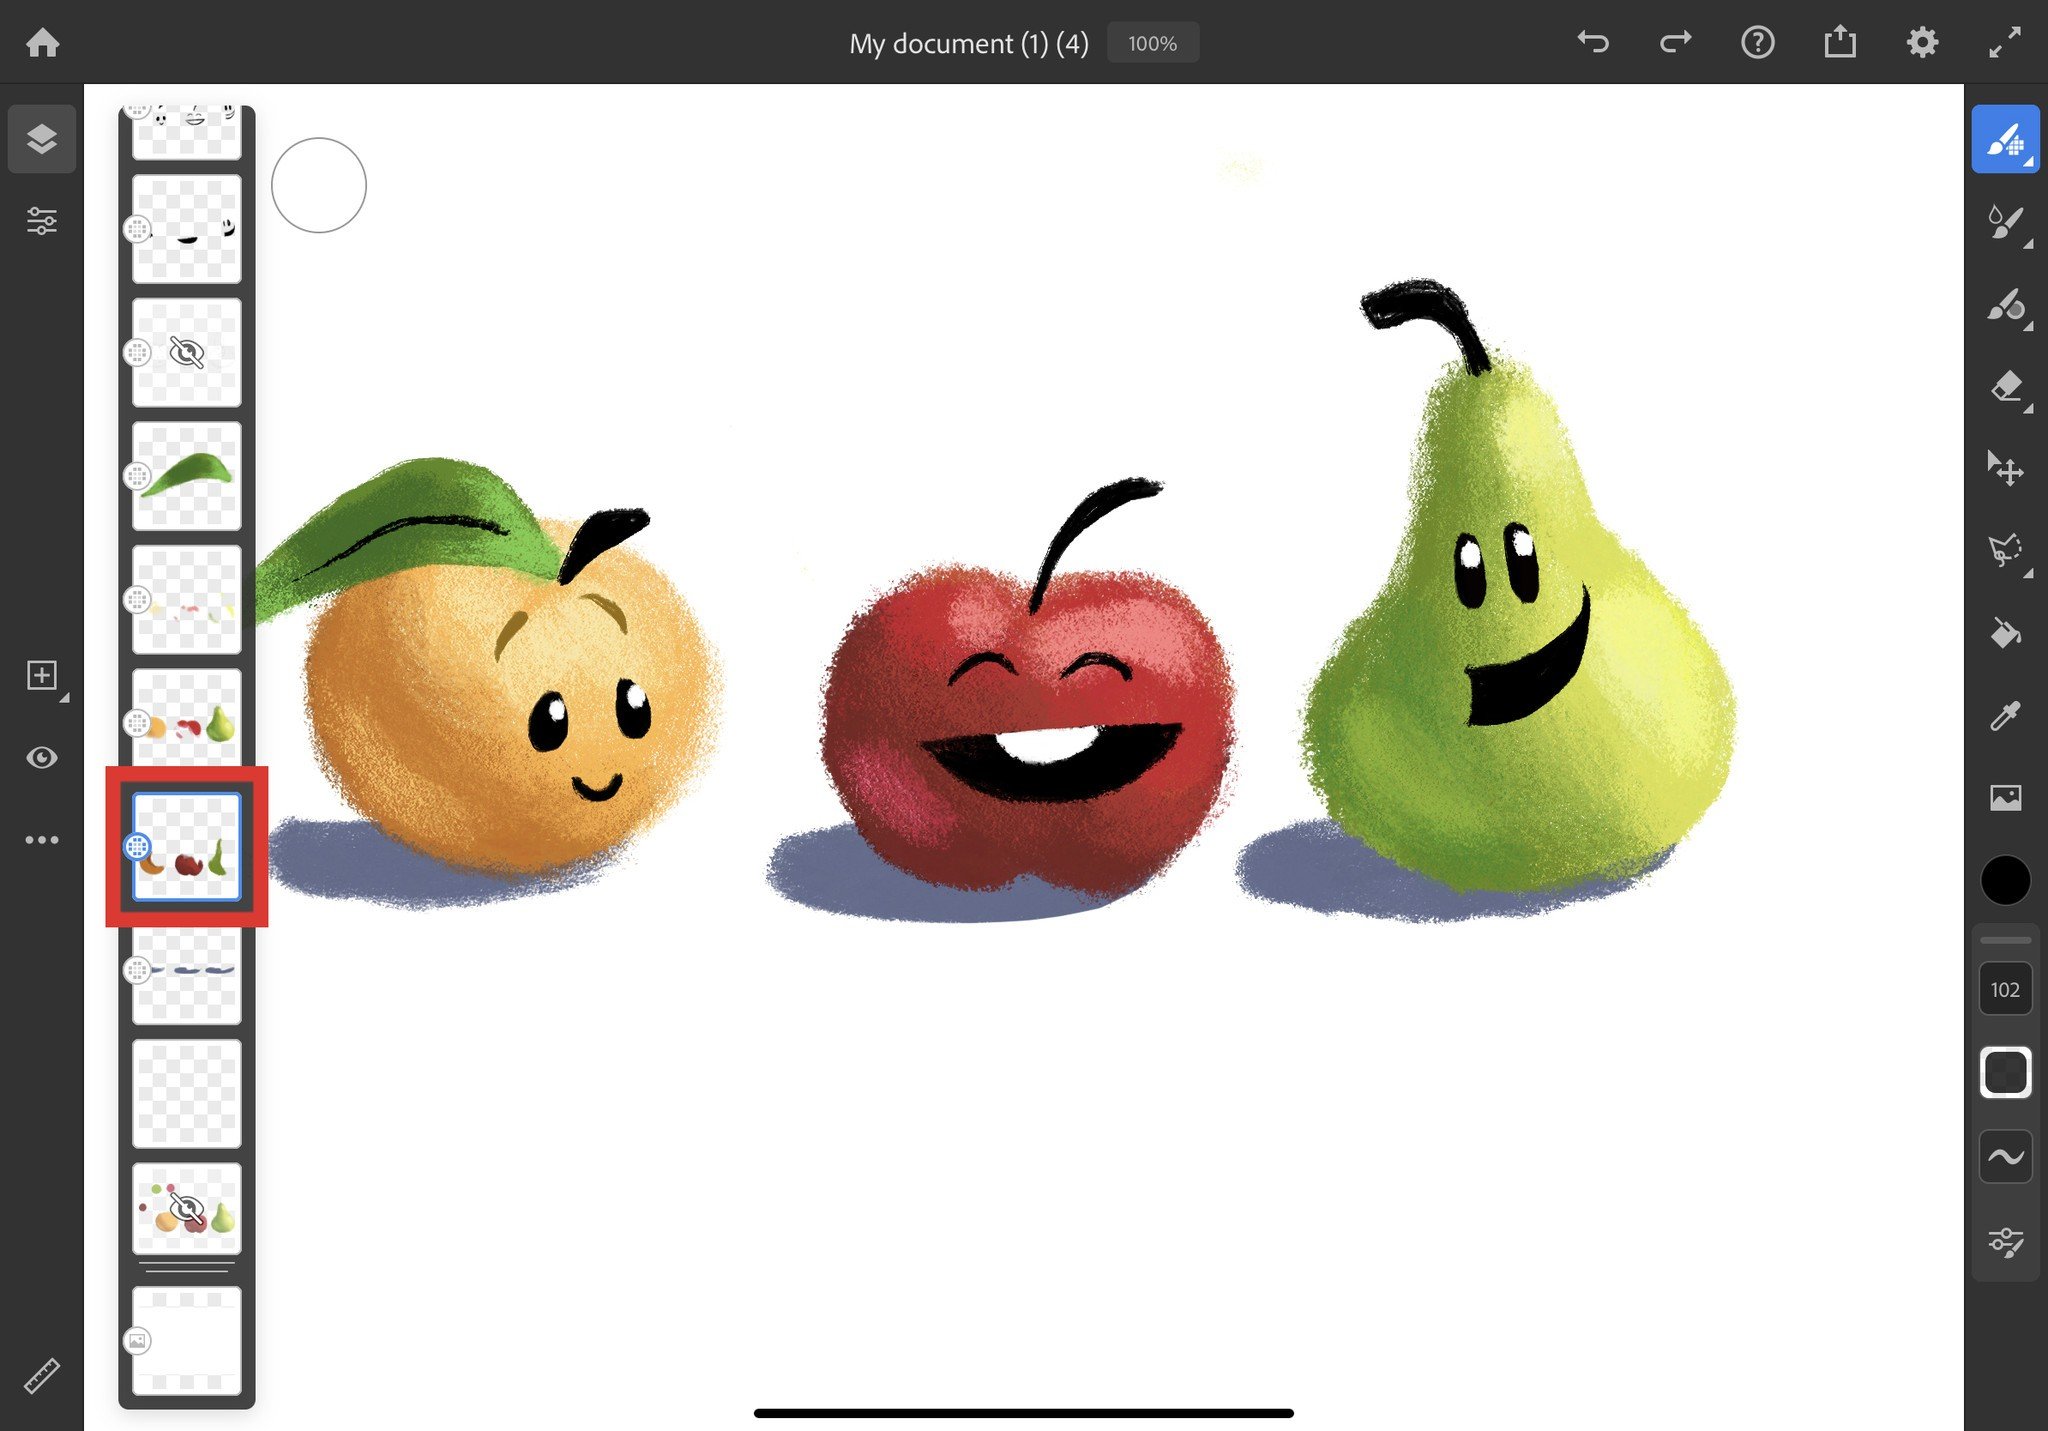
- Layers are selected simply by tapping them. Notice that a layer has a blue outline when it's selected.
-
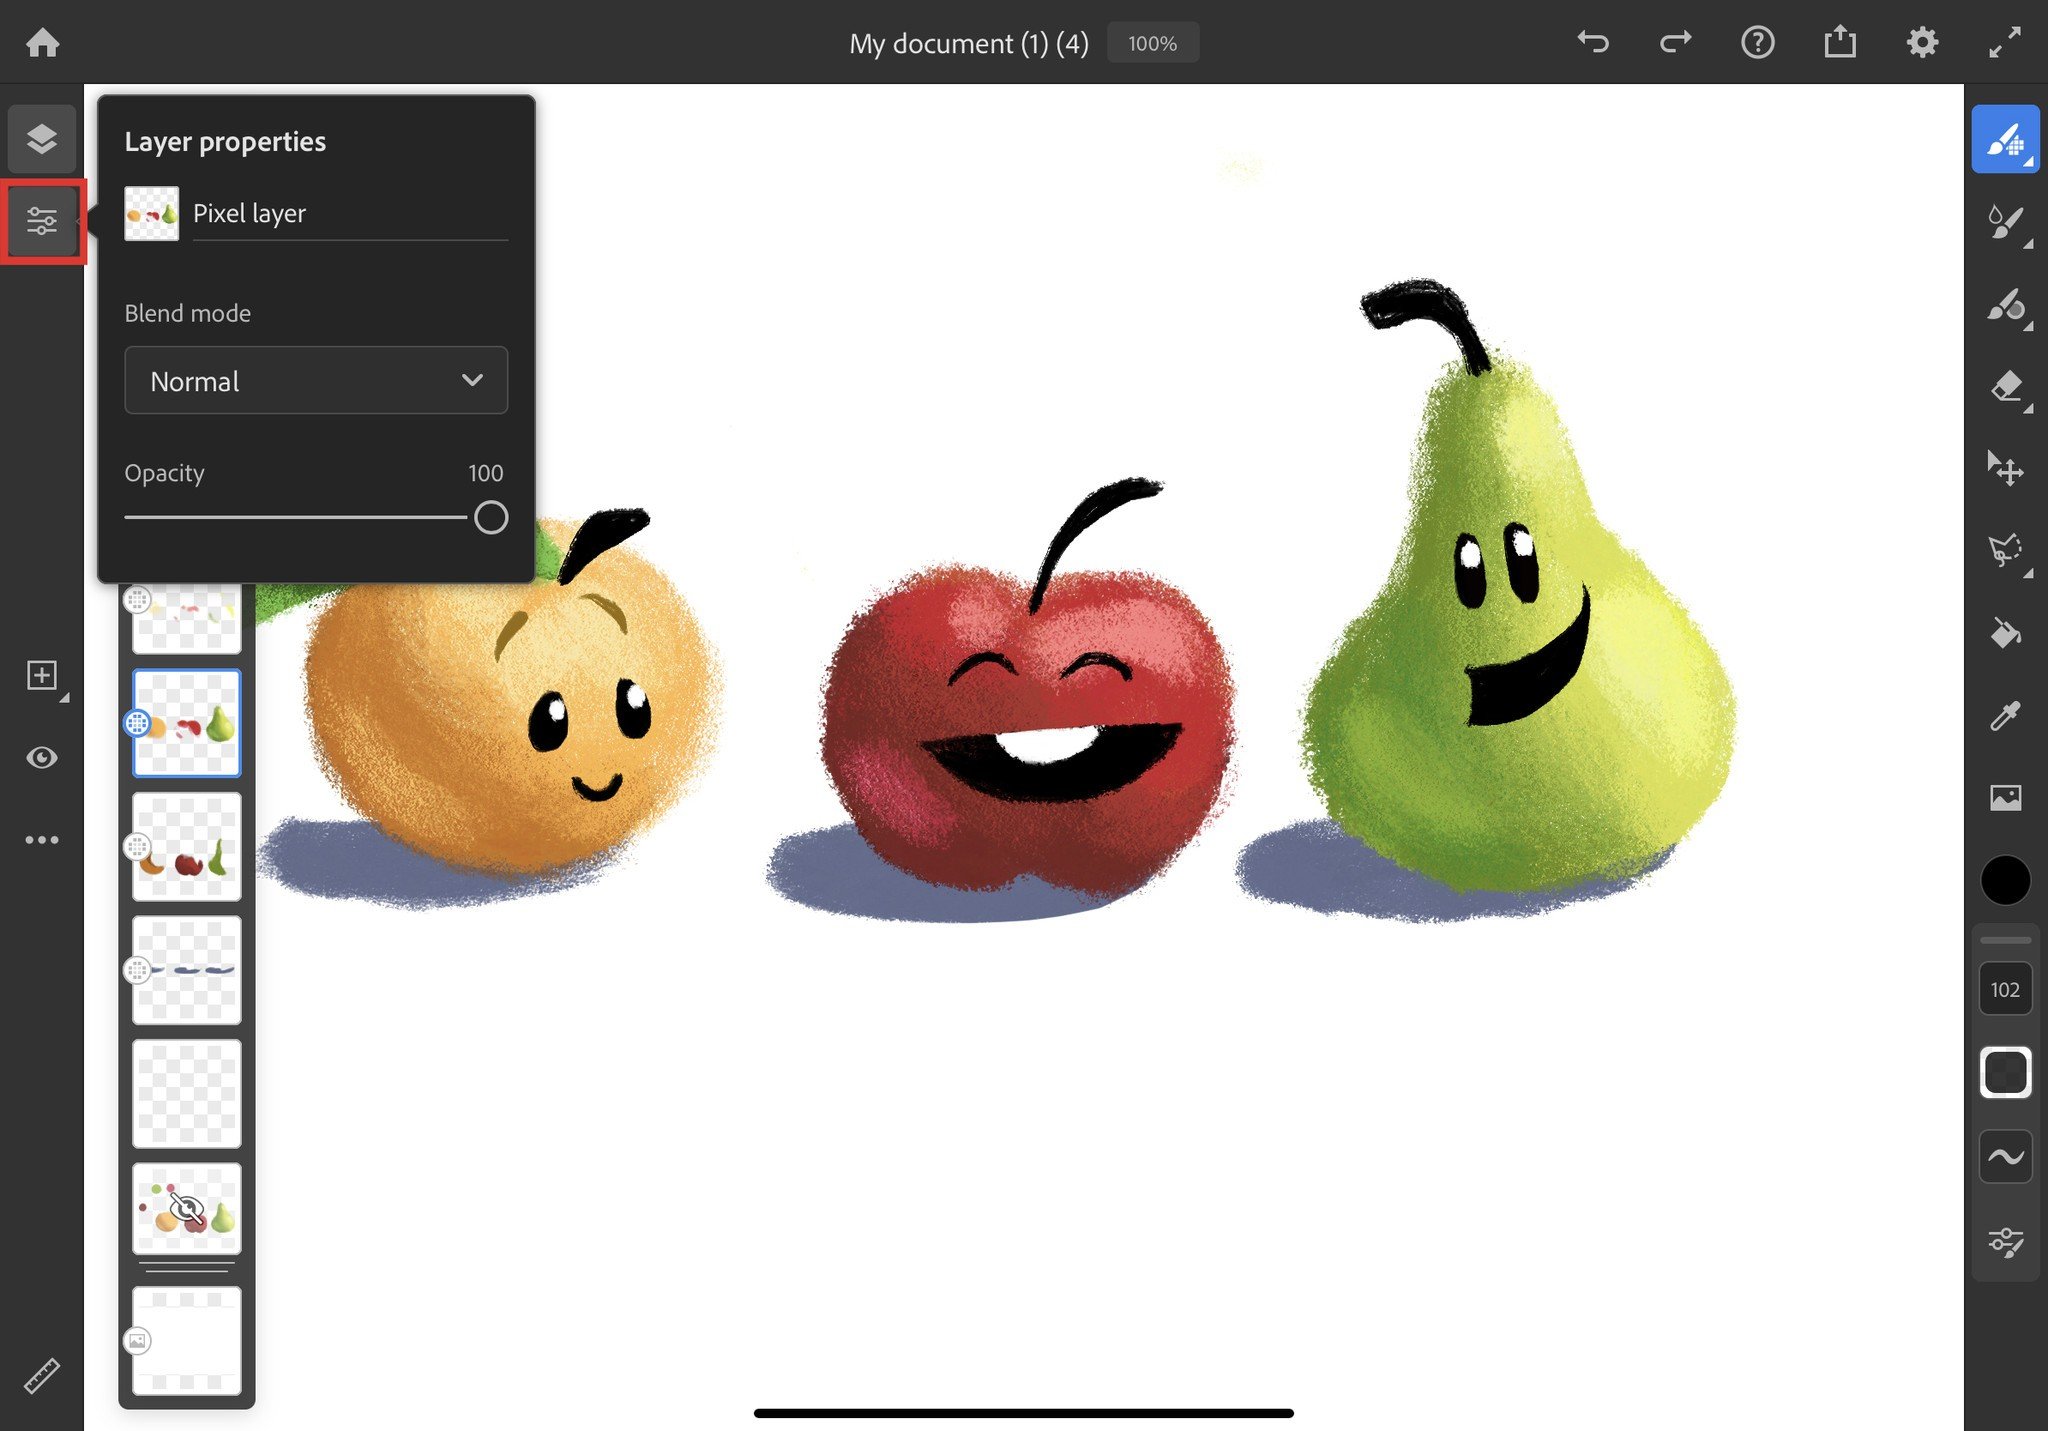
The settings button lets you change the blend mode or opacity of your image. The blend mode determines how the pixels and strokes in multiple layers blend together while opacity determines how transparent a layer is.
- You can move layers around simply by tapping on them and dragging them to a new location.
-
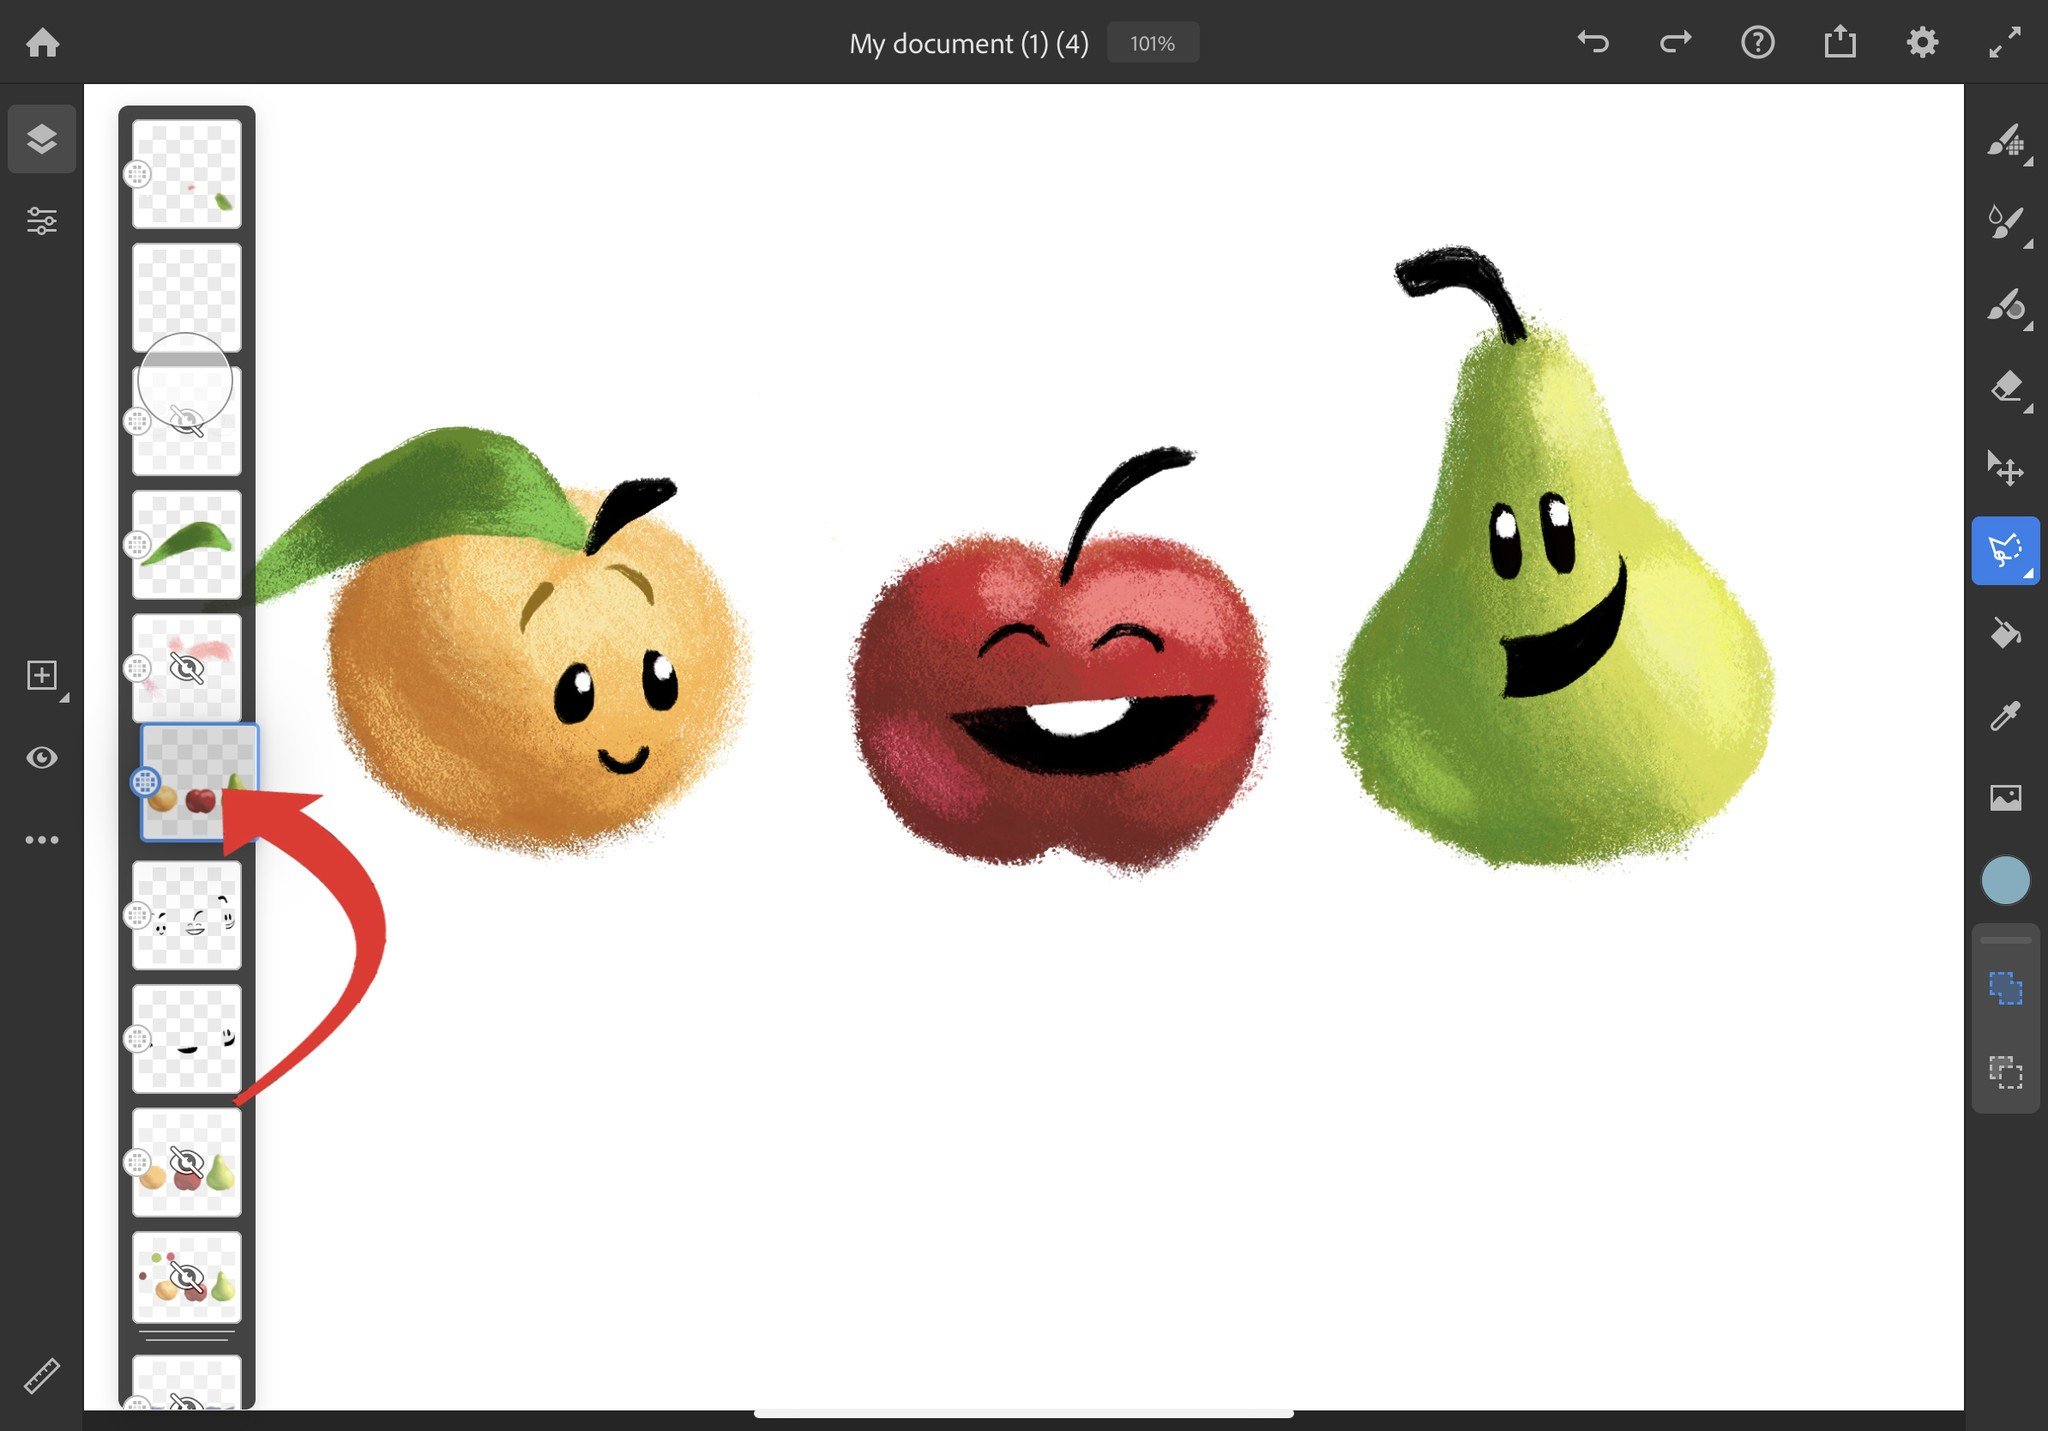
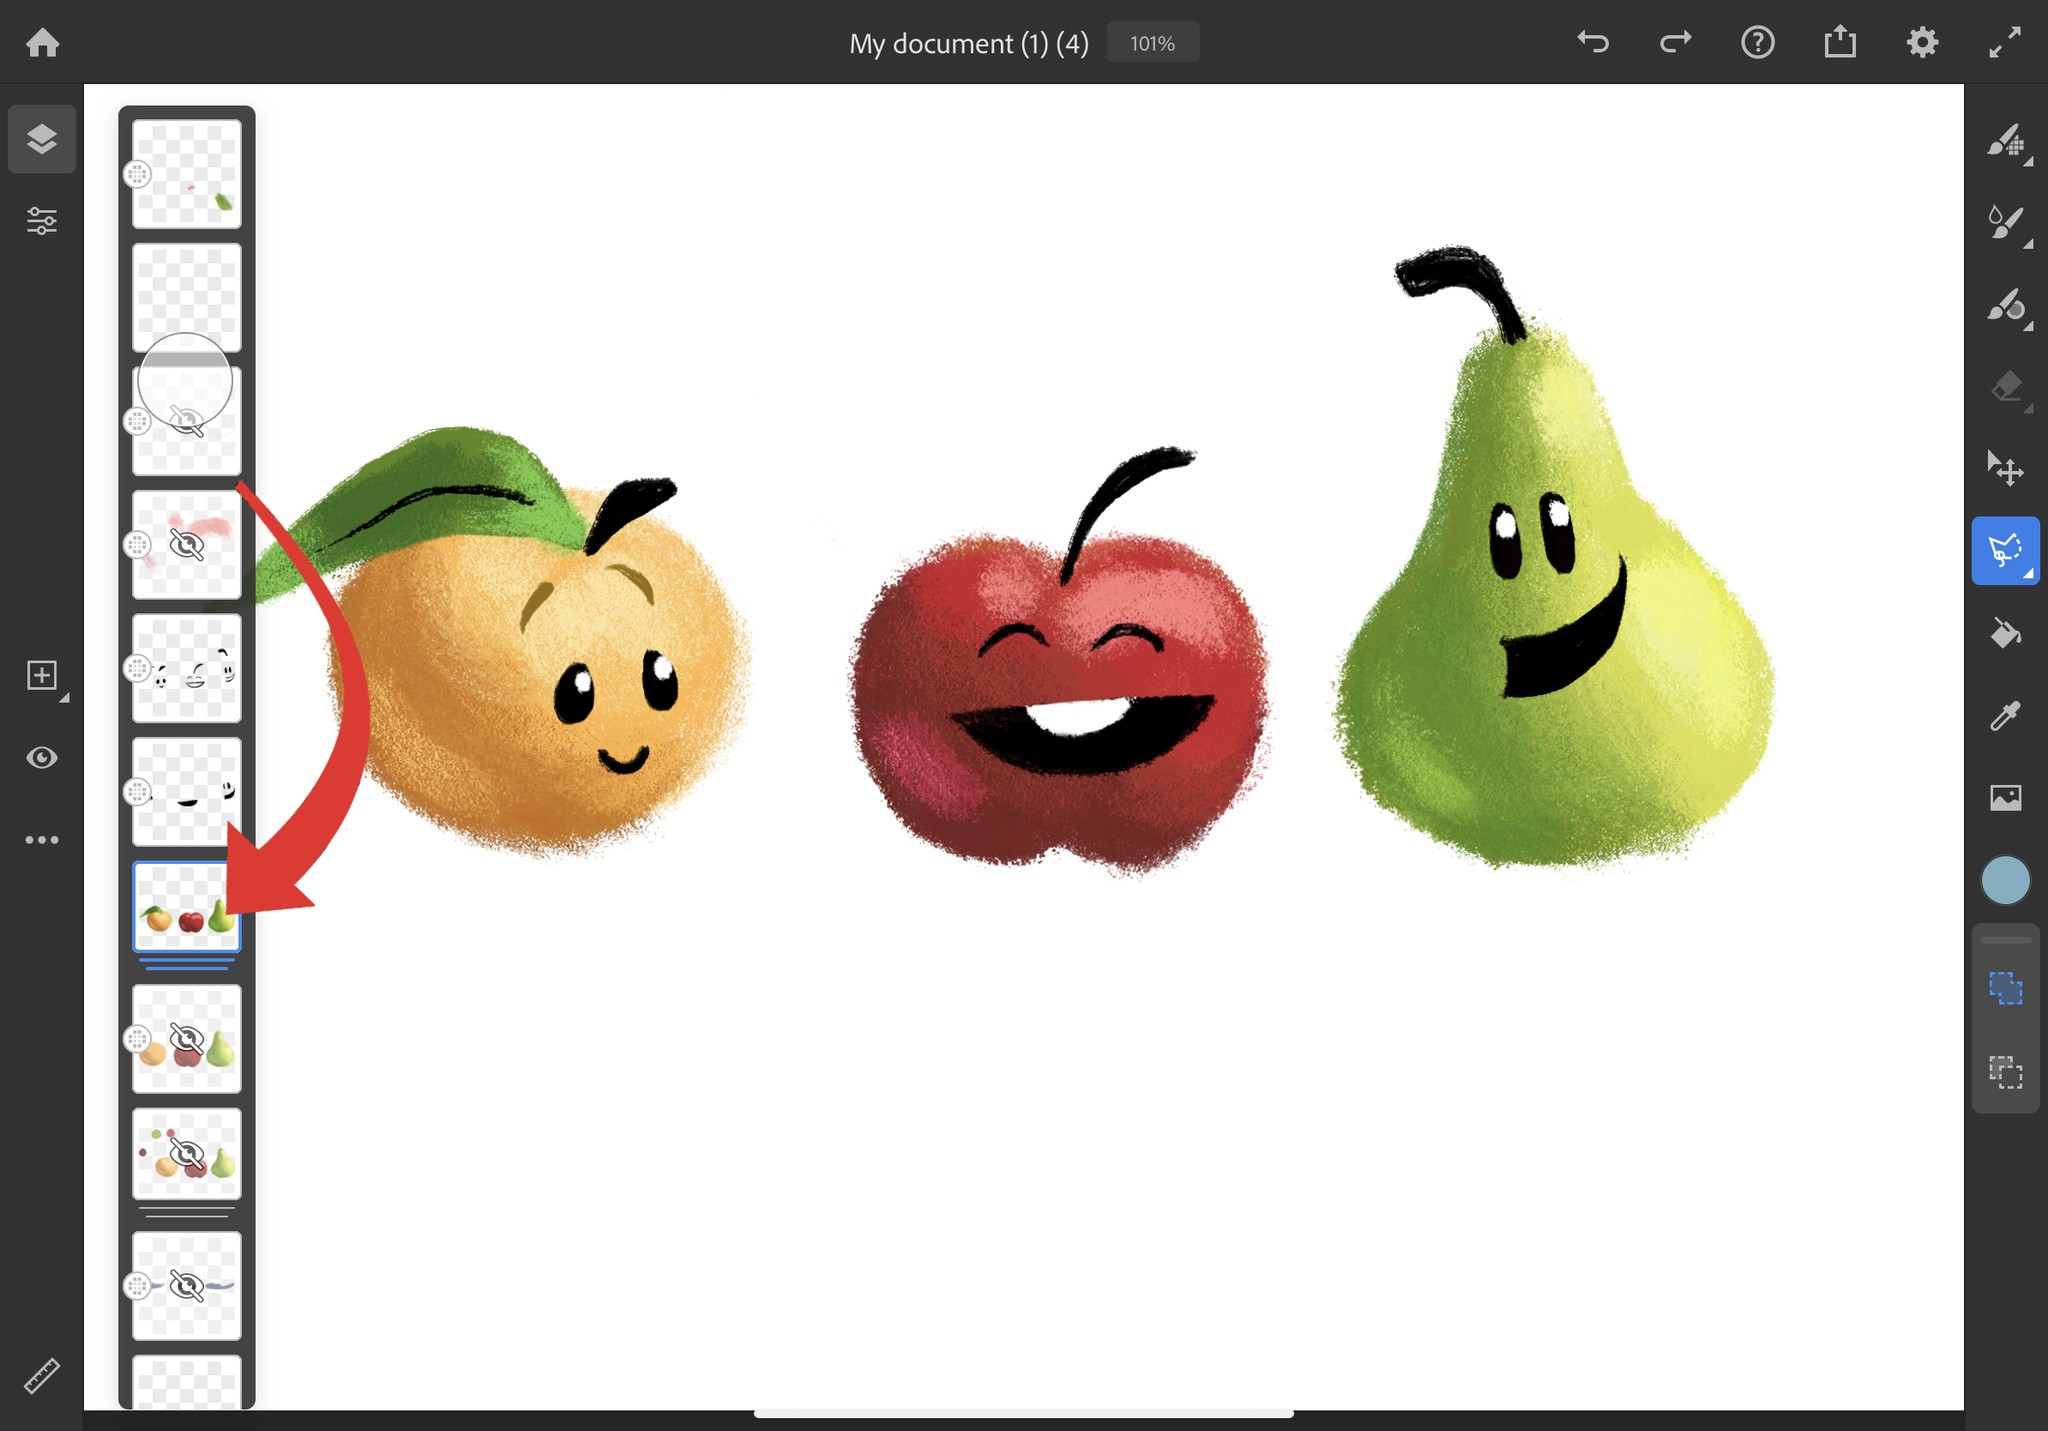
Similarly, you can combine layers into a layer group by dragging one layer onto another layer. You'll know that multiple layers have been grouped because two blue lines will appear under the layer.
-
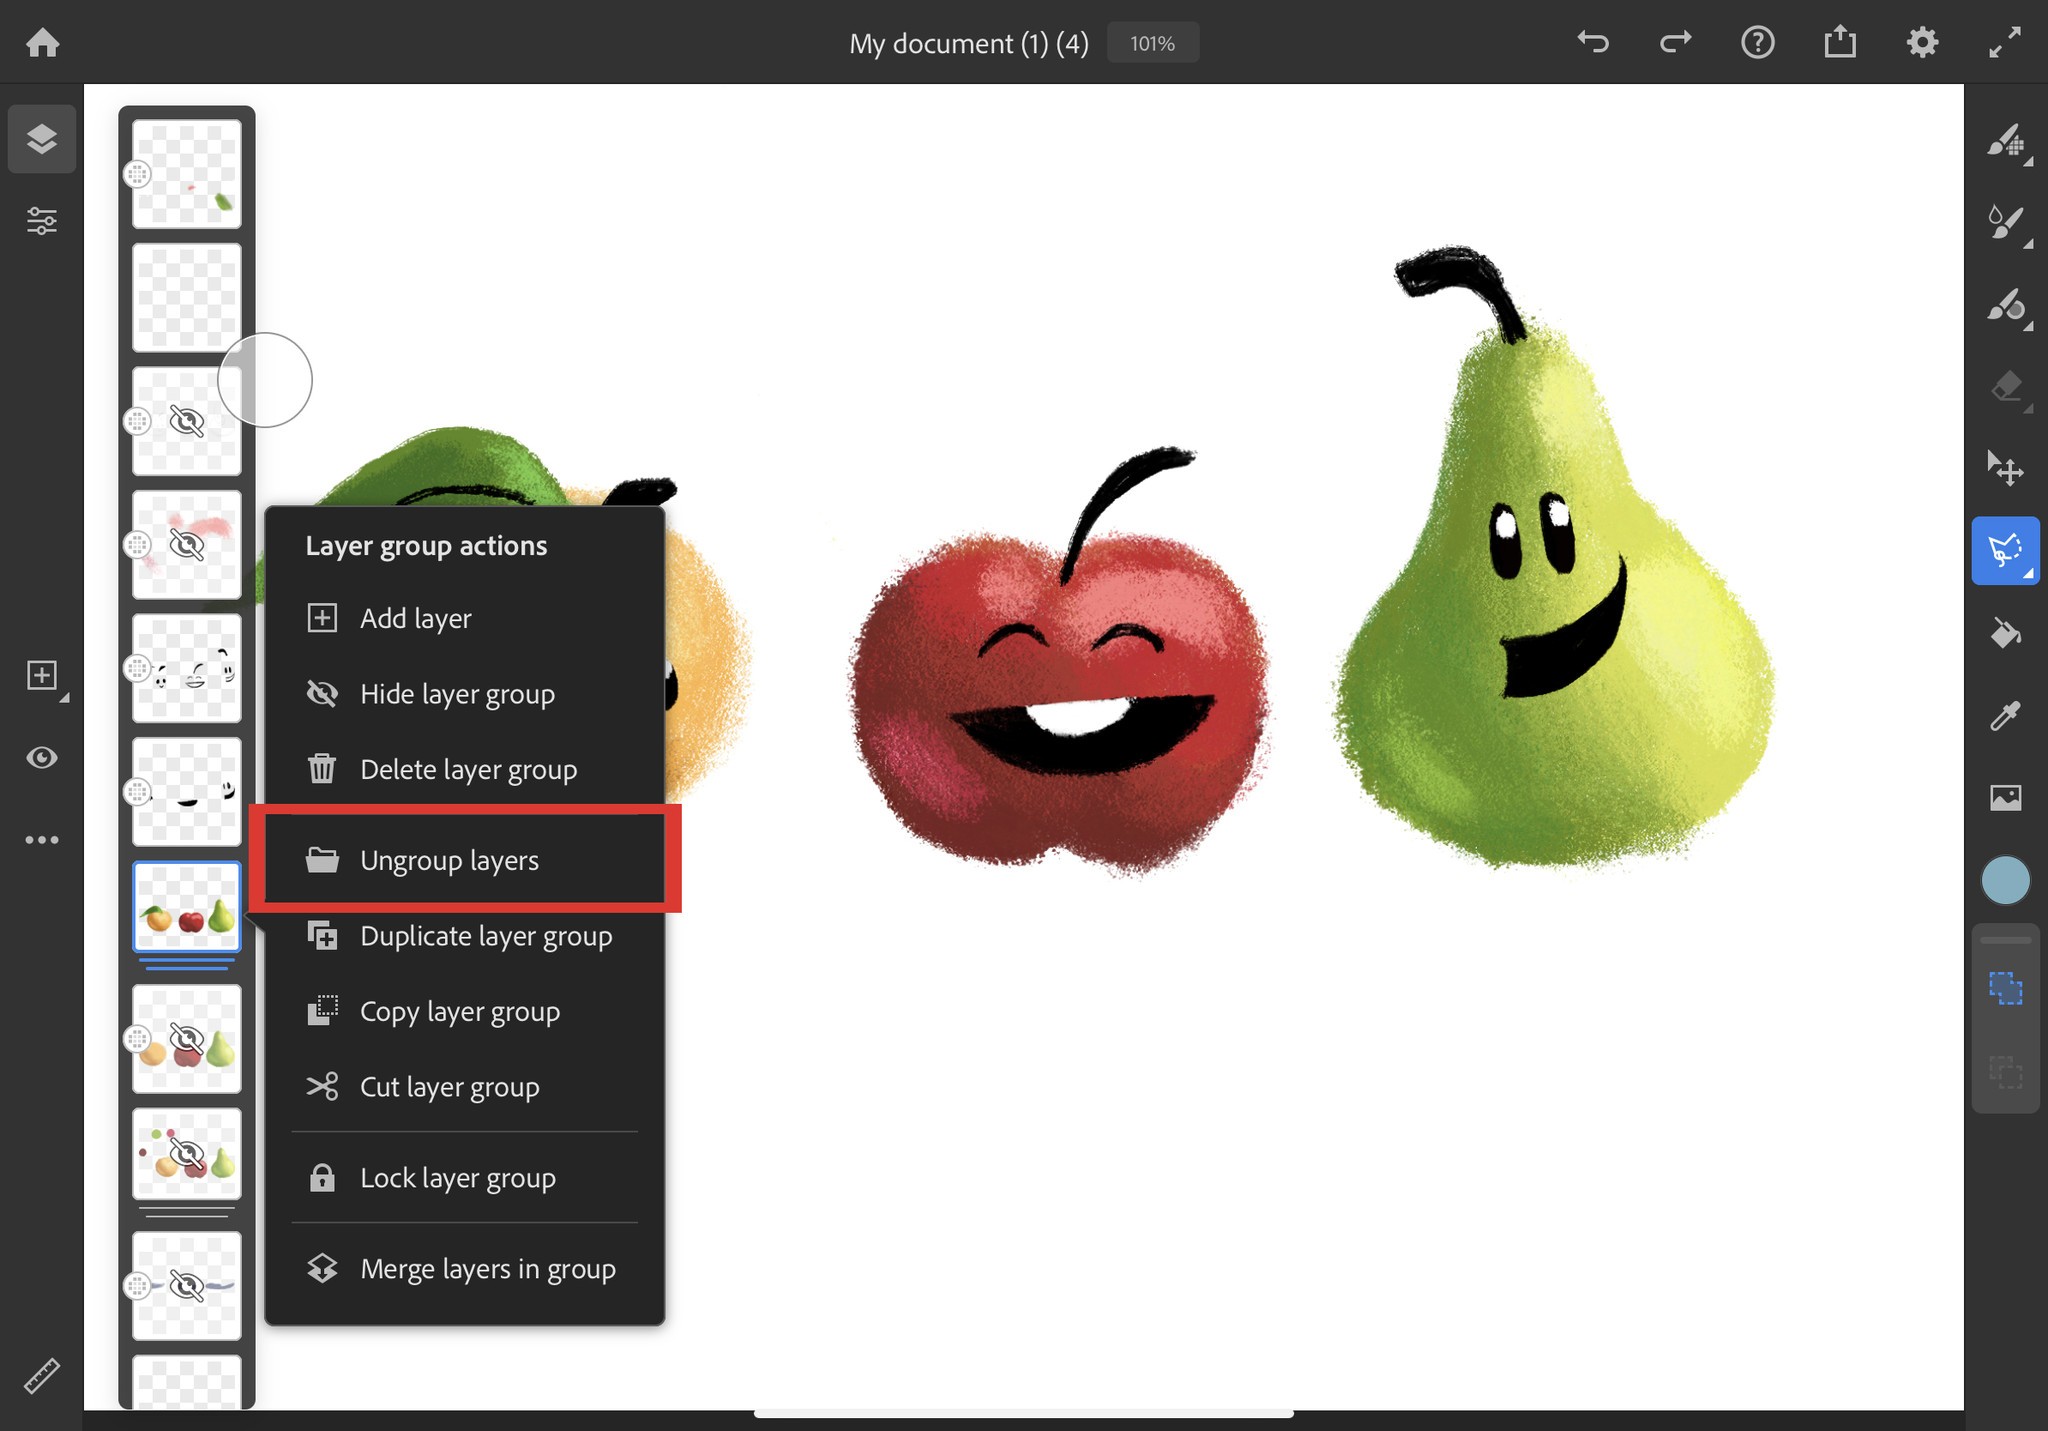
You can ungroup layers simply by tapping on a layer group. And then selecting Ungroup layers.

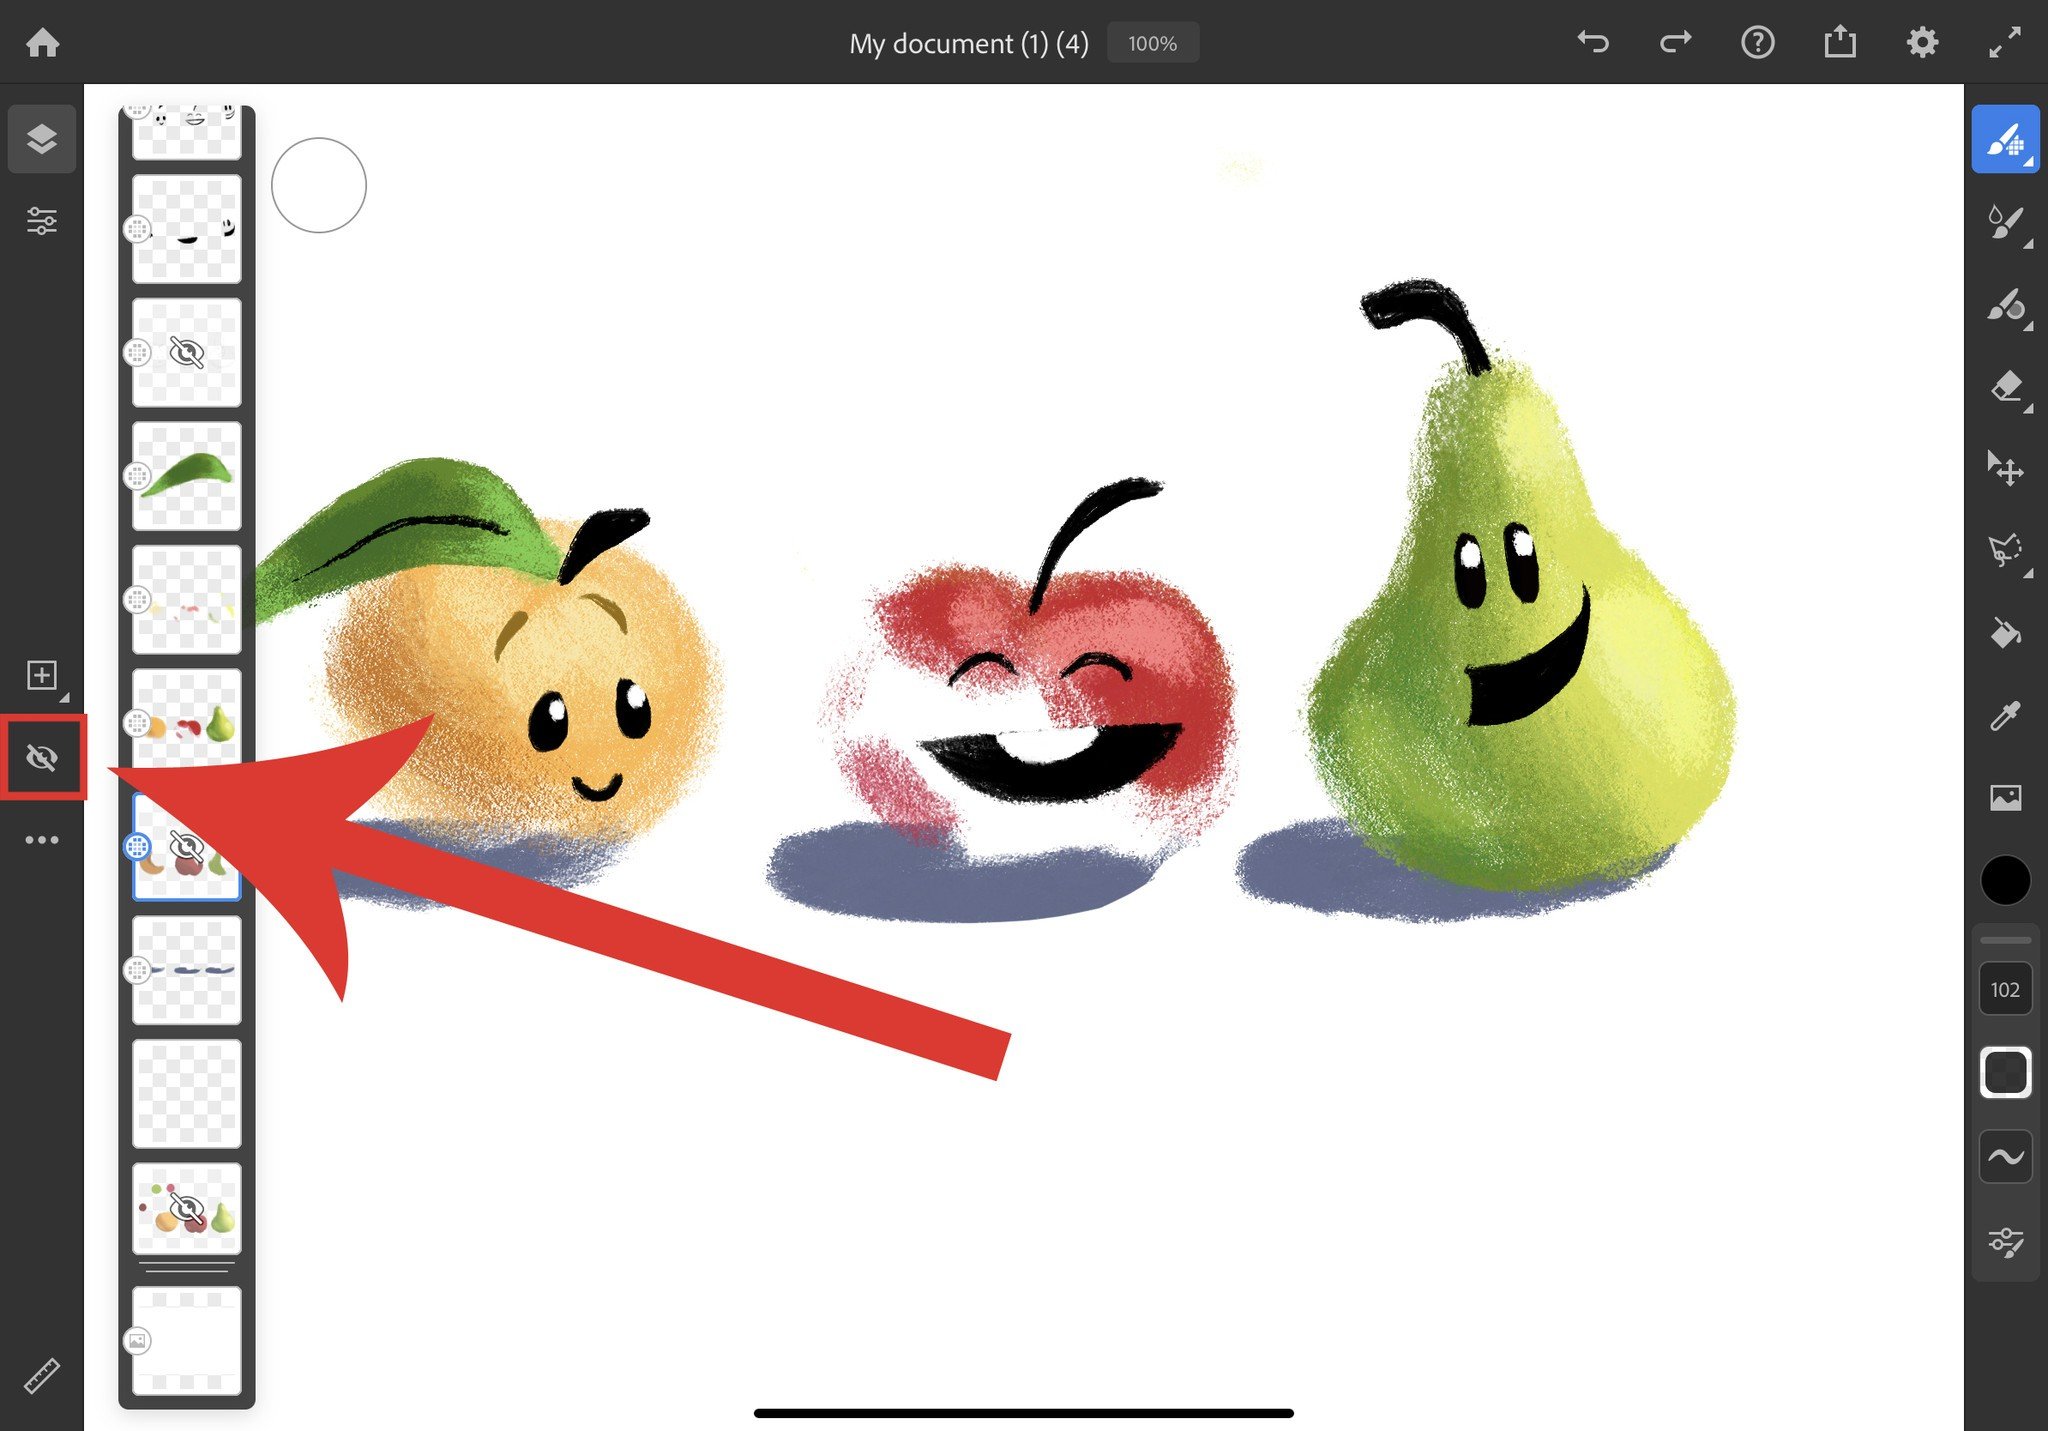
- You can make a layer or a layer group invisible by selecting it and then tapping on the eye icon. To make it visible again, tap the eye icon once more.
-
While a layer is selected, you can view additional option for that specific layer by tapping on the ellipsis button.
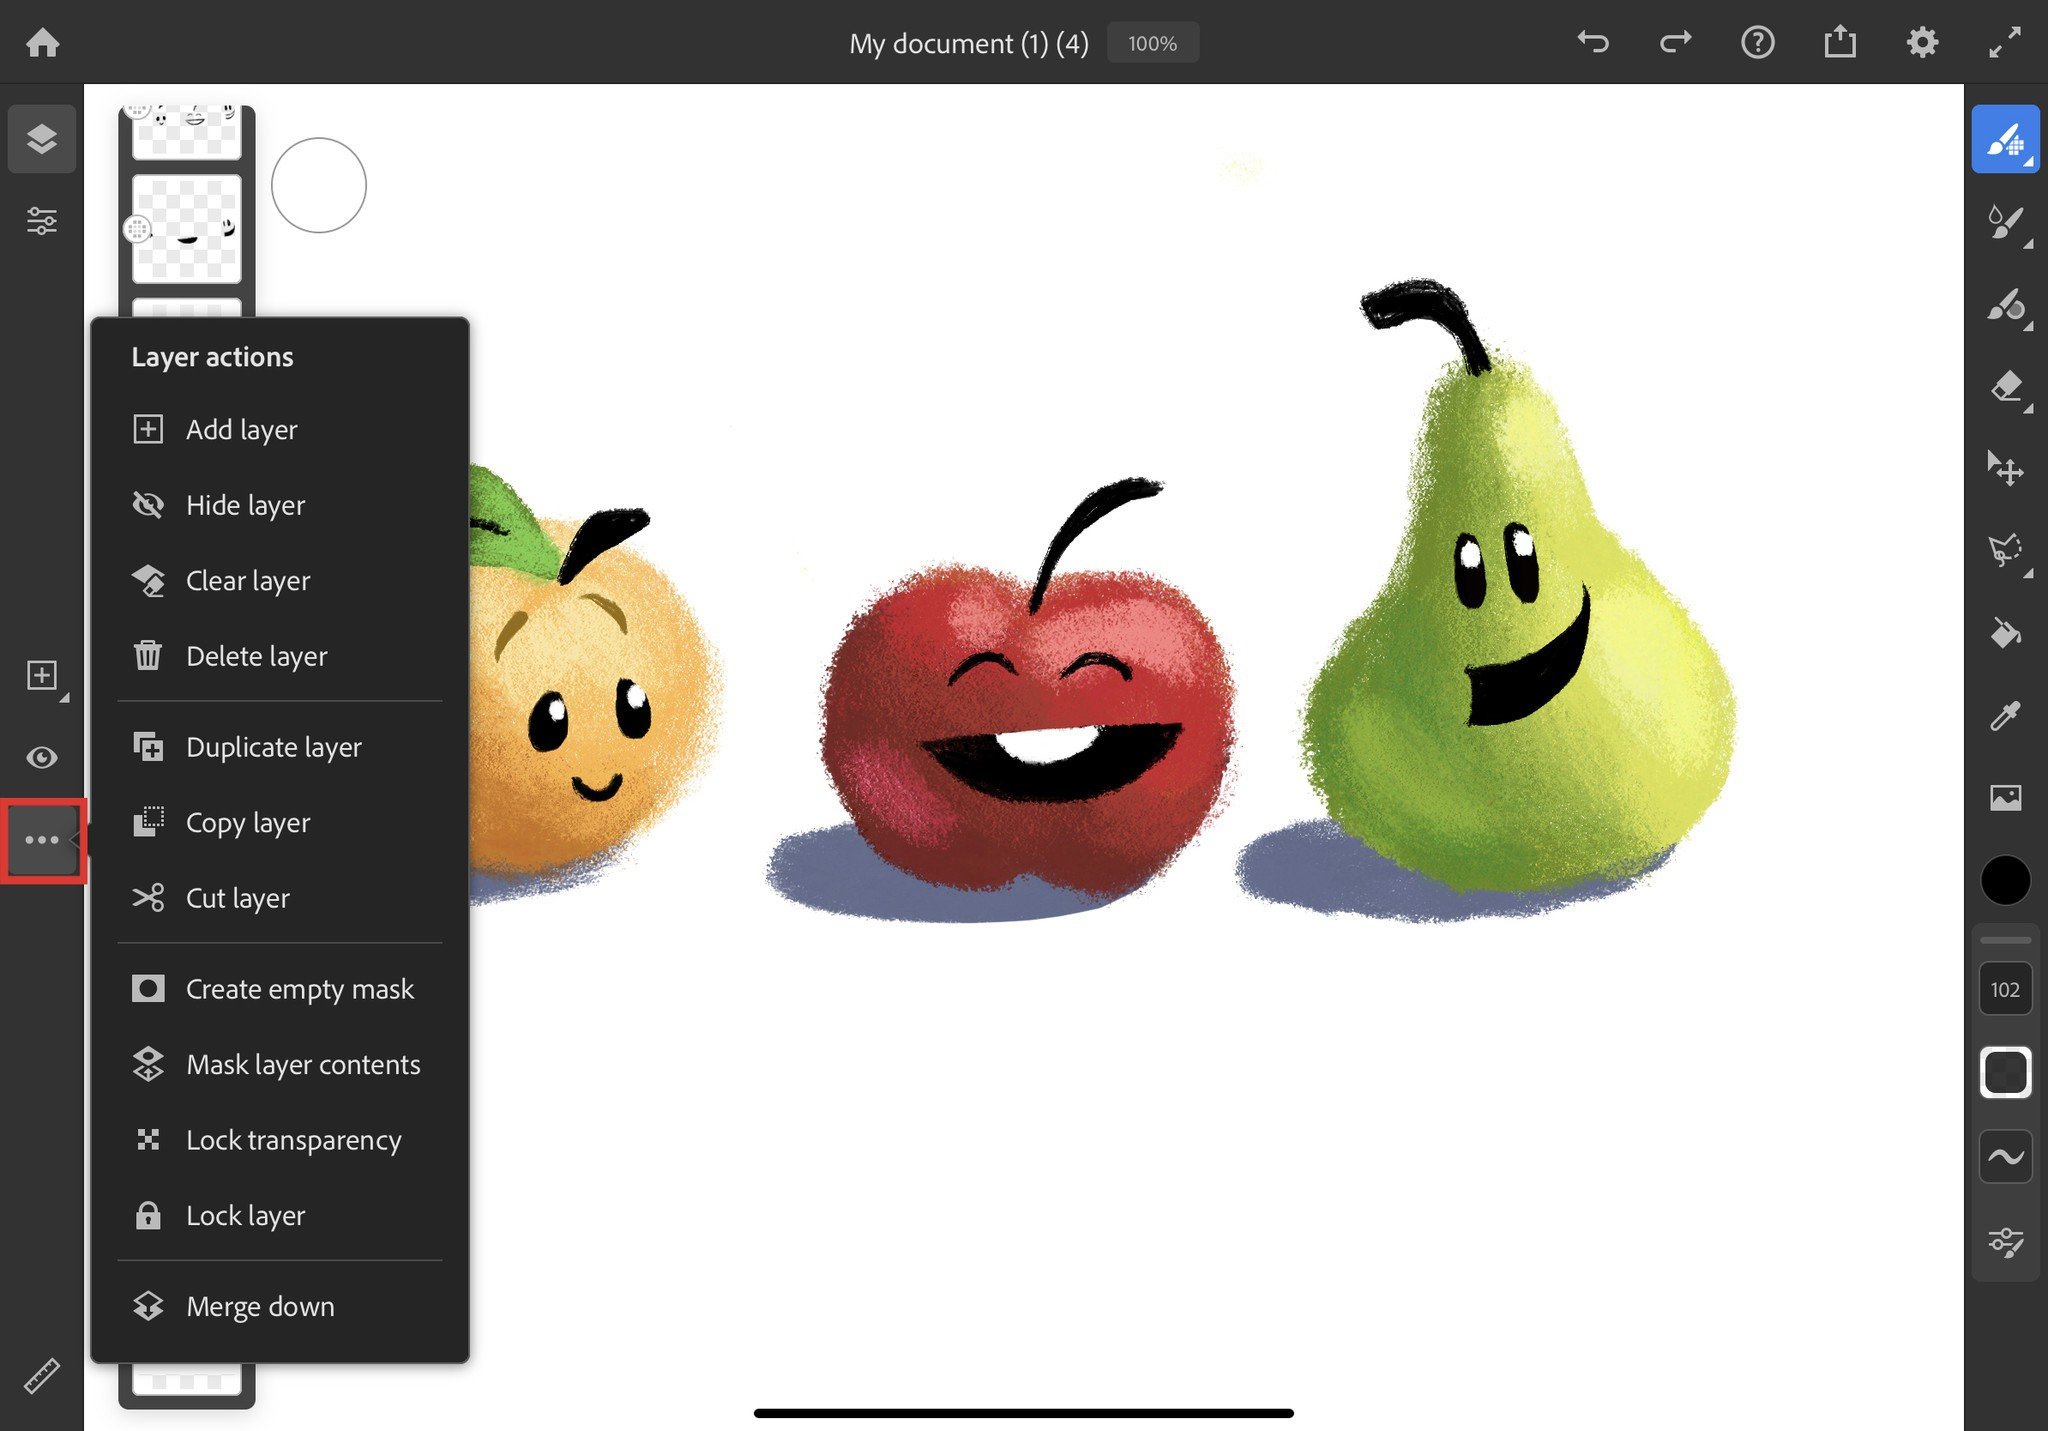
Layer Options Here are all of the options made available to you via the ellipsis button and what they do.
- Add layer: Selecting this allows you to add a new layer above the layer you currently have selected.
- Hide Layer: This allows you to make the current layer invisible.
- Clear layer: Tap this if you want to get rid of all strokes made to a layer, but want to keep the layer itself.
- Delete layer: If you don't need a layer, get rid of it by pressing this.
- Duplicate layer: The program will create a new layer with the same imagery as what is on the selected layer.
- Copy layer: Everything on the selected layer is copied for you to paste onto another layer.
- Cut layer: Everything on the selected layer is cut so you can paste it onto another layer.
- Create empty mask: Masks allow you to show or hide sections of your work. Selecting this allows you to make a new mask thumbnail with a black dot on the left side. Swipe to the left on this thumbnail to view the actual layer.
- Mask layer contents:
- Lock transparency: This makes it so you cannot change the opacity of a layer.
- Lock layer : This protects a layer from being edited. You won't be able to make changes to the layer until you unlock the layer.
- Merge down: The selected layer and the one just beneath it will merge into one layer.
Gestures & Shortcuts
There are several shortcuts built into Adobe Fresco to make drawing and painting more convenient. Here are the most important ones and what they do.
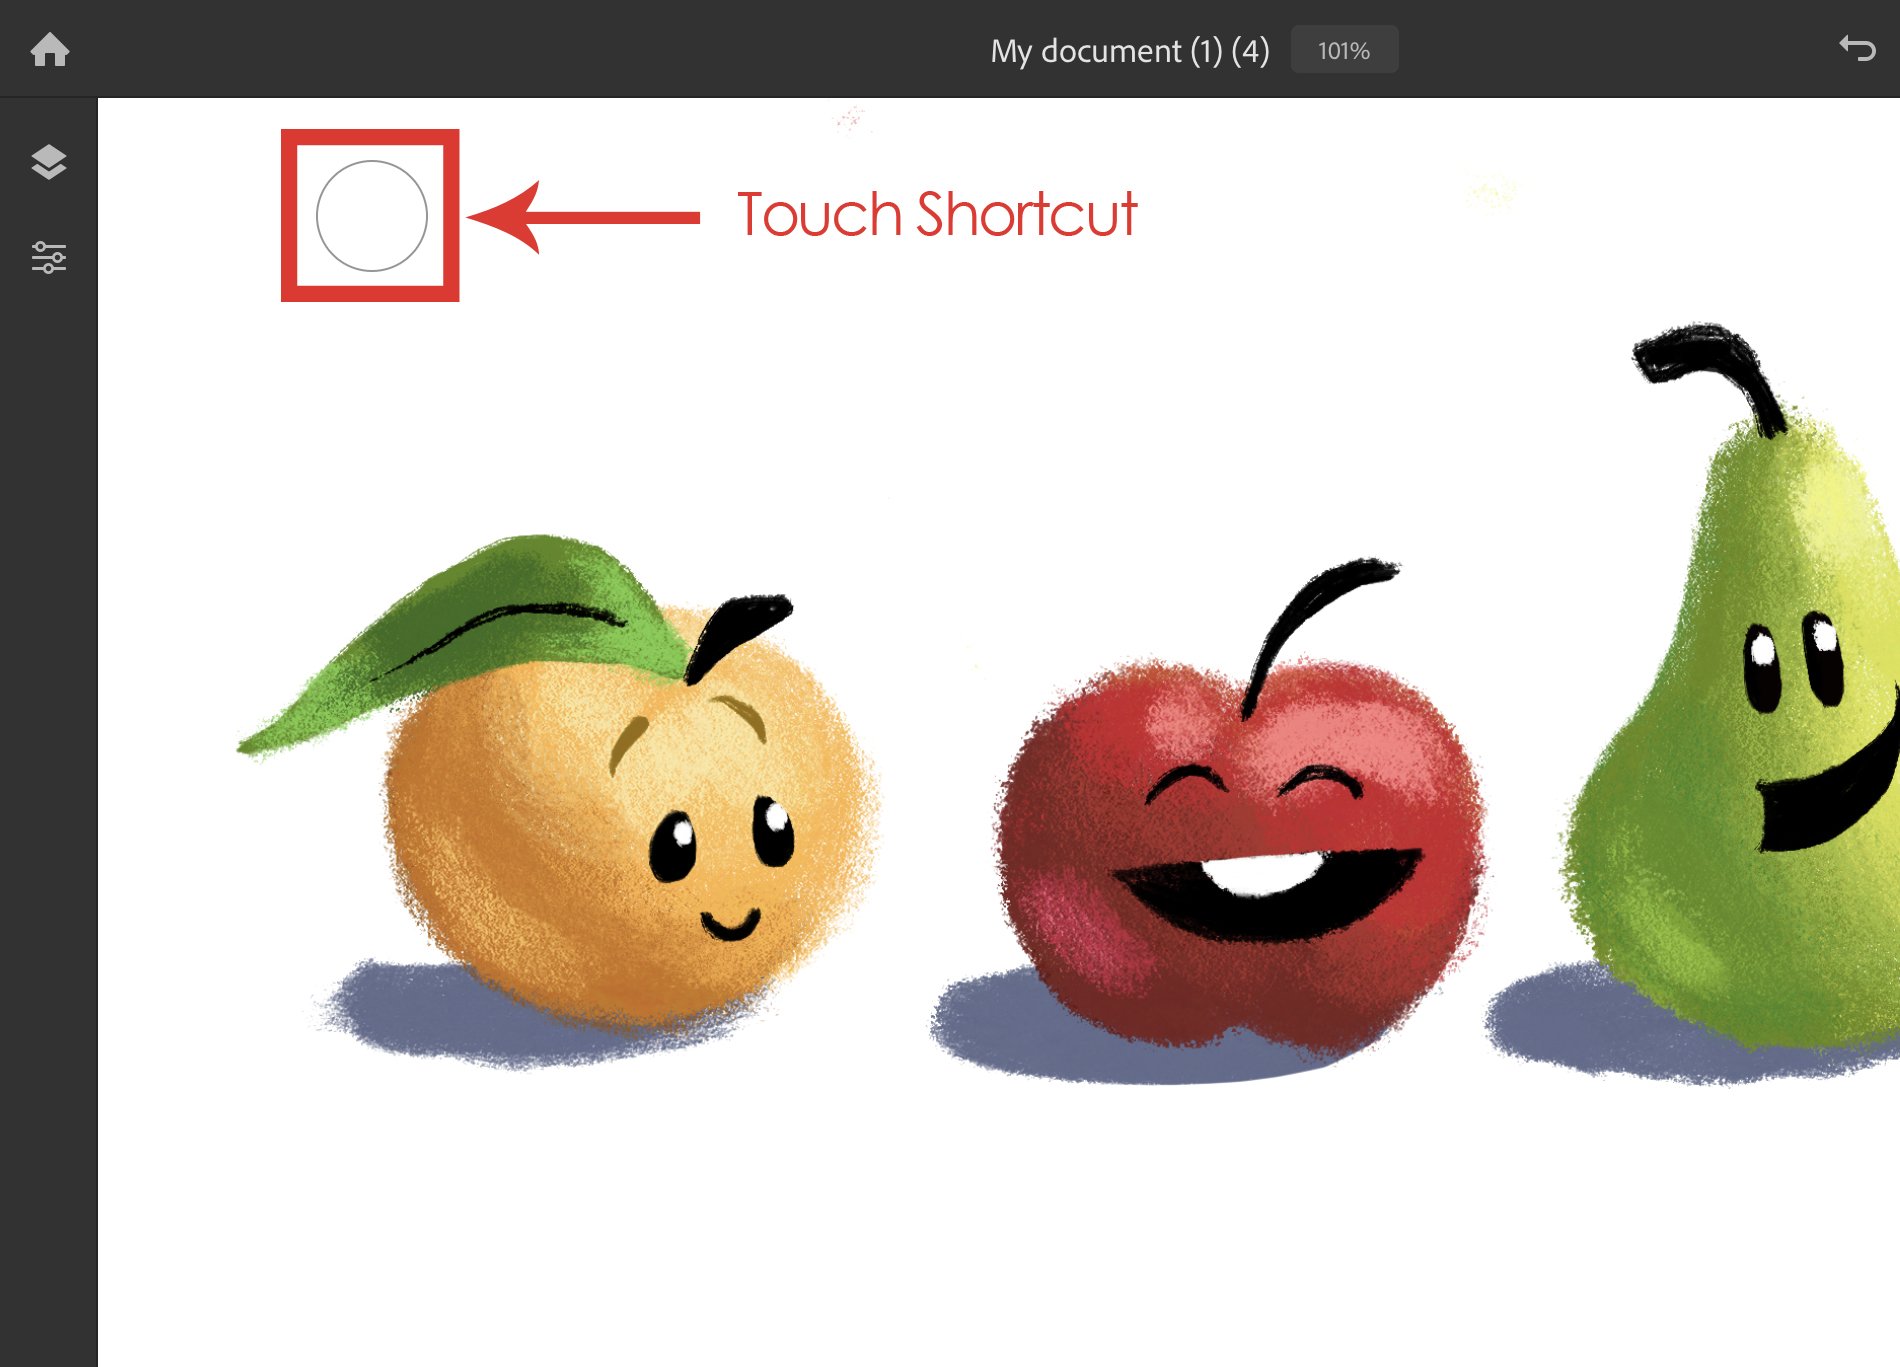
- Touch Shortcut: The circle on the screen allows you to change how some tools behave quickly. For example, while pushing down on the circle with one hand and using a pixel or vector brush with the other hand, the brush temporarily becomes an eraser until you let the circle go.
- Zoom: Use two fingers to zoom in and out of your project like you would when using a smartphone.
- Fit to view: Place two fingers on the screen as though you're going to zoom, but this time quickly pinch two fingers together. The project you're working on will fill the screen.
- Rotate canvas: Place two fingers on the screen and rotate them.
- Undo: Tap two fingers on the screen to undo.
- Redo: Tap three fingers on the screen to redo.
- Eyedropper: Long press one finger on the screen to select a color.
Color tools
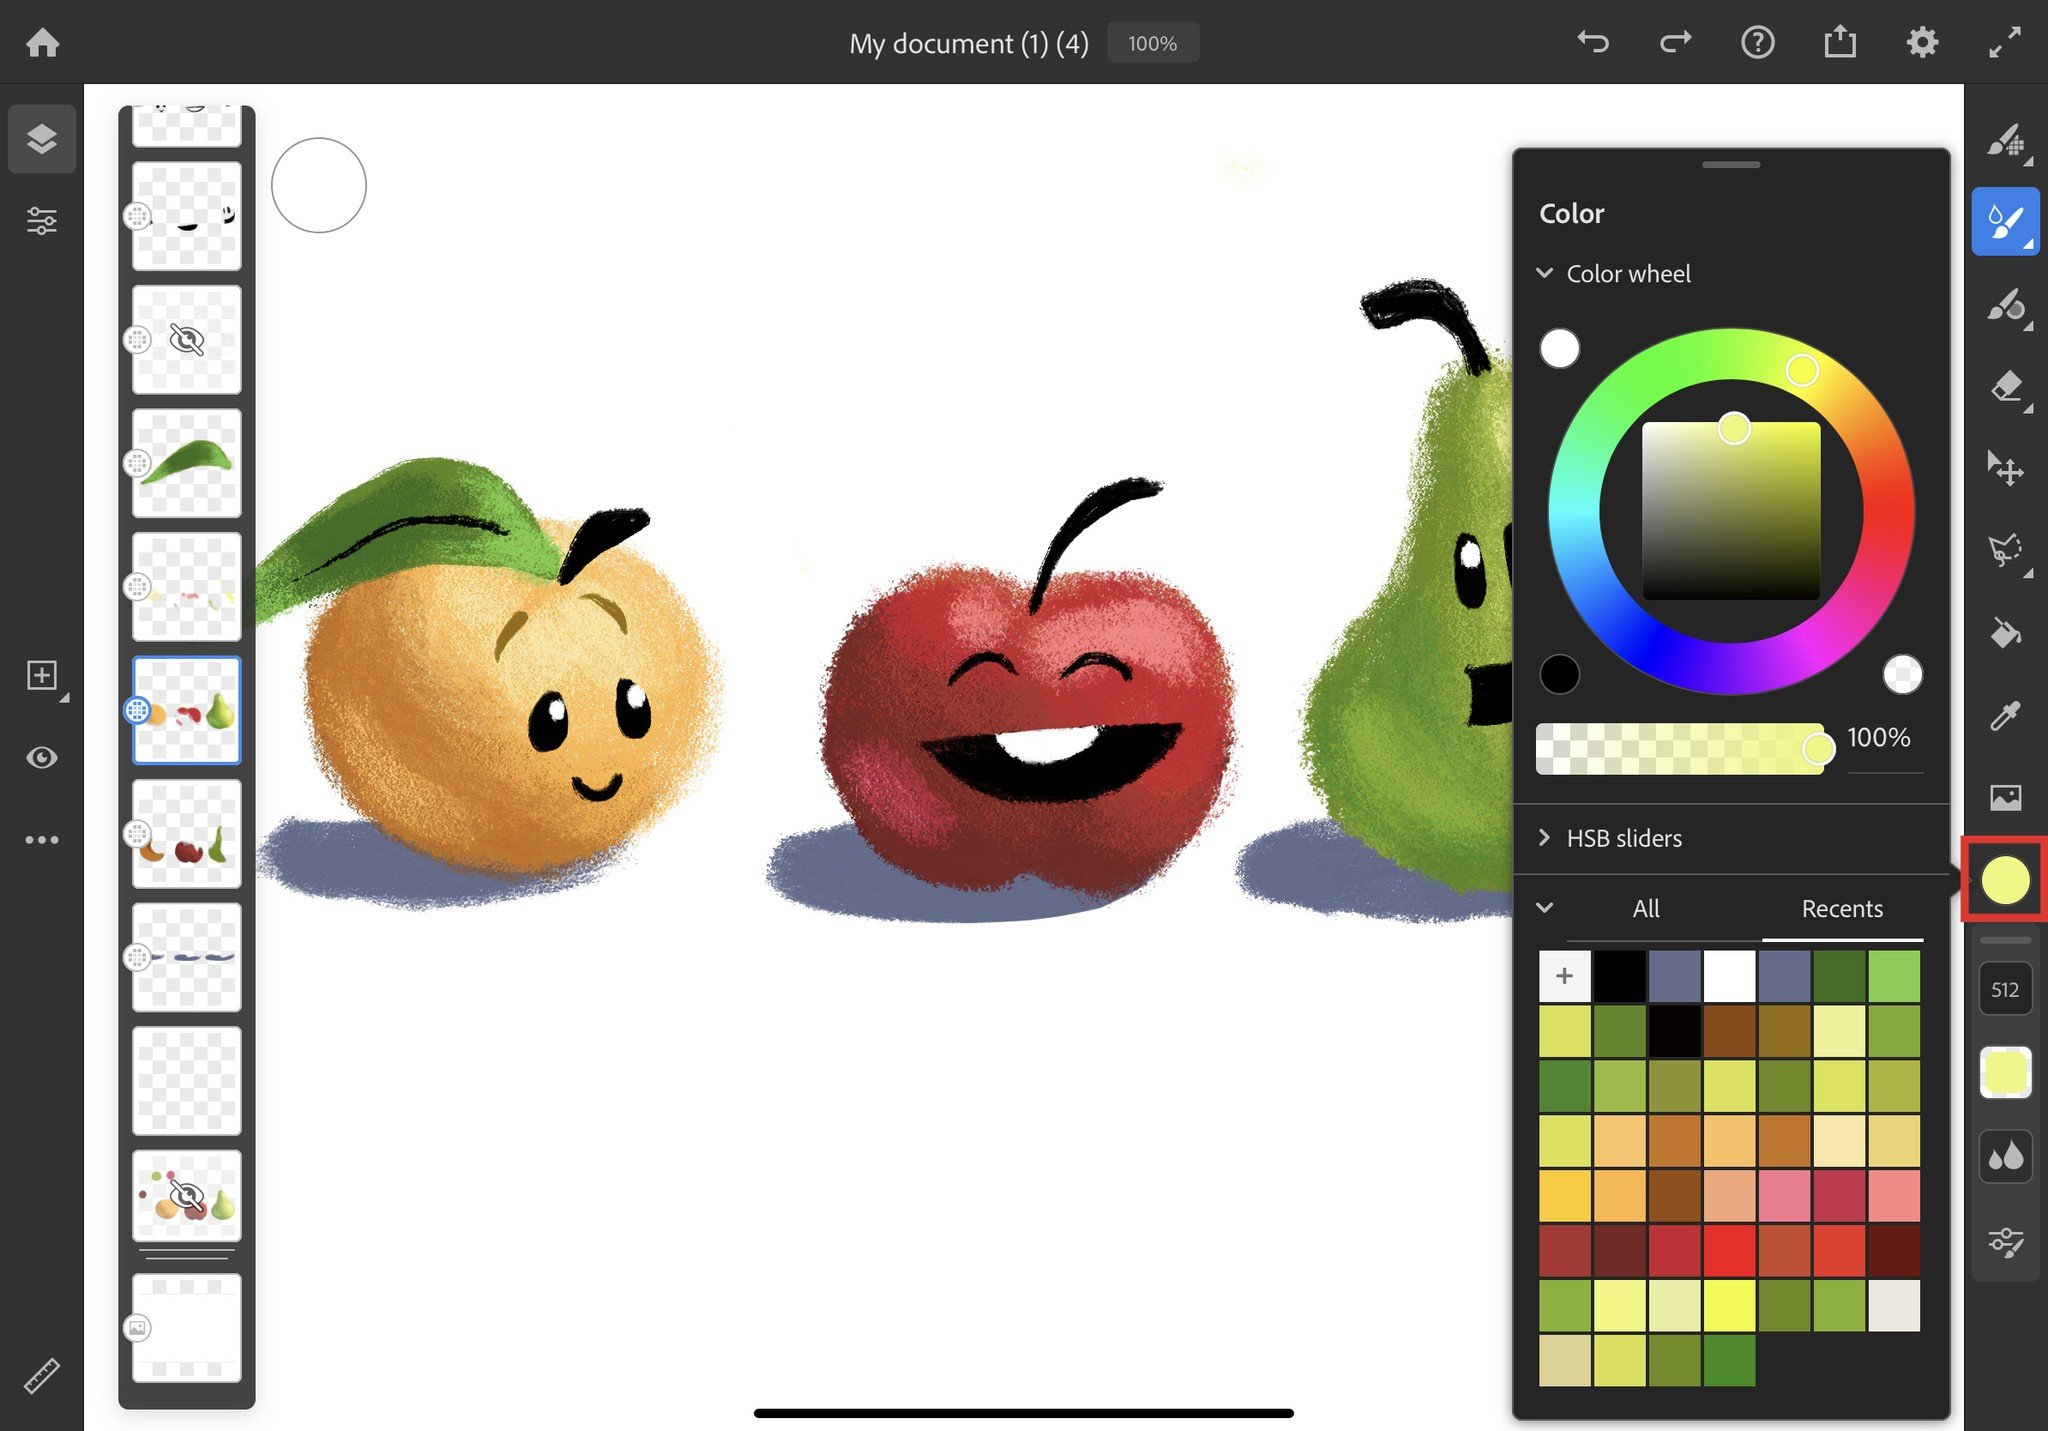
- You'll tap on this circle to select a color. You can then tap anywhere on the color wheel to get the exact hue and tone you're wanting. Notice that the program remembers the colors you've used most recently in the section below the color wheel.
-
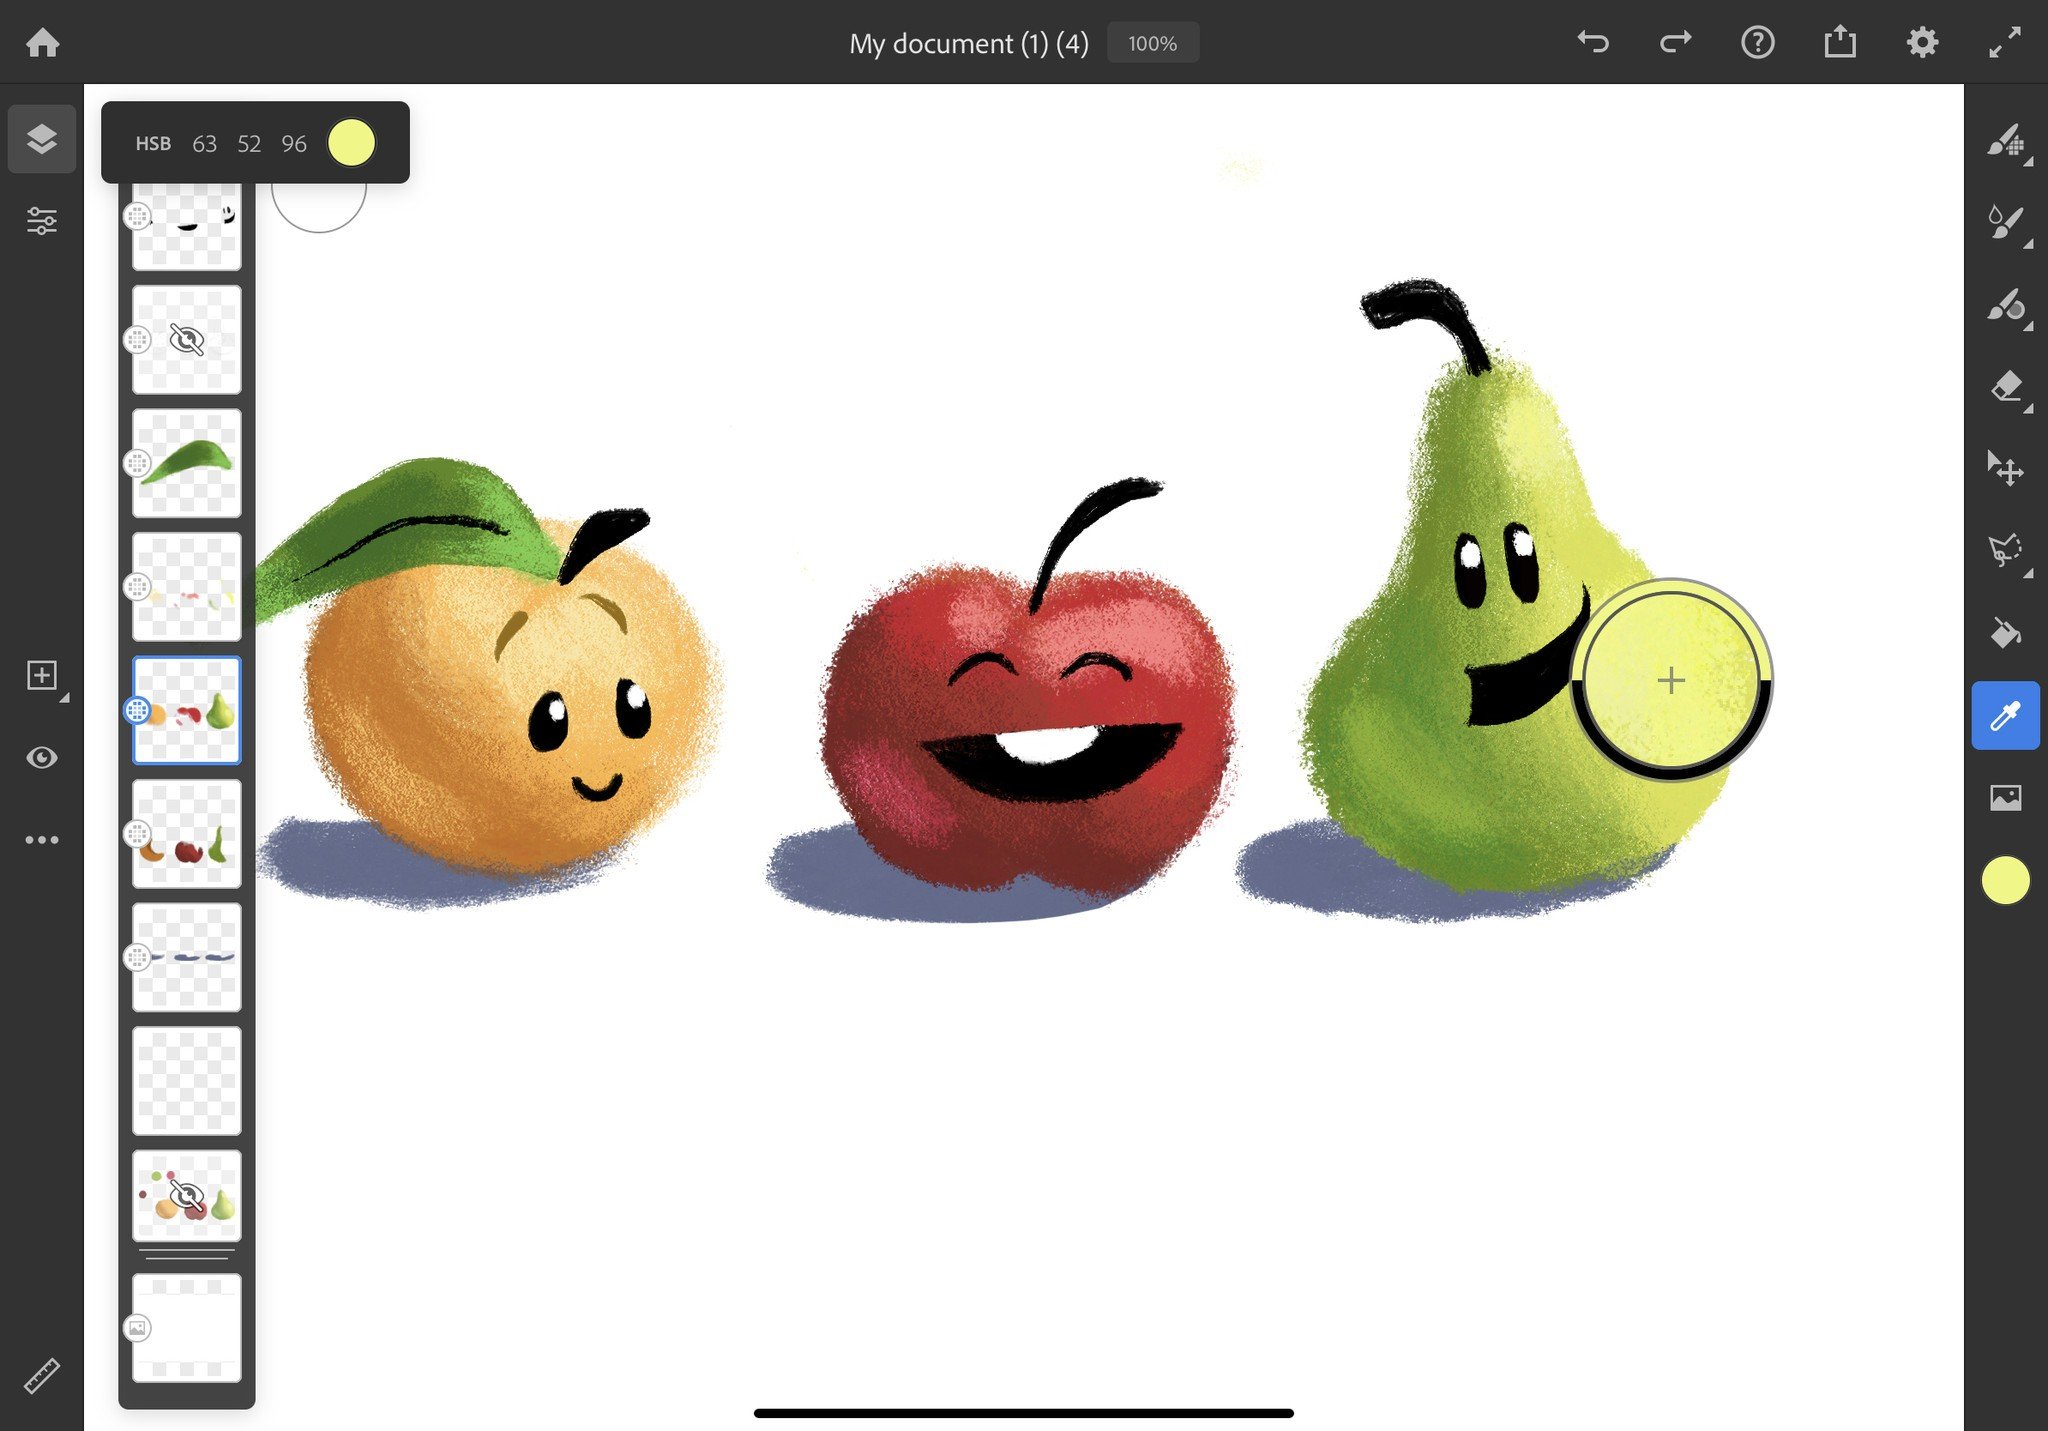
The eyedropper allows you to select a color already on a layer. In this image, light green is being pulled from the pear. The black half-circle represents the color I had previously selected.
-
The fill tool allows you to make an entire layer one color. If used within sealed off vector lines, the fill tool will only fill inside the vector strokes.
Brushes and the eraser
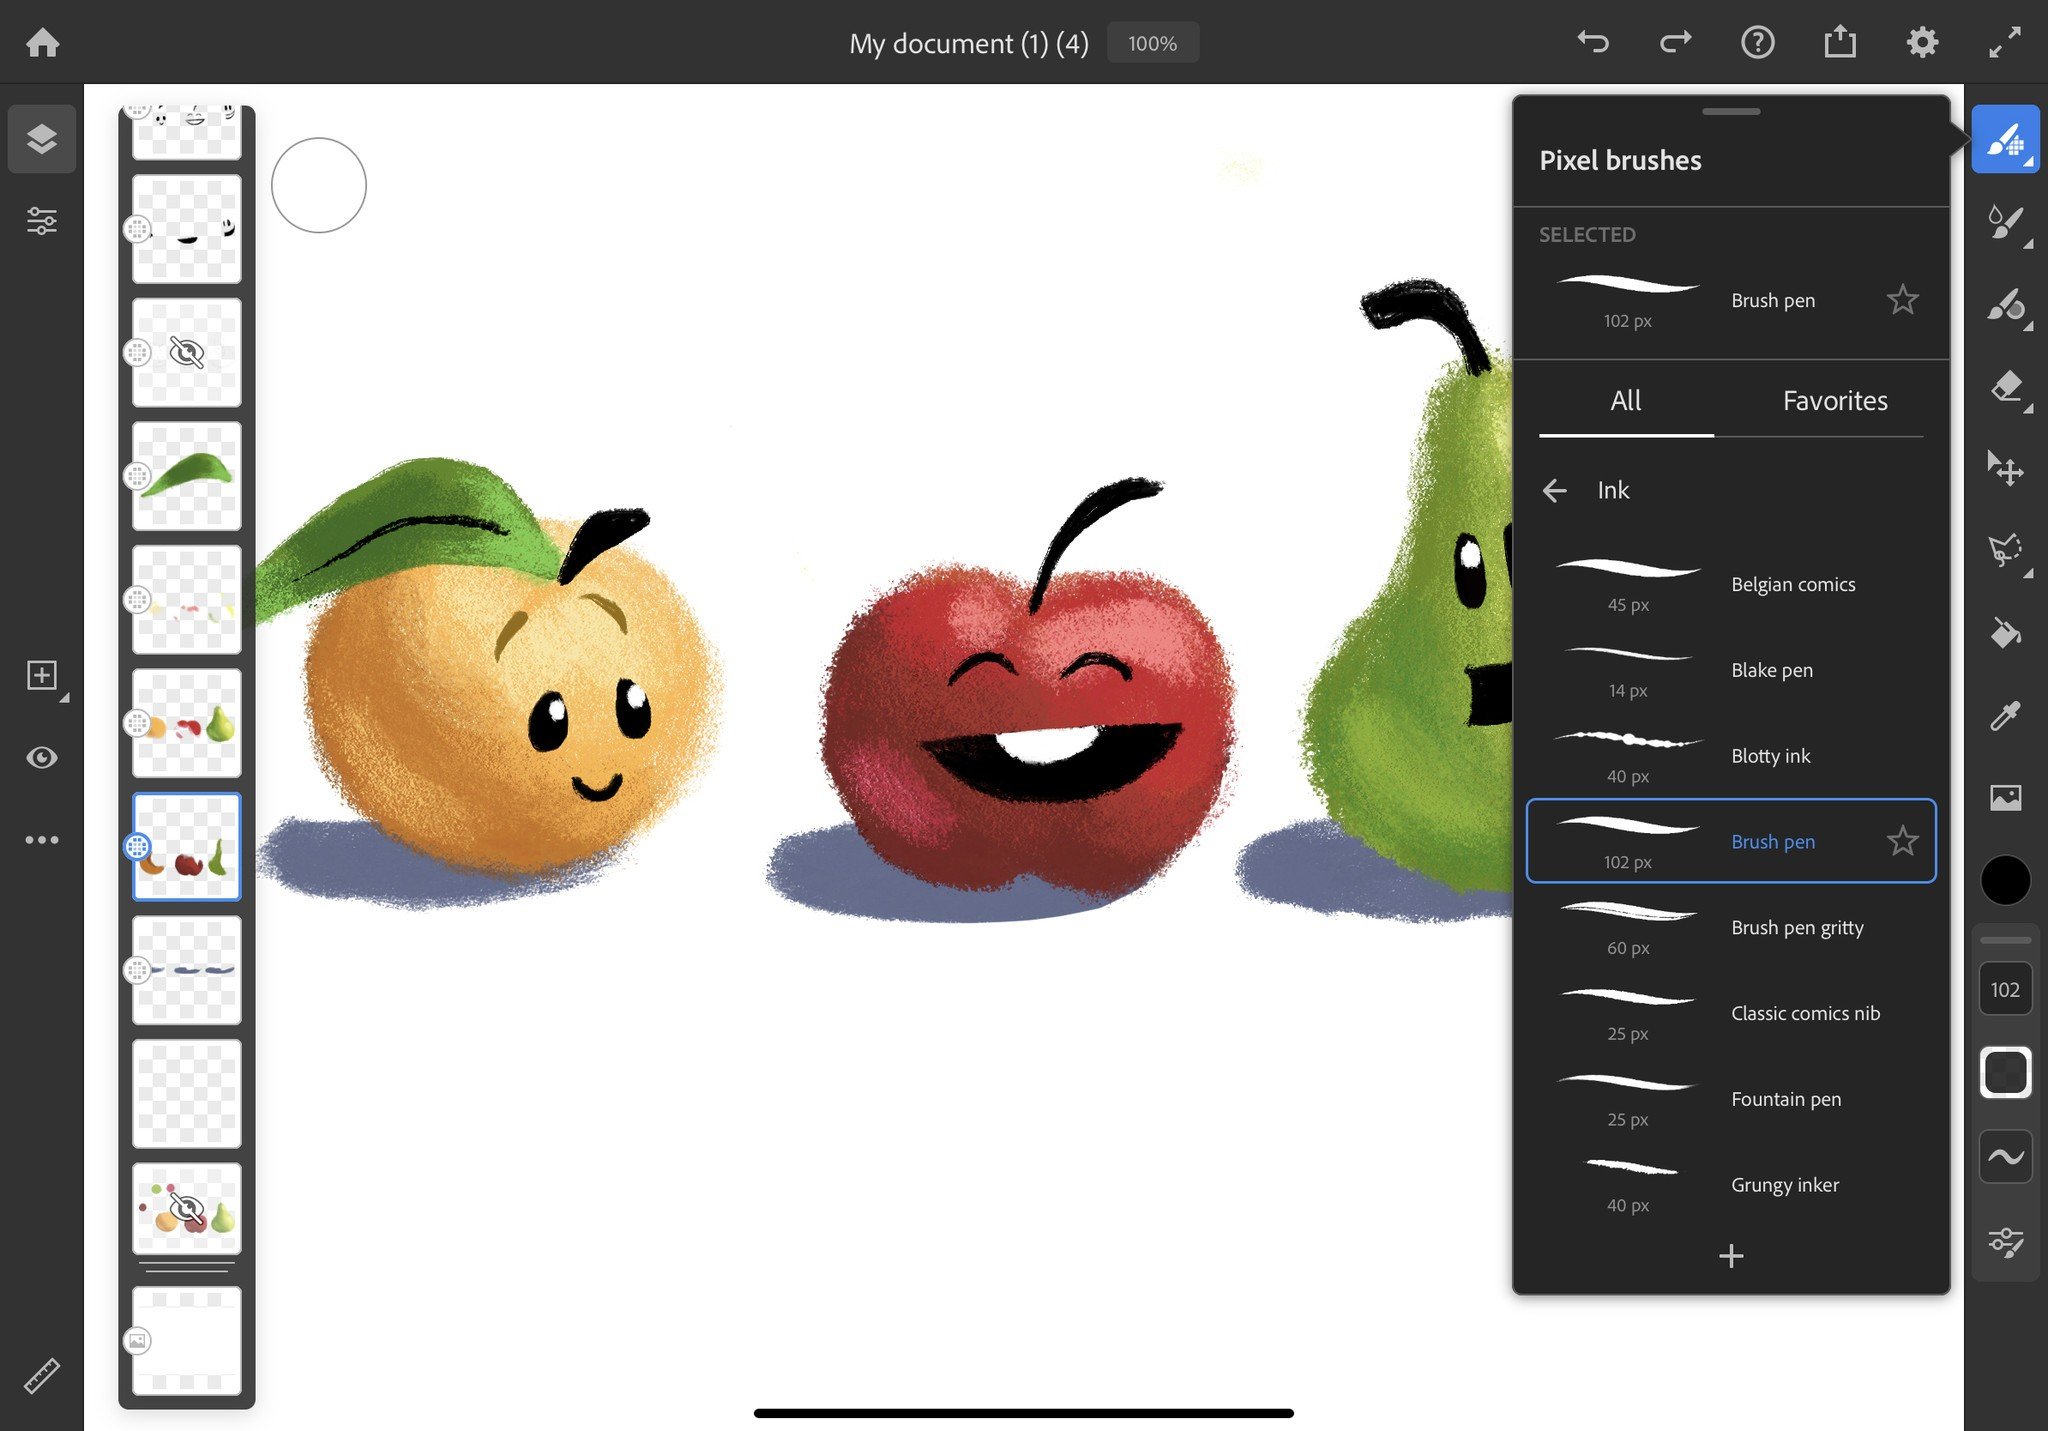
There are three kinds of brushes in Adobe Fresco: Pixel, live, and vector. Pixel brushes are basic raster brushes. Live brushes replicate the movement and flow of oils and water to look more realistic. Vector brushes are made of straight or curved lines to produce smooth strokes. These three brush tools take up the first three positions at the top of the toolbar.
Note that two different types of brushes cannot be used within the same layer. If you're working with one kind of brush on a layer and then switch to a different brush, a new layer will be created.
Pixel brush
If you quickly tap on this button, you'll change to this tool. Tap it again and a menu showing all of the available pixel brushes will appear. Each pixel brush creates a different effect, so you'll want to test them all out. If you star any brushes, you'll be able to view them from the Favorites tab.
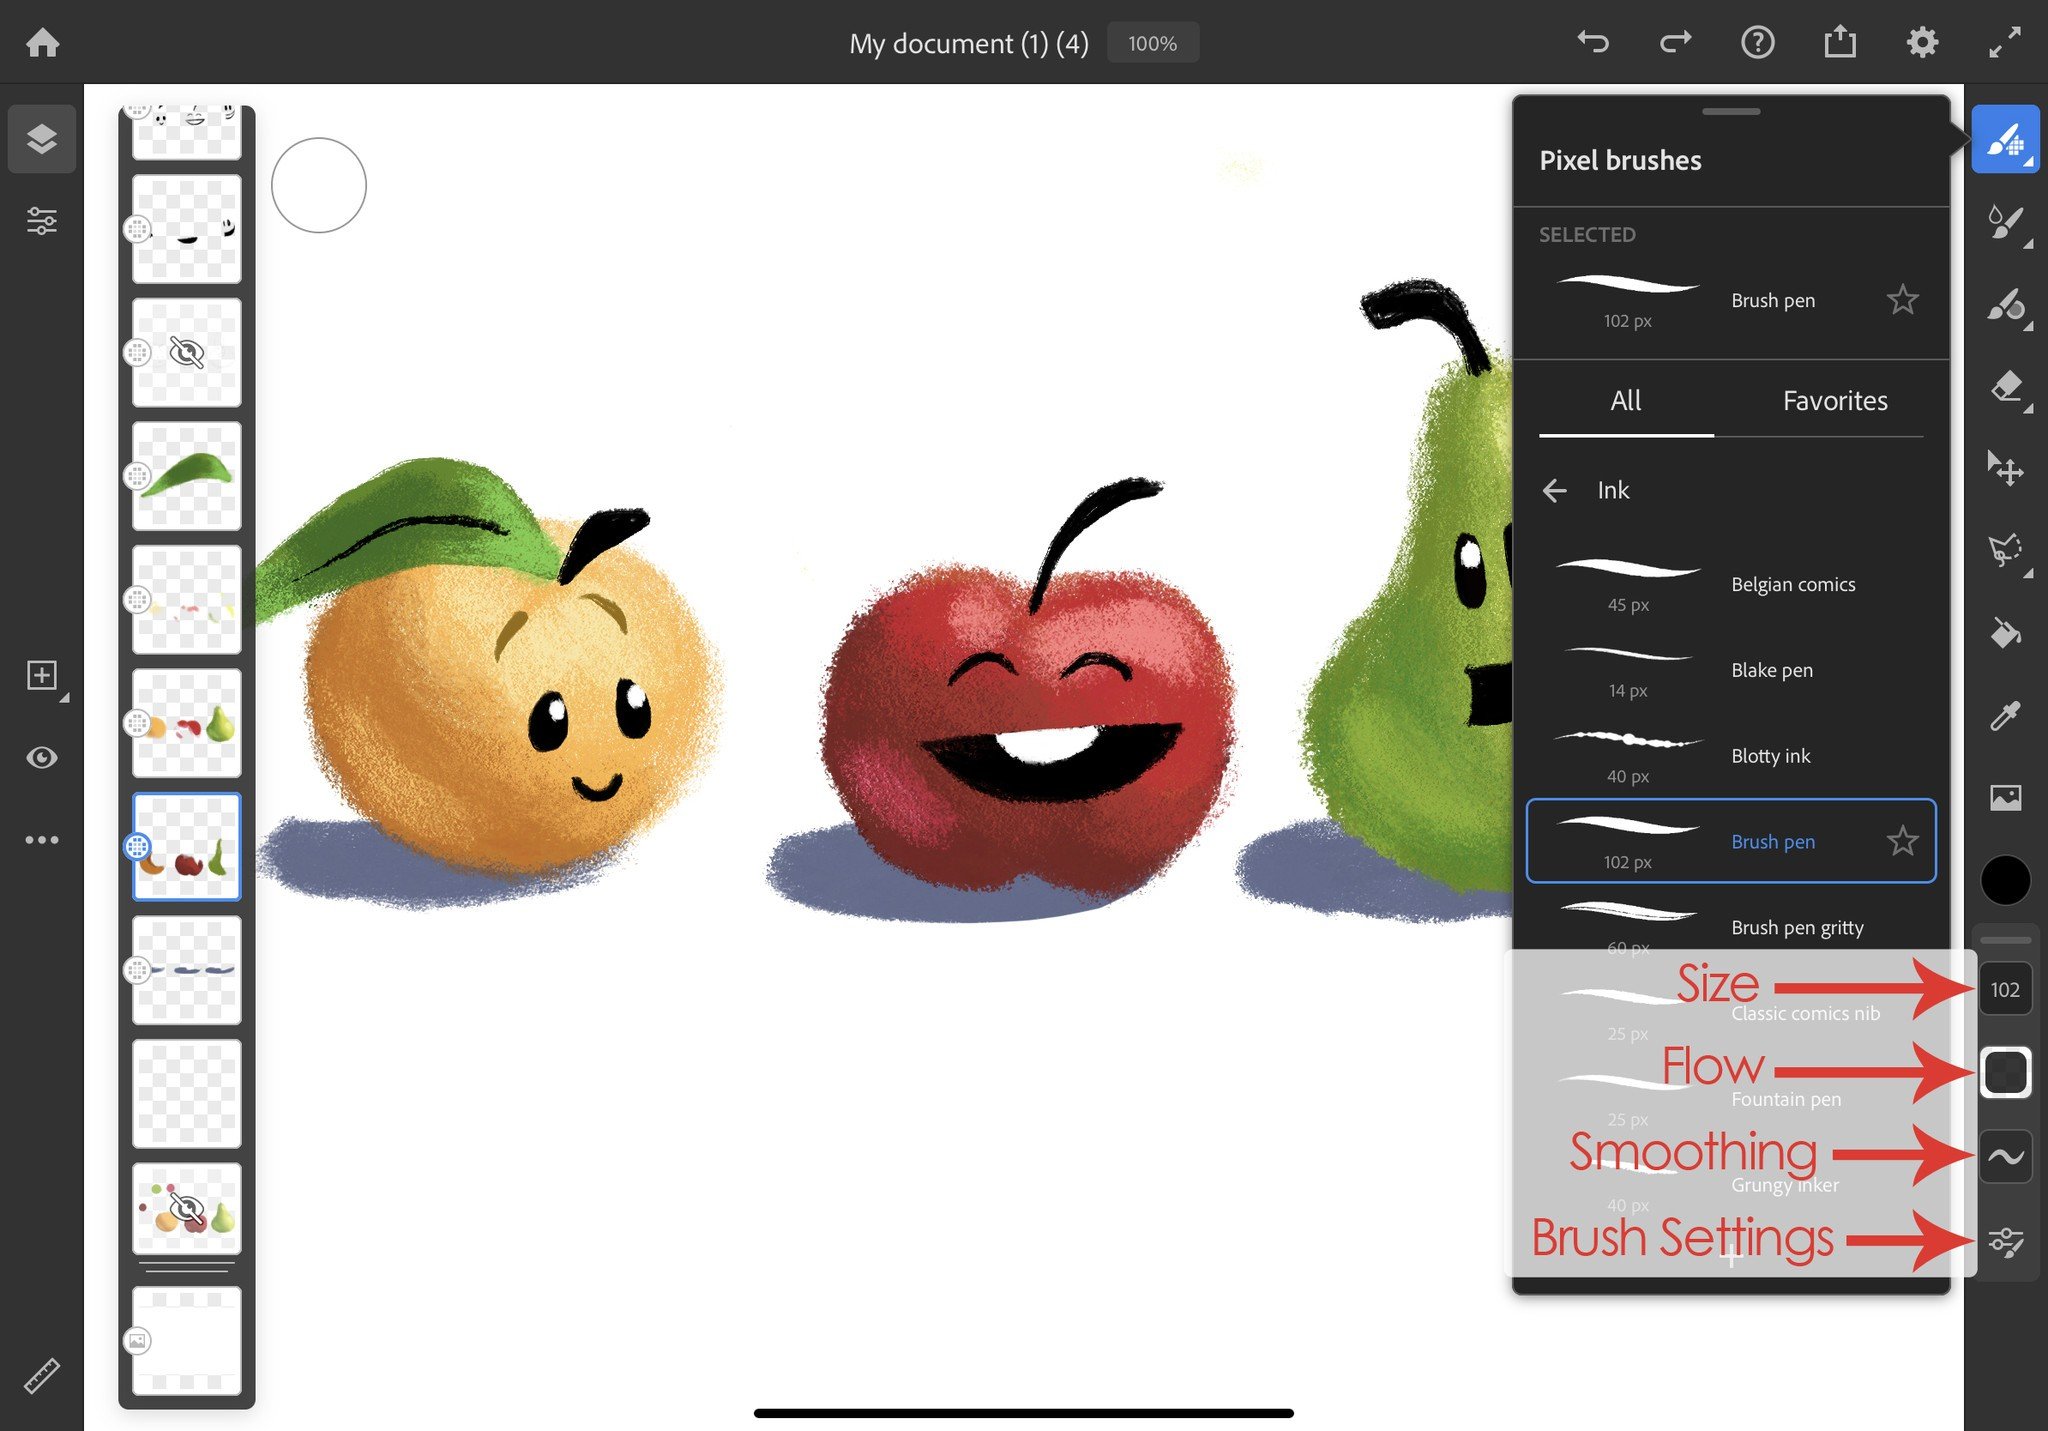
Once a pixel brush is selected, you can choose its size, flow, and smoothing by tapping on the corresponding tool. Each of these things affects what it looks like when applied to a layer. Size determines how big the brush is. Flow determines how quickly paint is laid down whenever you make a stroke, and smoothing determines how much the program corrects your strokes to make them look more smooth.
The Brush settings tool is where things get really technical. Since this is a basic guide, we won't jump into it much. Suffice it to say that this allows you to have more control over how your brush strokes look.
Live brush
If you quickly tap on this button, you'll change to this tool. Tap it again and a menu showing all of the available live brushes will appear. Each live brush creates a different effect, so you'll want to test them all out. If you star any brushes, you'll be able to view them from the Favorites tab.

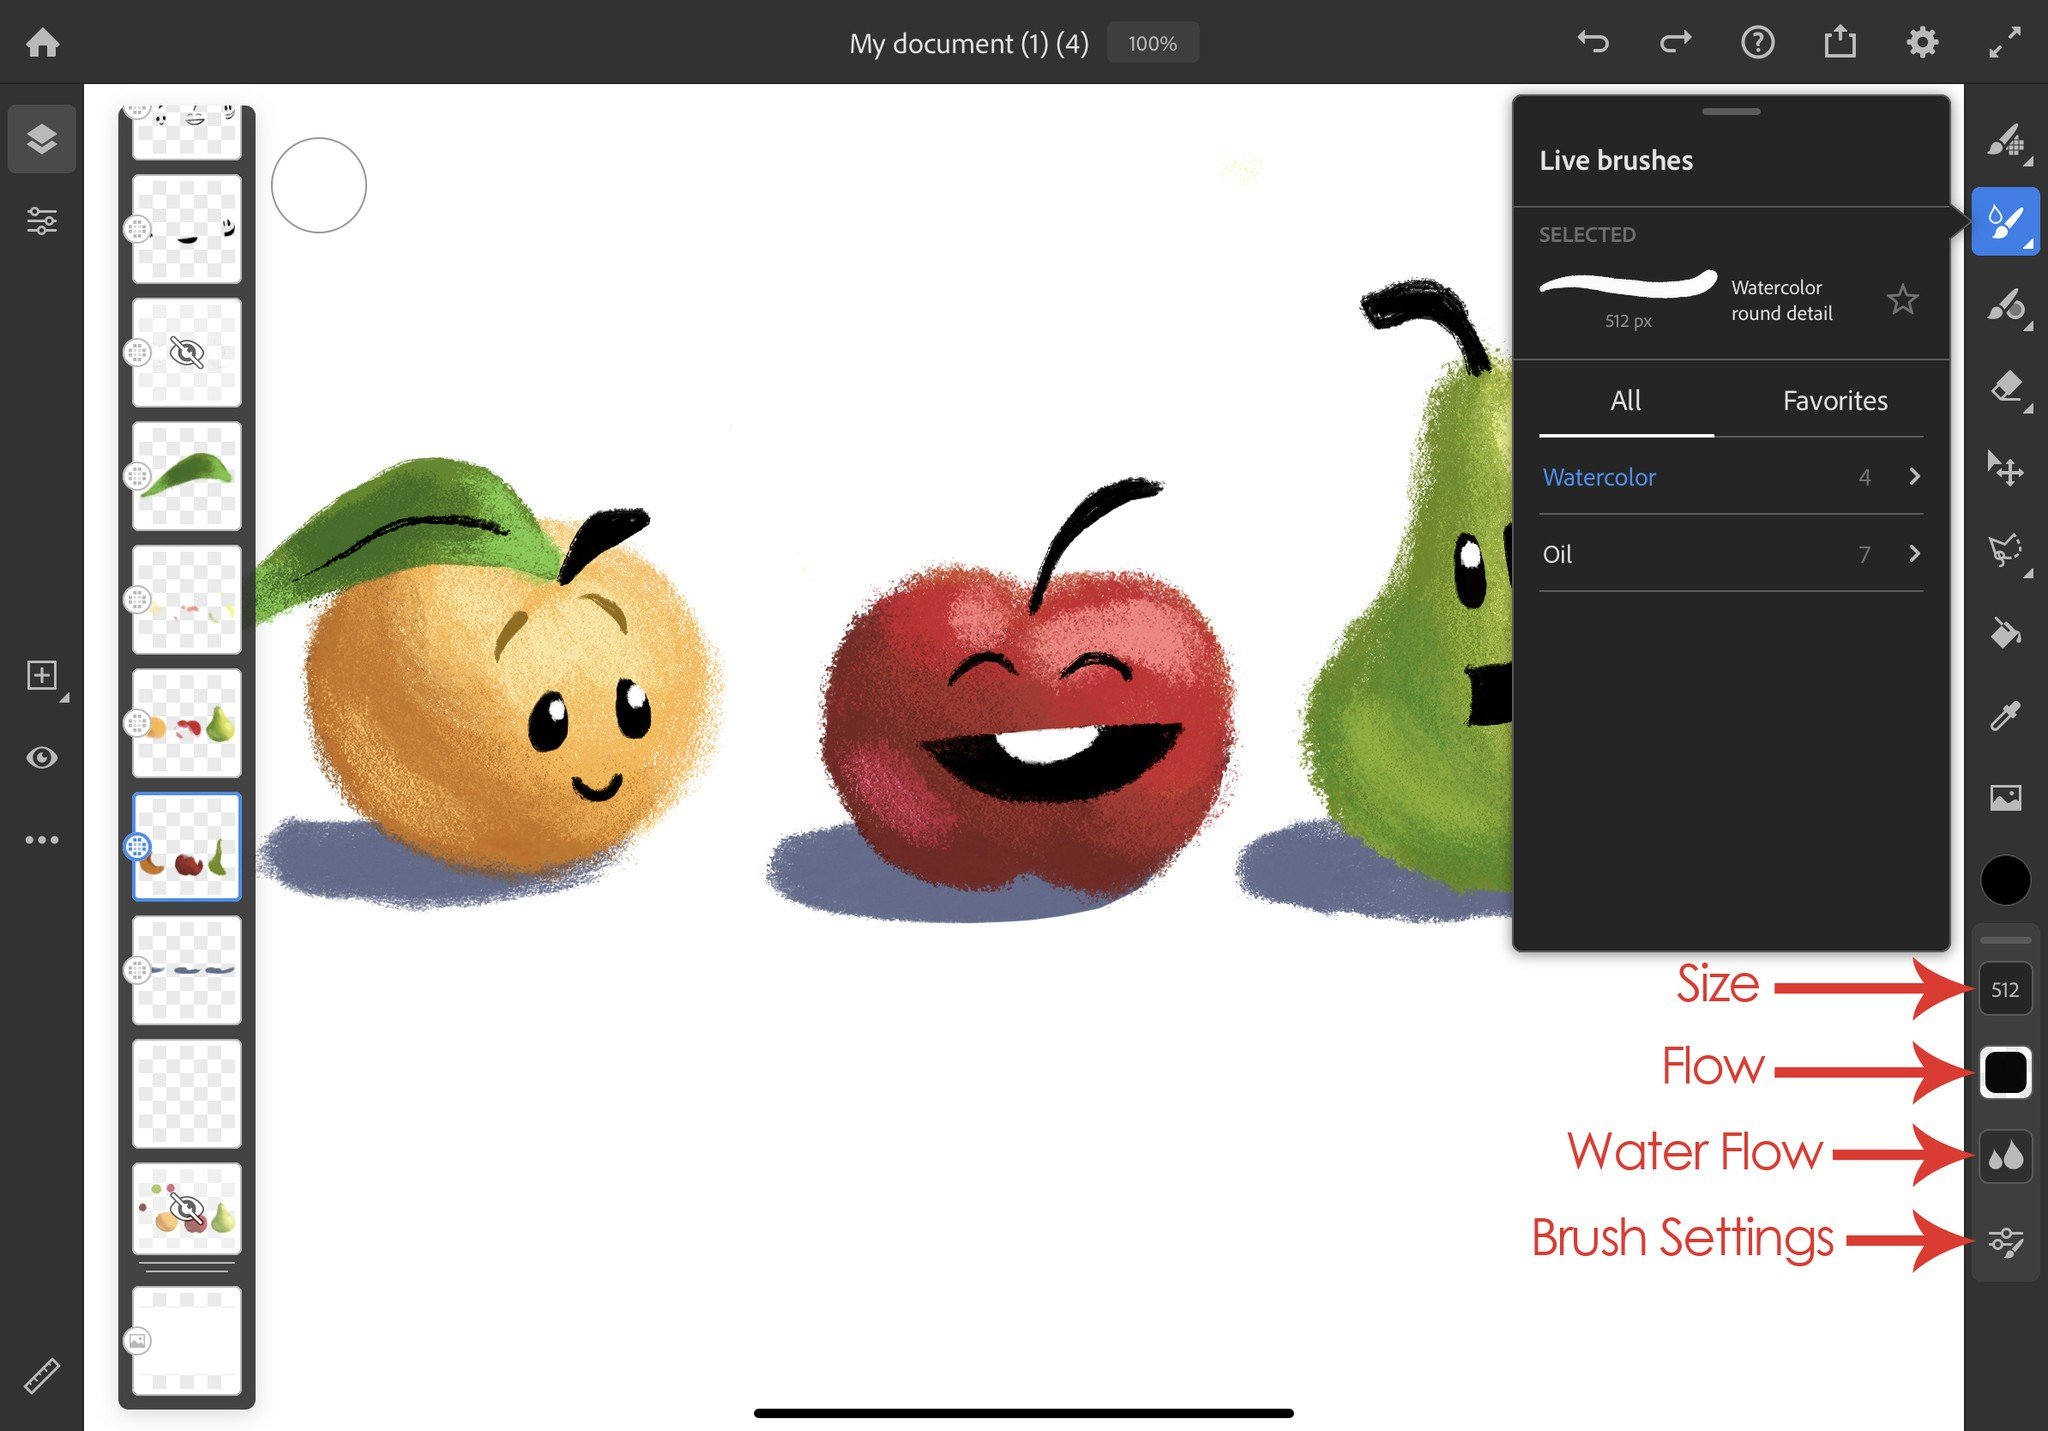
Once a live brush is selected, you can choose its size, flow, and water flow. Each of these things affects what it looks like when applied to a layer. Size determines how big the brush is. Flow determines how quickly paint is laid down whenever you make a stroke, and water flow determines how much water is on your brush.
The Brush settings tool is where things get really technical. Since this is a basic guide we won't jump into it much. Suffice it to say that this allows you to have more control over how your brush strokes look.
Vector brush
If you quickly tap on this button, you'll change to this tool. Tap it again and a menu showing all of the available vector brushes will appear. Each vector brush creates a different effect toolbar so you'll want to test them all out. If you star any brushes, you'll be able to view them from the Favorites tab.
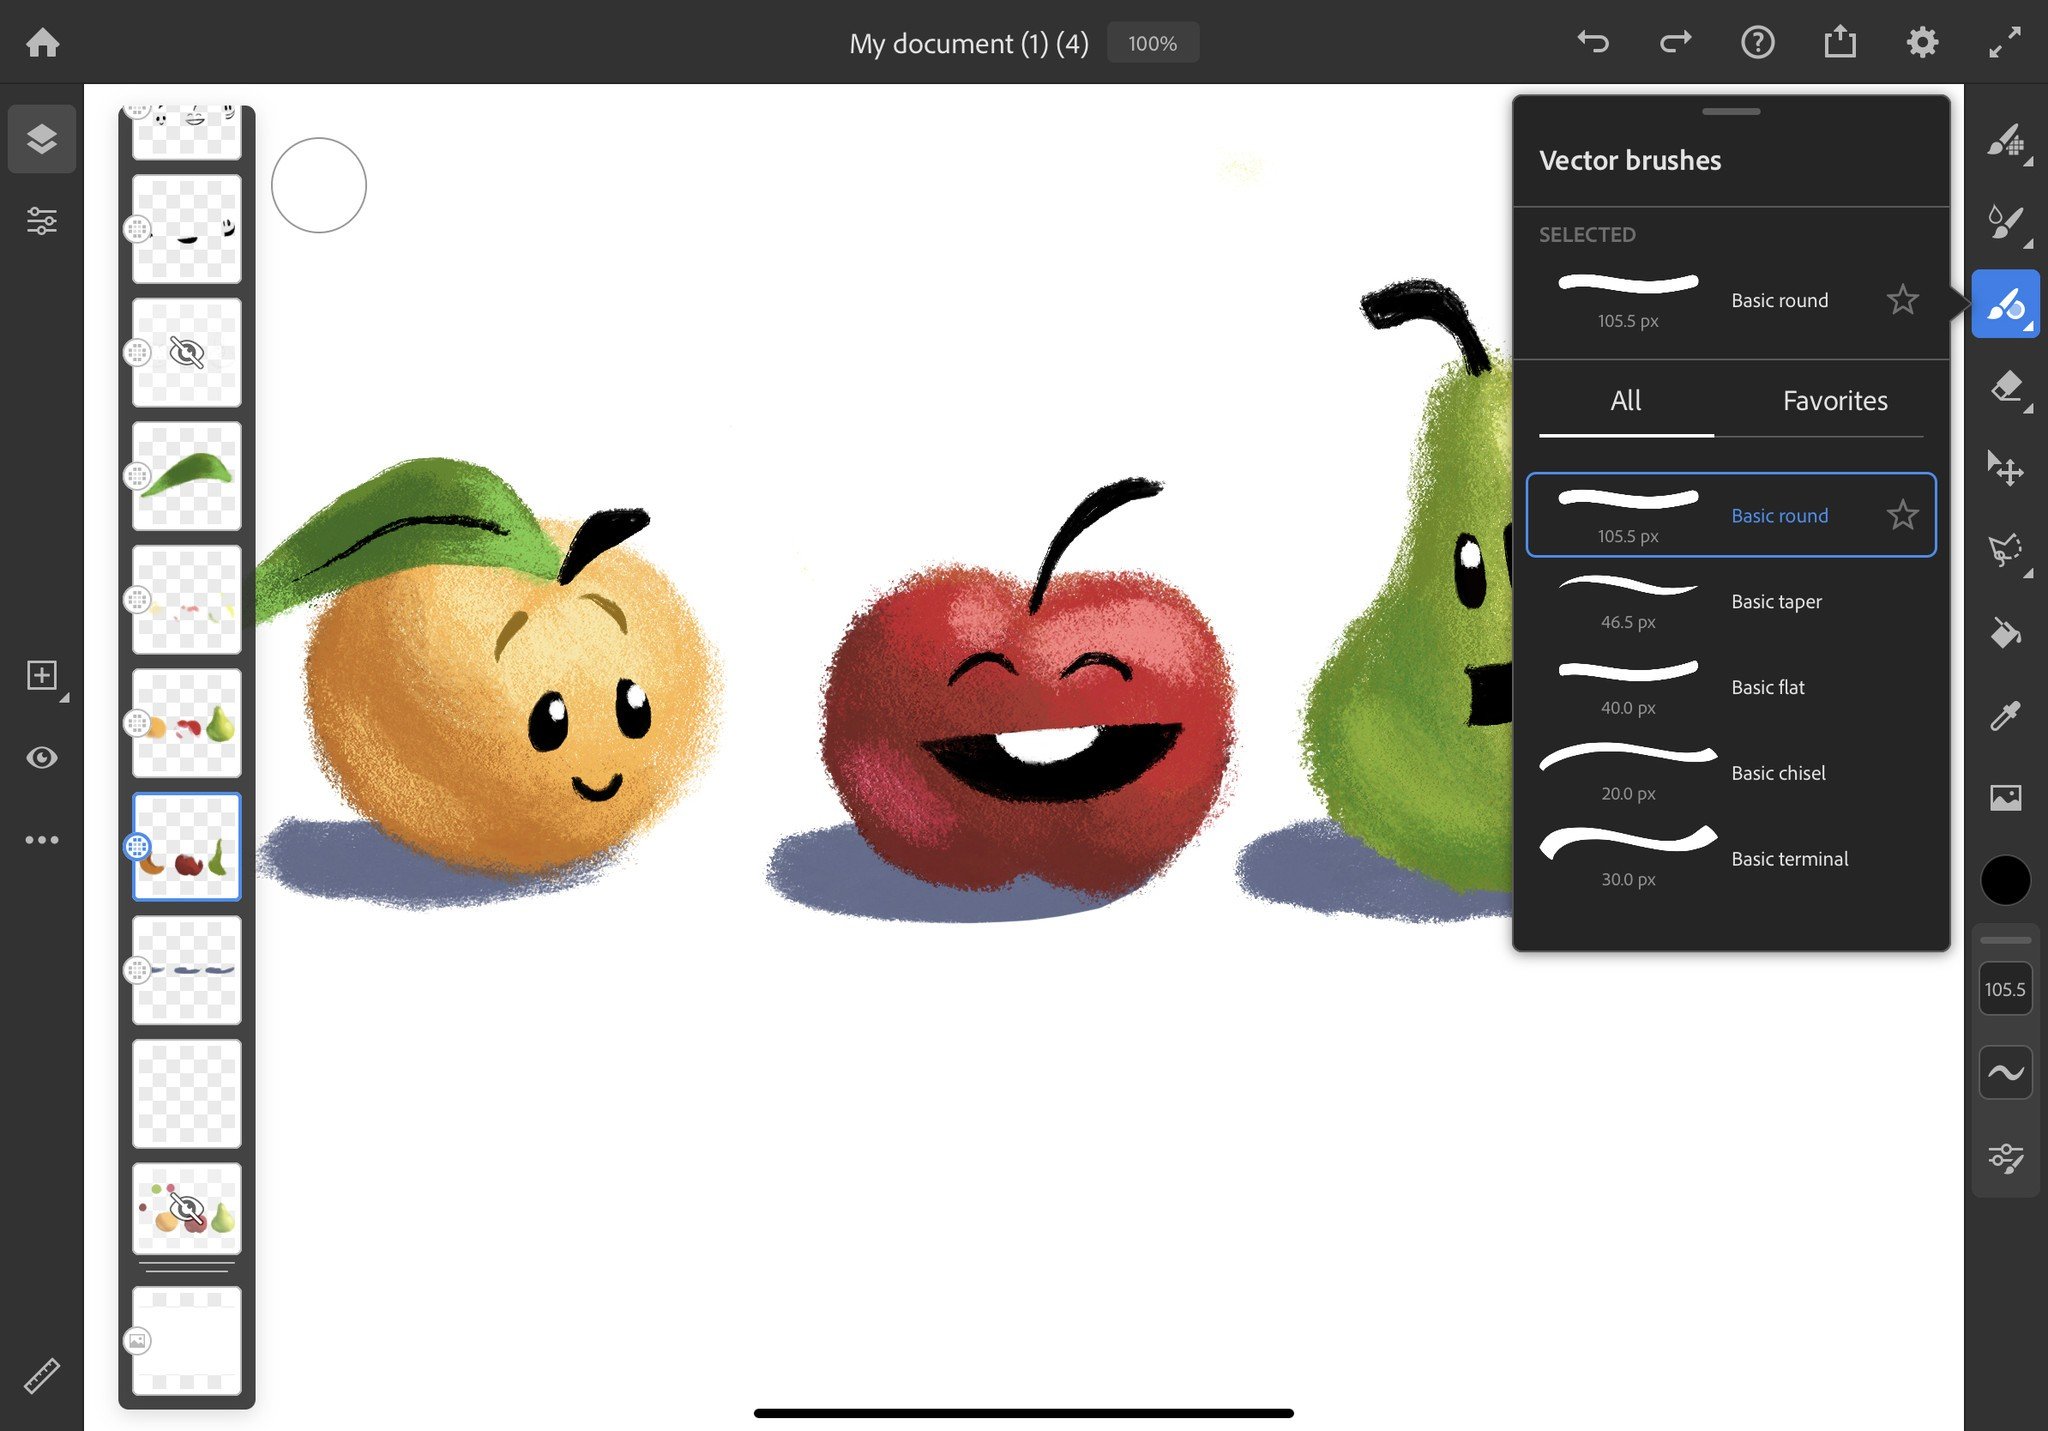
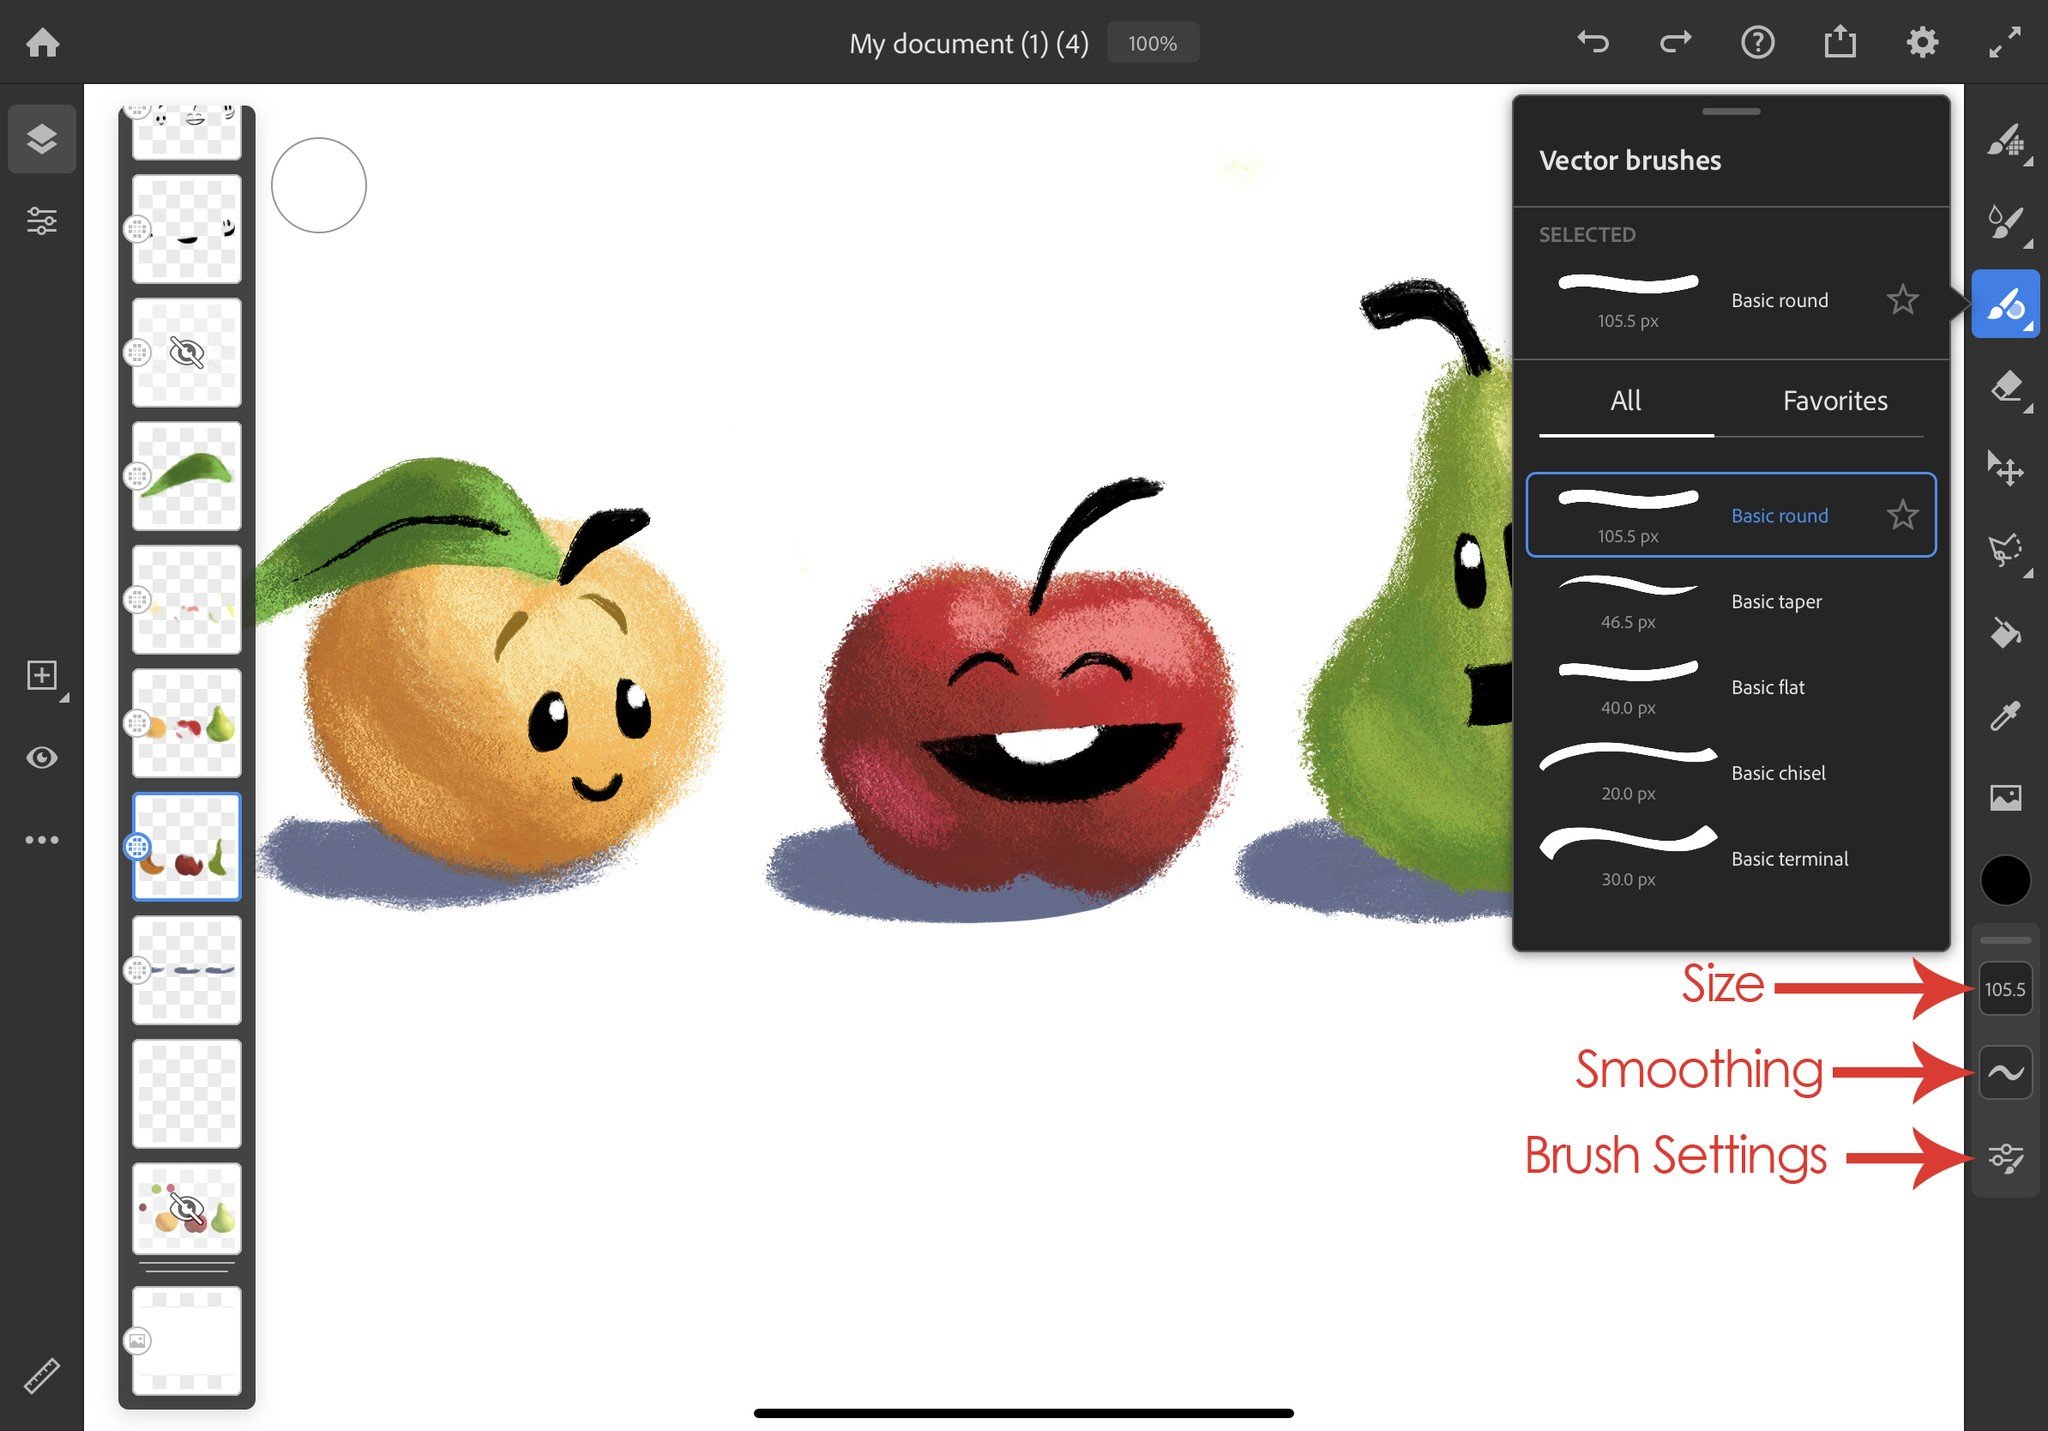
Once a vector brush is selected, you can choose its size or smoothing. Each of these things affects what it looks like when applied to a layer. Size determines how big the brush is. Smoothing determines how much the program corrects your strokes to make them look more smooth.
The Brush settings tool is where things get really technical. Since this is a basic guide we won't jump into it much. Suffice it to say that this allows you to have more control over how your brush strokes look.
Eraser
You might not think of an eraser as a brush, but in drawing programs, it functions very similarly. If you quickly tap on this button, you'll change to this tool. Tap it again and a menu showing all of the available Eraser brushes will appear.
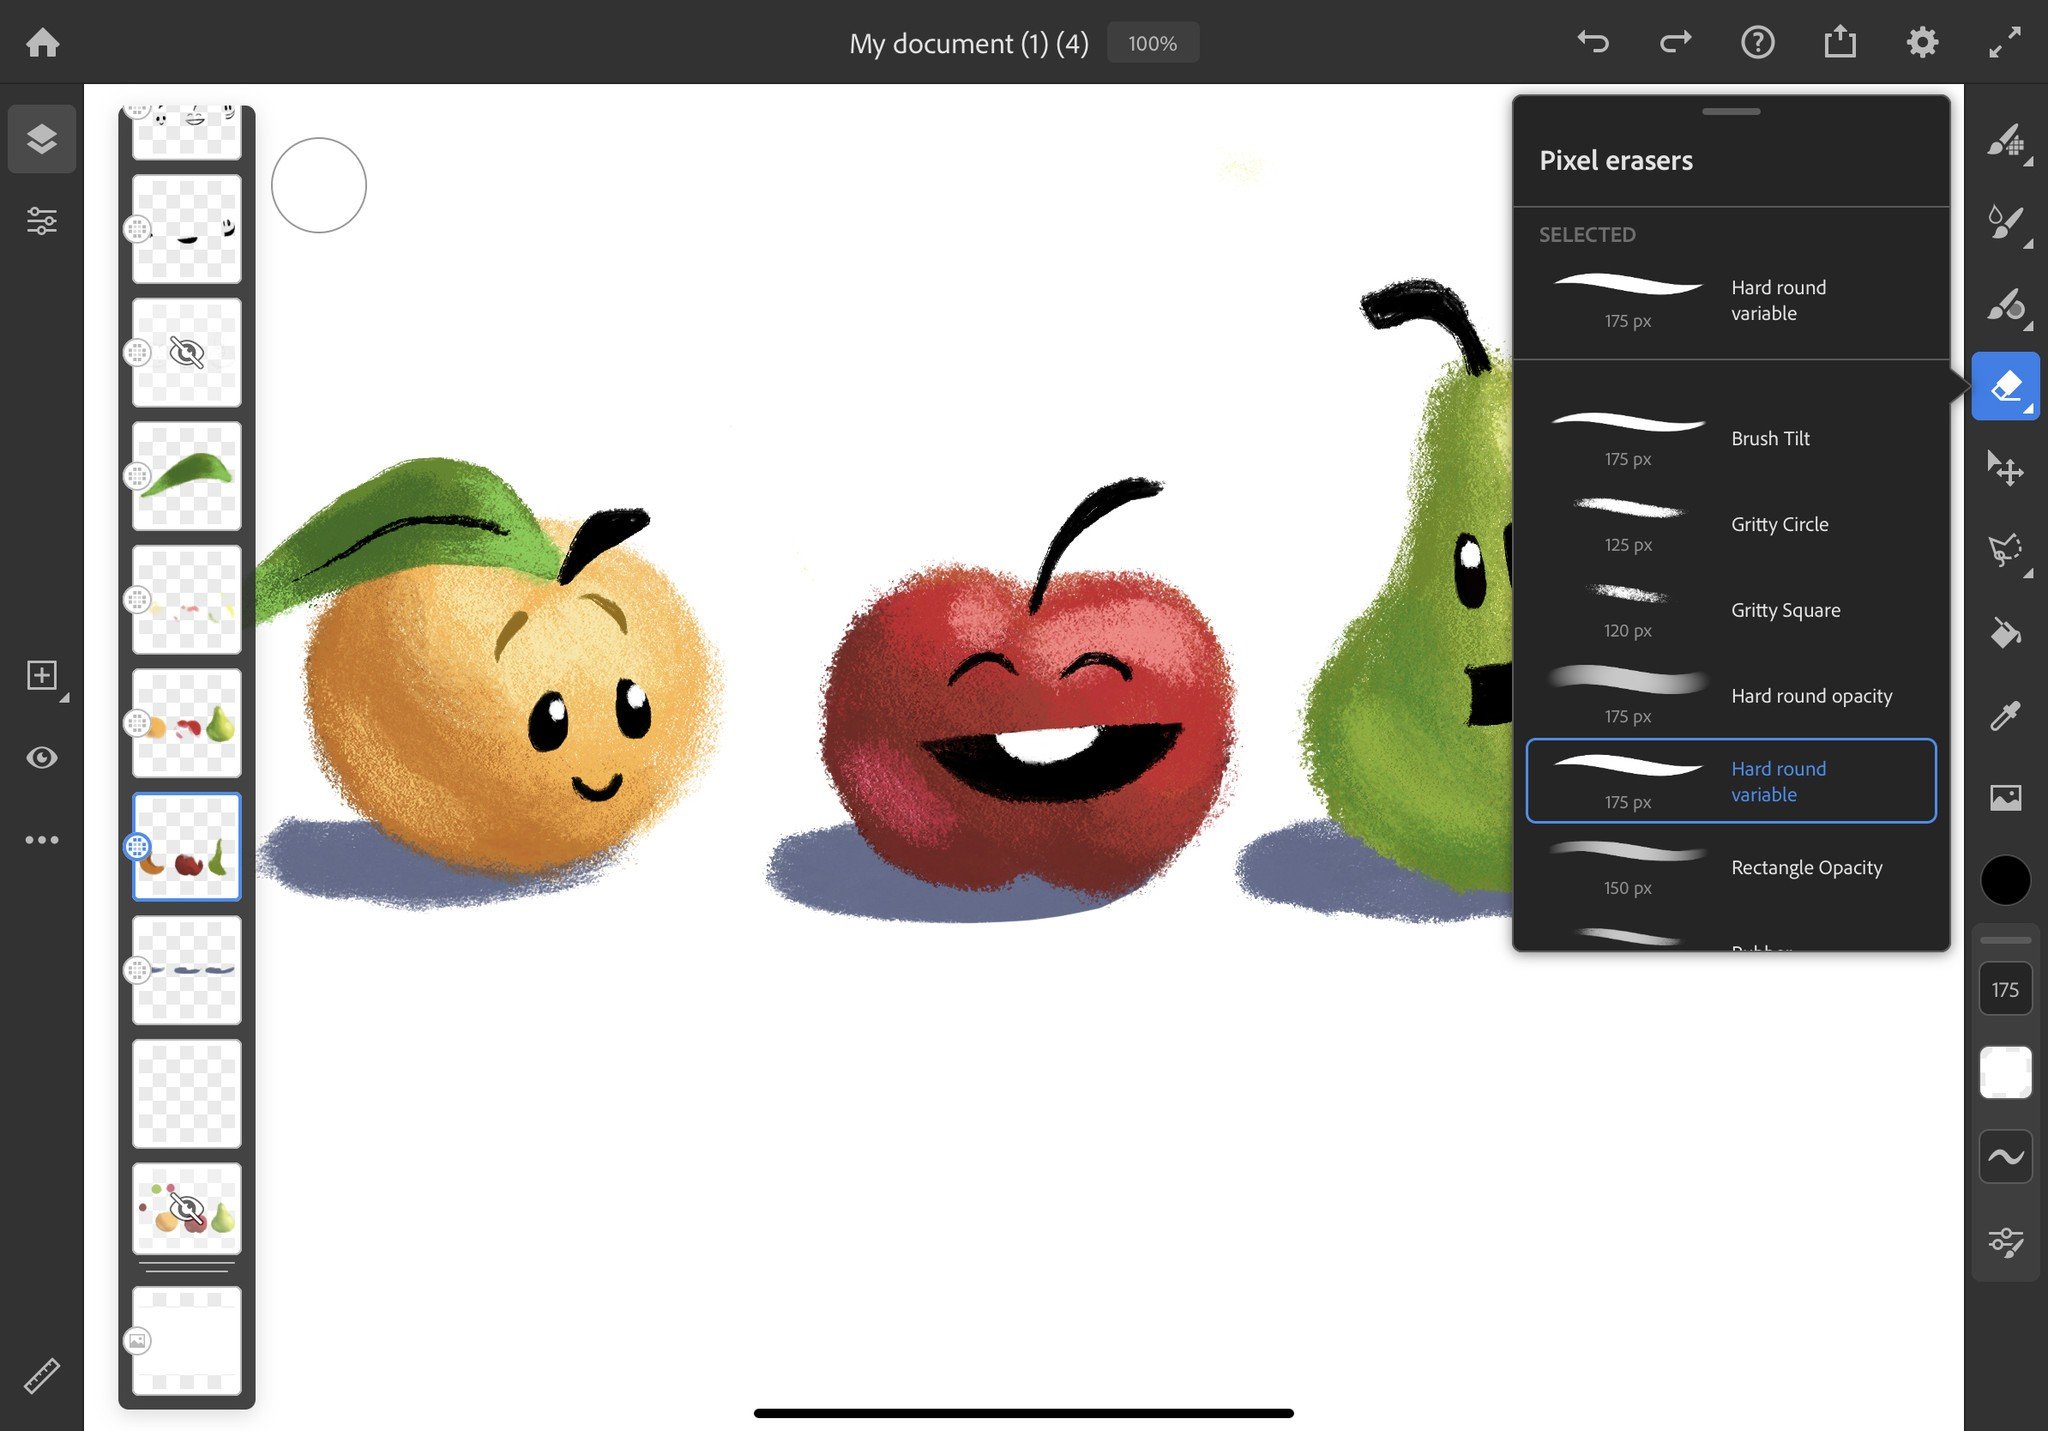
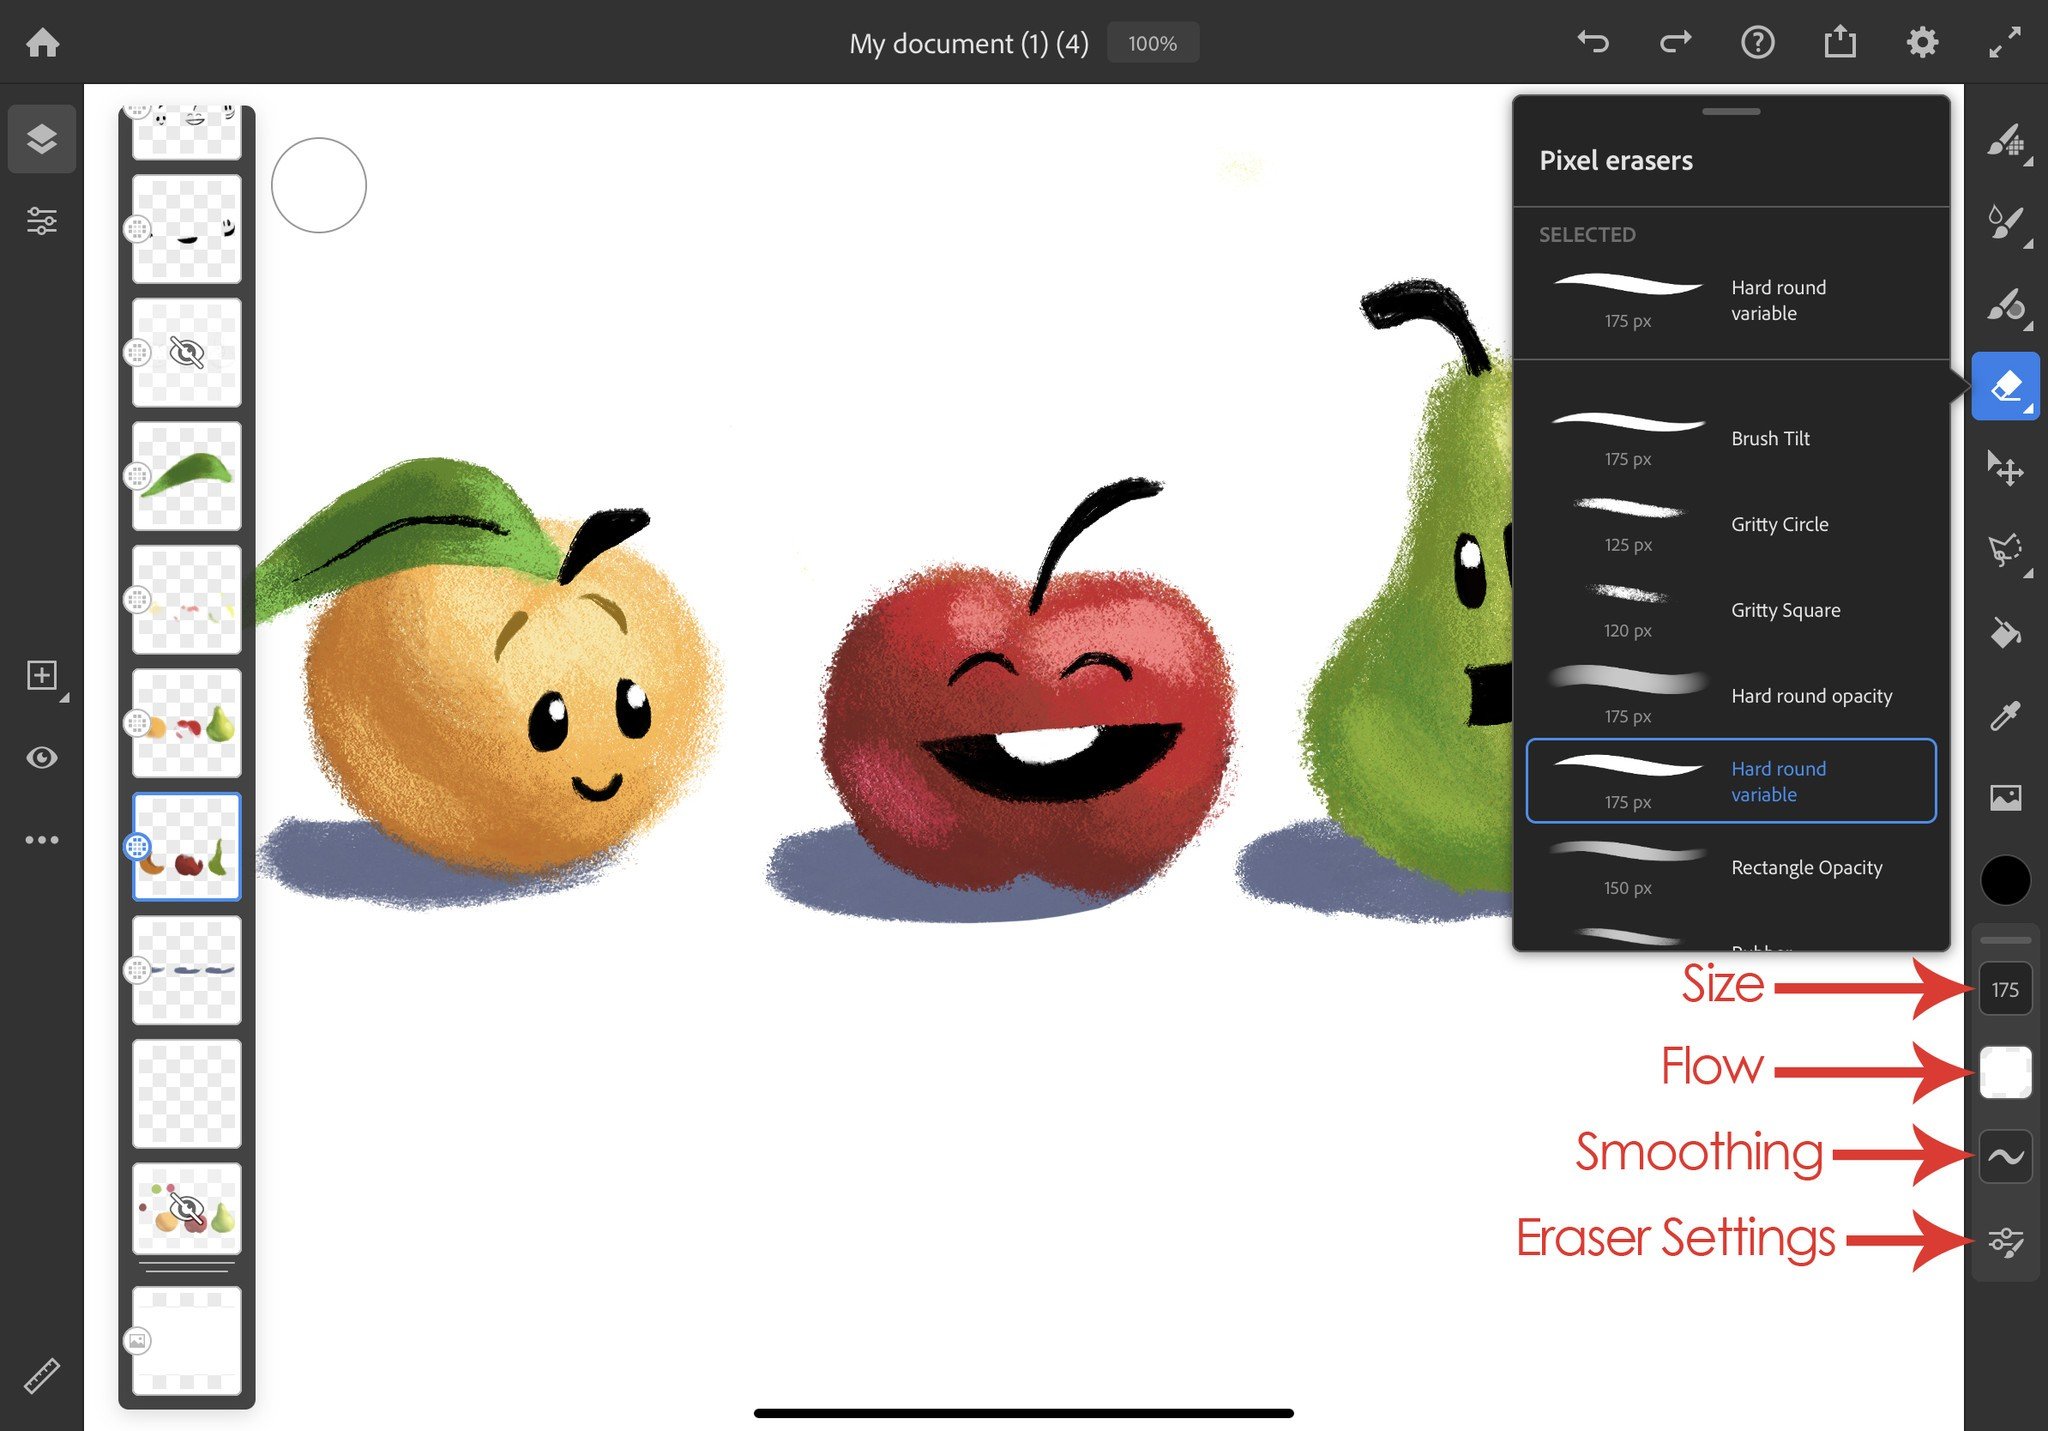
Once an eraser is selected, you can choose its size, flow, or smoothing at the bottom of the tool bar. Each of these things affects what it looks like when applied to a layer. Size determines how big the eraser is. Flow determines how quickly paint is removed whenever you make a stroke, and smoothing determines how much the program corrects your strokes to make them look more smooth.
Unlike physical art supplies, the eraser can remove anything you apply it to, including watercolor, oil paint, and ink brushes.
Selection tools
When an area is selected, only that area can be edited. Make sure you are on the correct layer when you want to make a selection.
There are four selection tools: Lasso, quick selection, square, and circle:
- Lasso selection: Allows you to trace any shape that you want over an area and selects everything within your tracing.
- Quick selection: Works more like a brush and selects everything you touch.
- Square selection: Only makes a selection in a square or rectangular shape.
- Circle selection: Lets you select any area within a circular or oval shape.
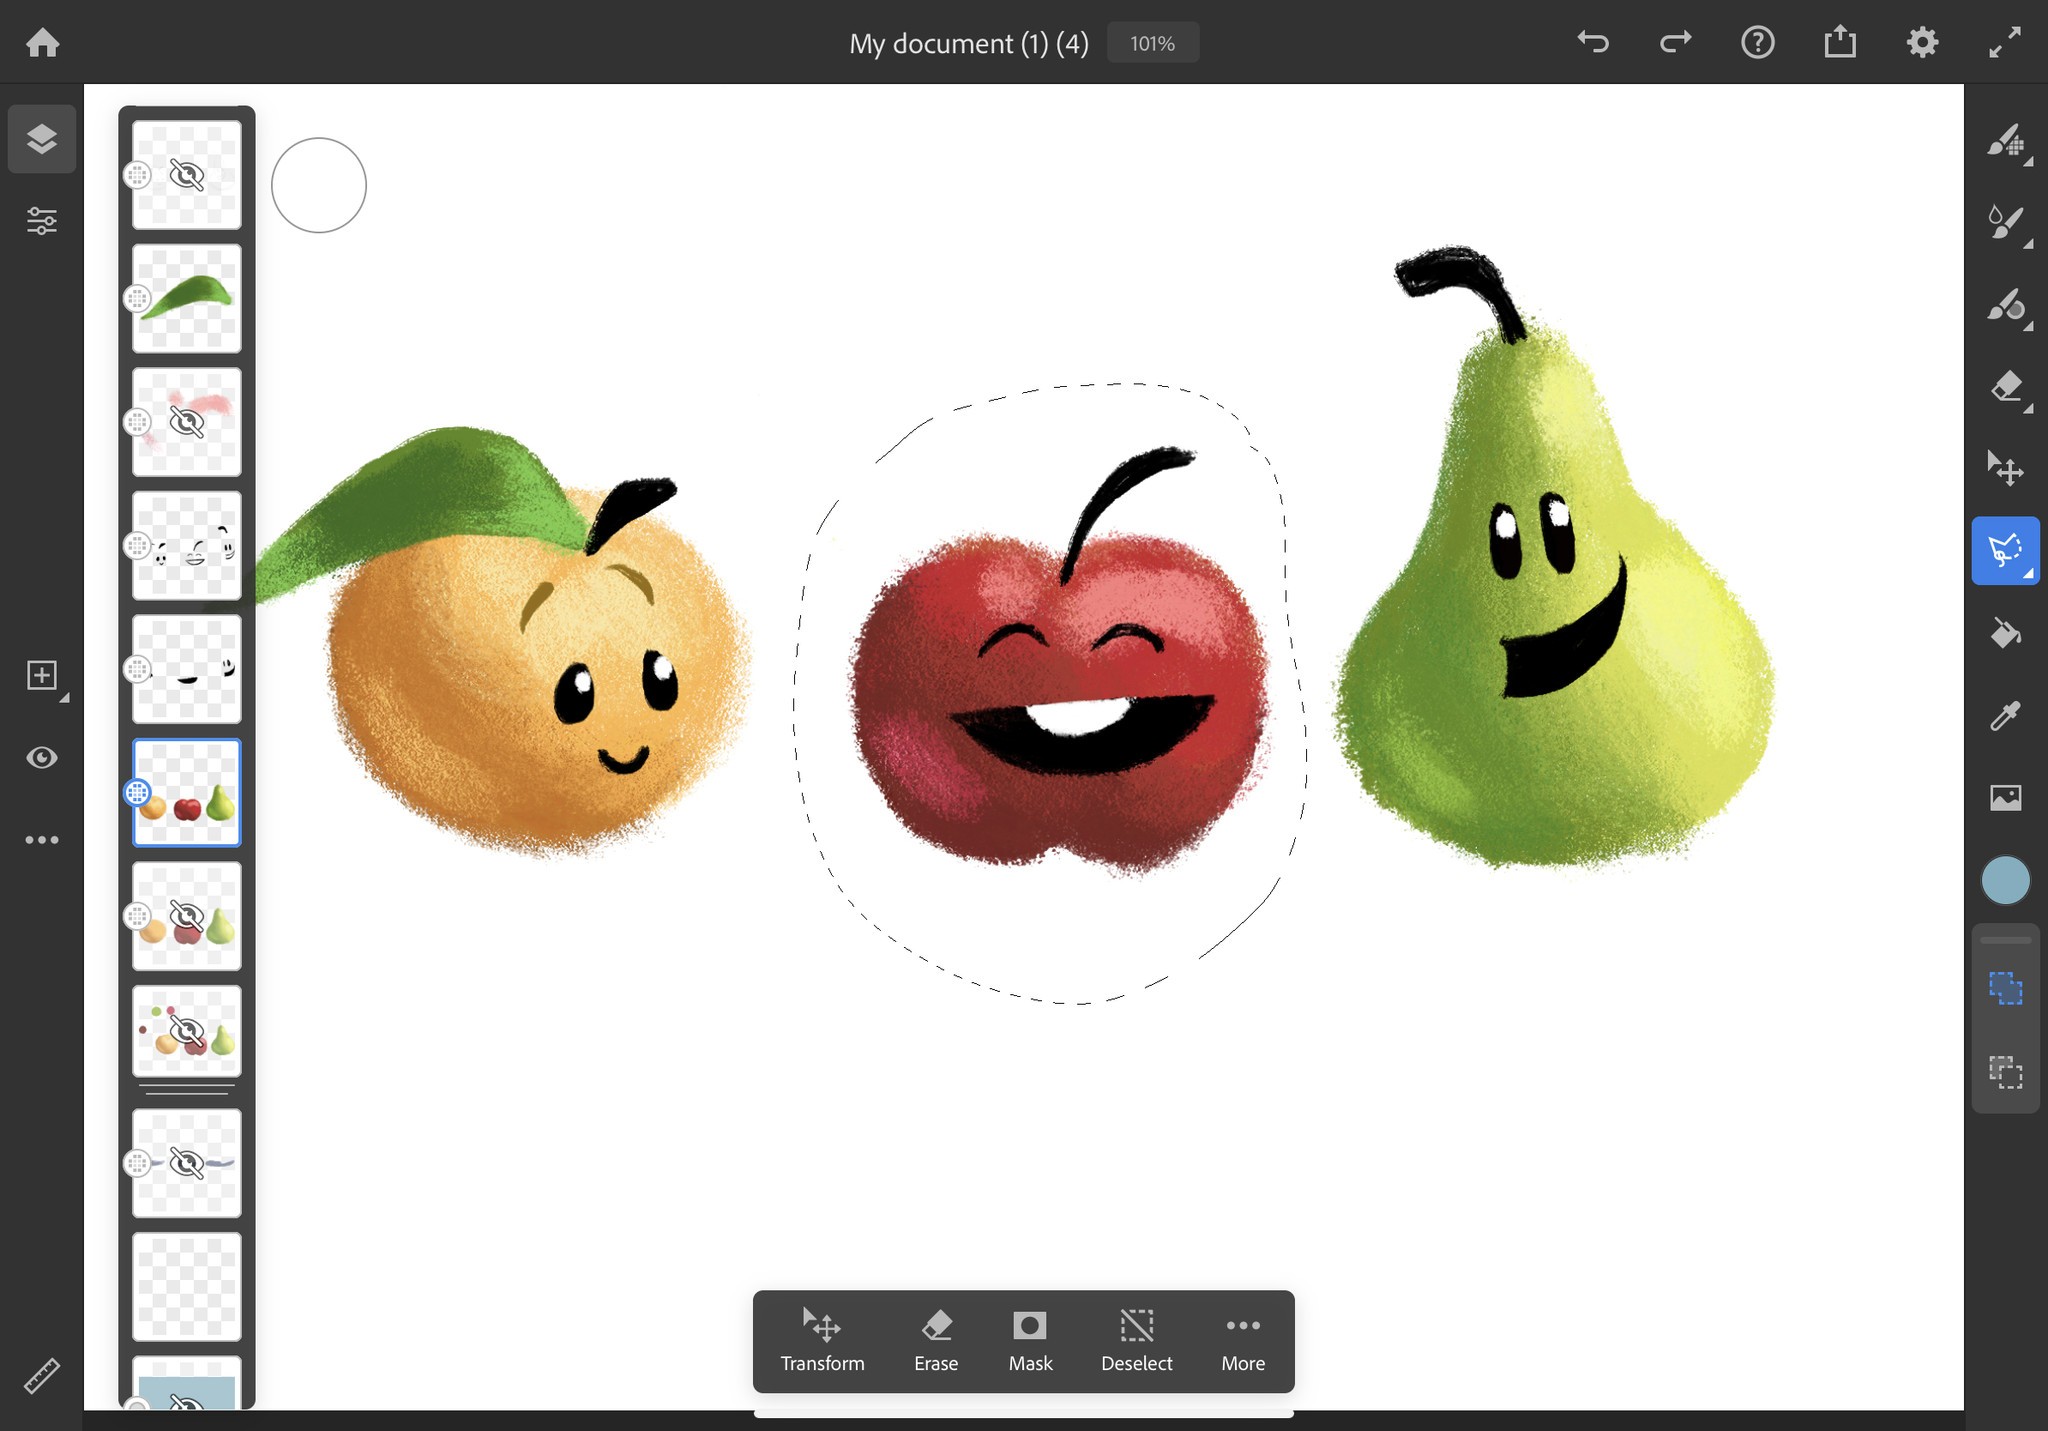
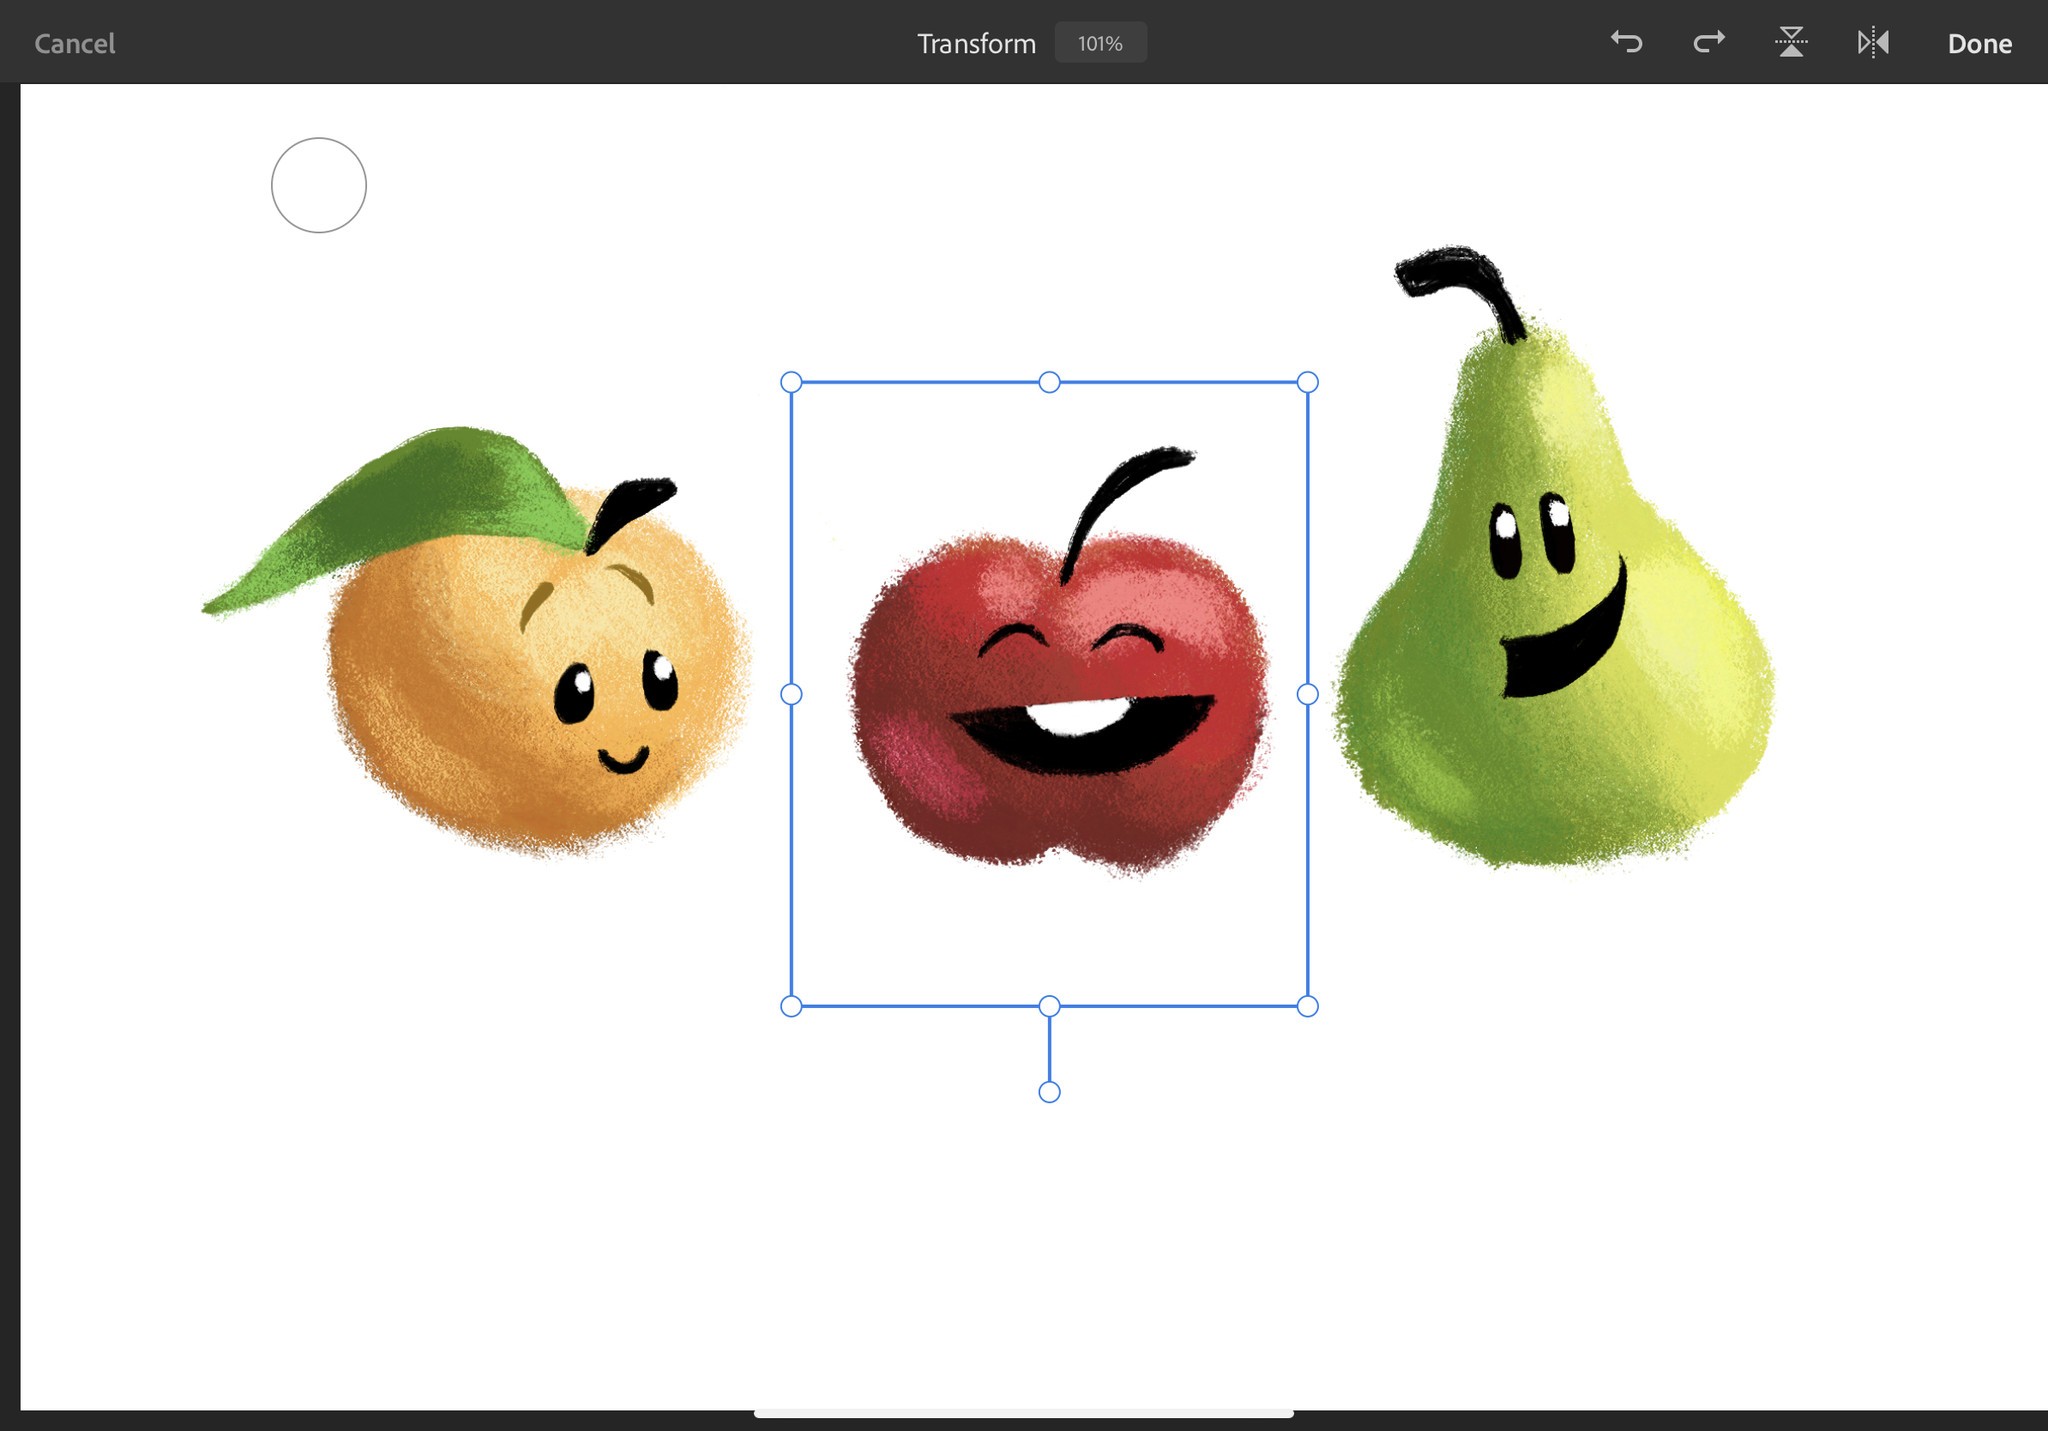
Using a selection tool
- Using one of the four selection tools select an area of your project. In this case, I used the Lasso selection.
-
Once a section is selected you can edit it, transform the selection into a different size, or else add or subtract from the current selection by using a tool in the box at the bottom of the screen. In this case I transformed the apple into a smaller size, which makes it look like a cherry.
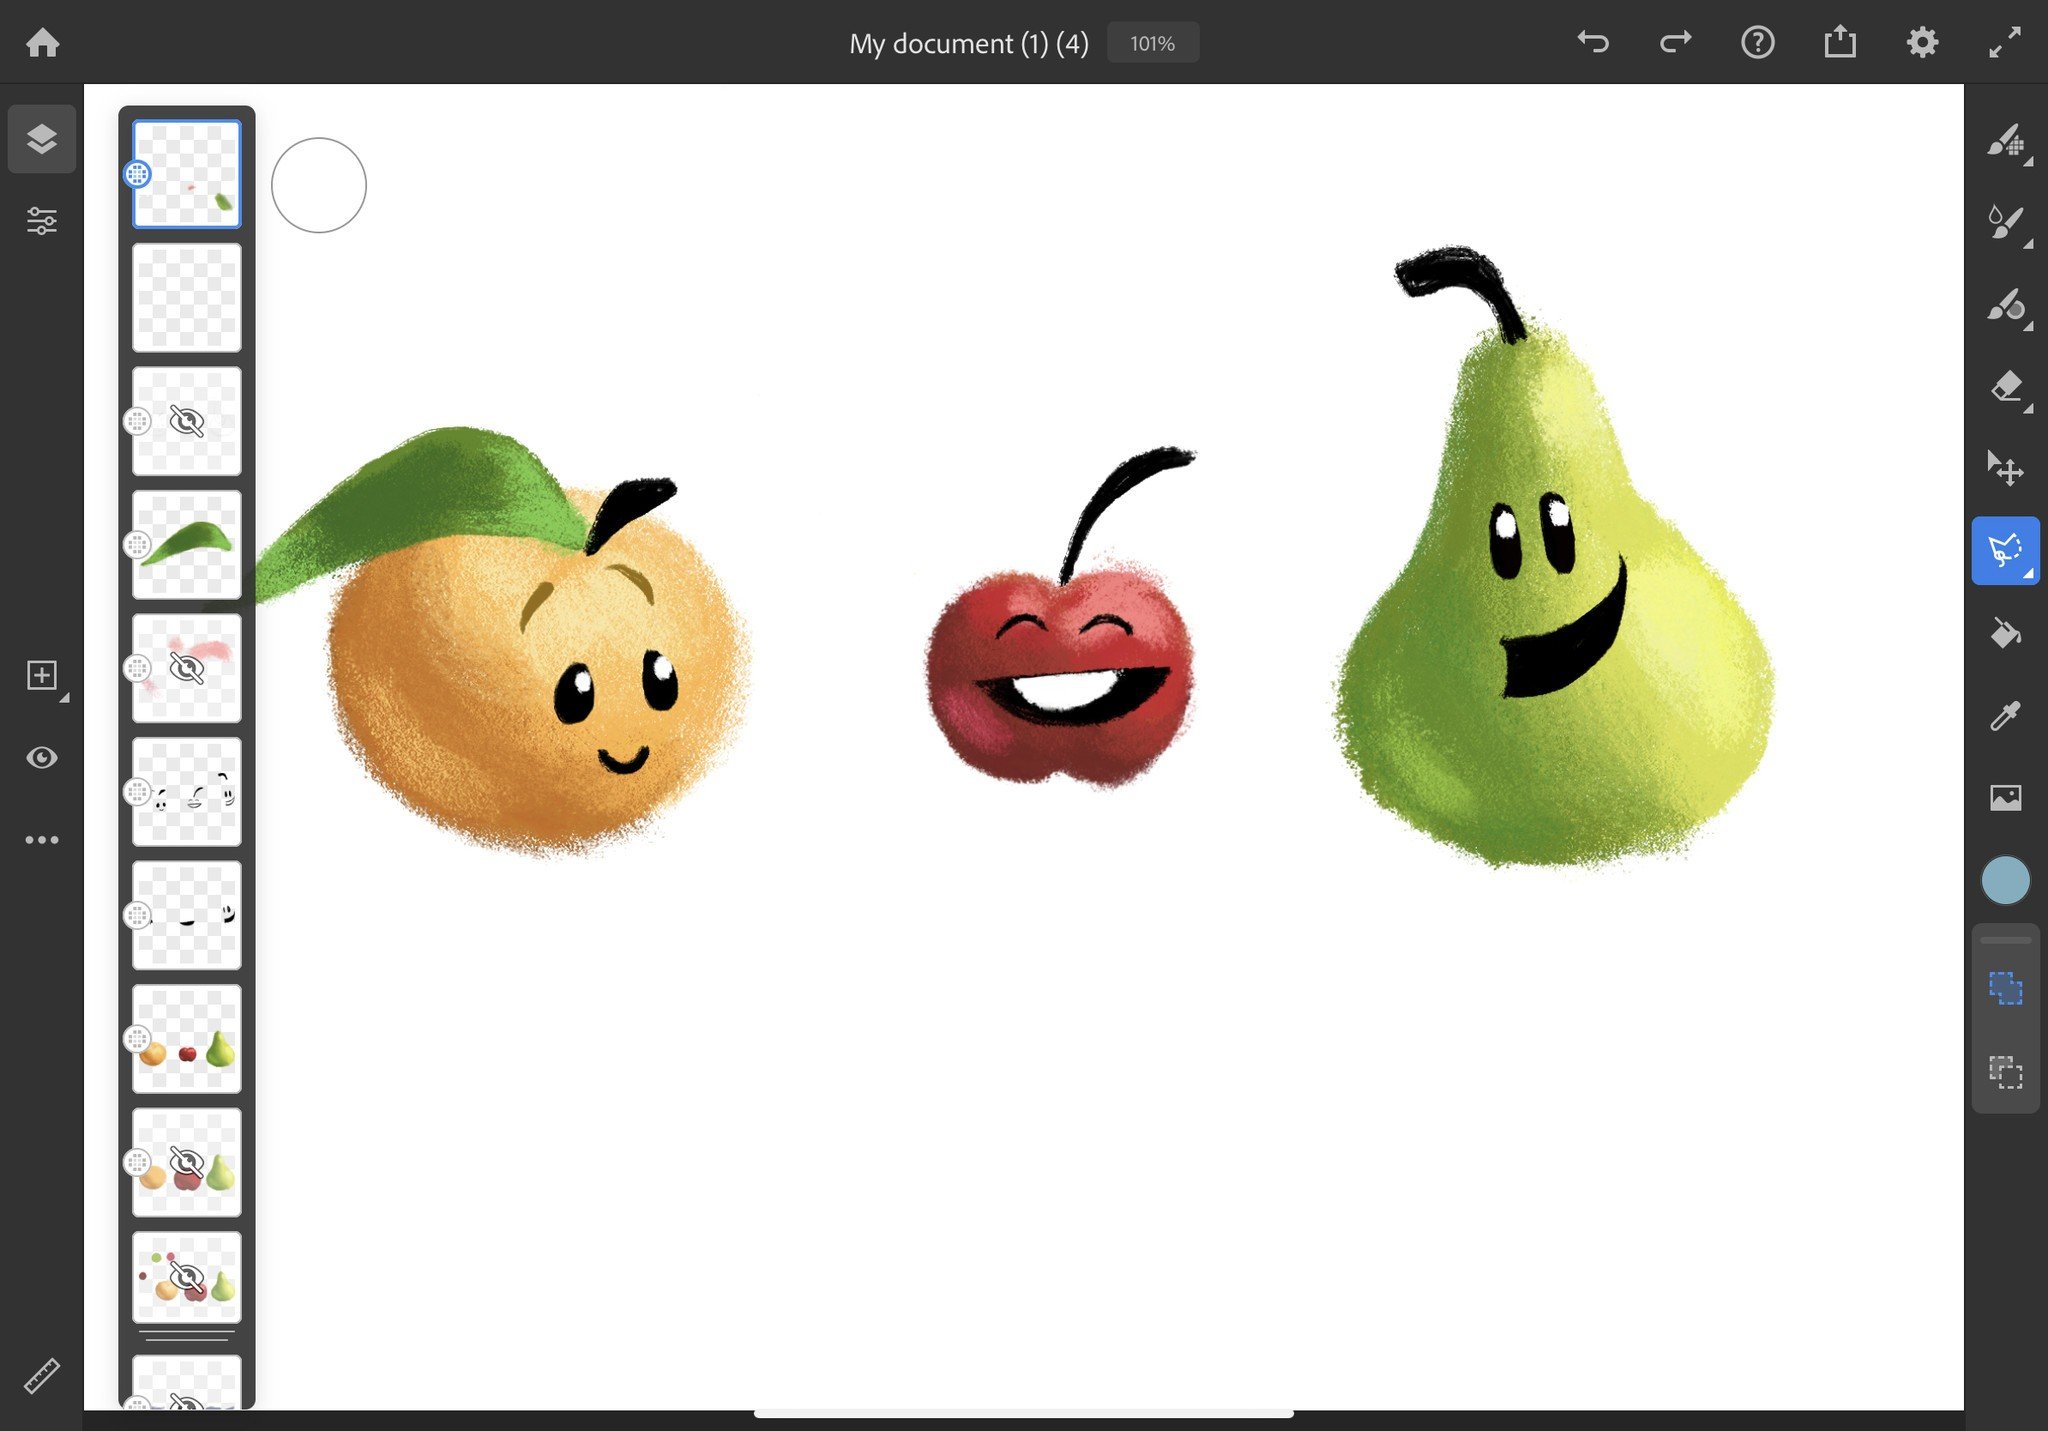
- Just make sure to deselect when you're done making changes. Otherwise you won't be able to edit any other areas of your project.
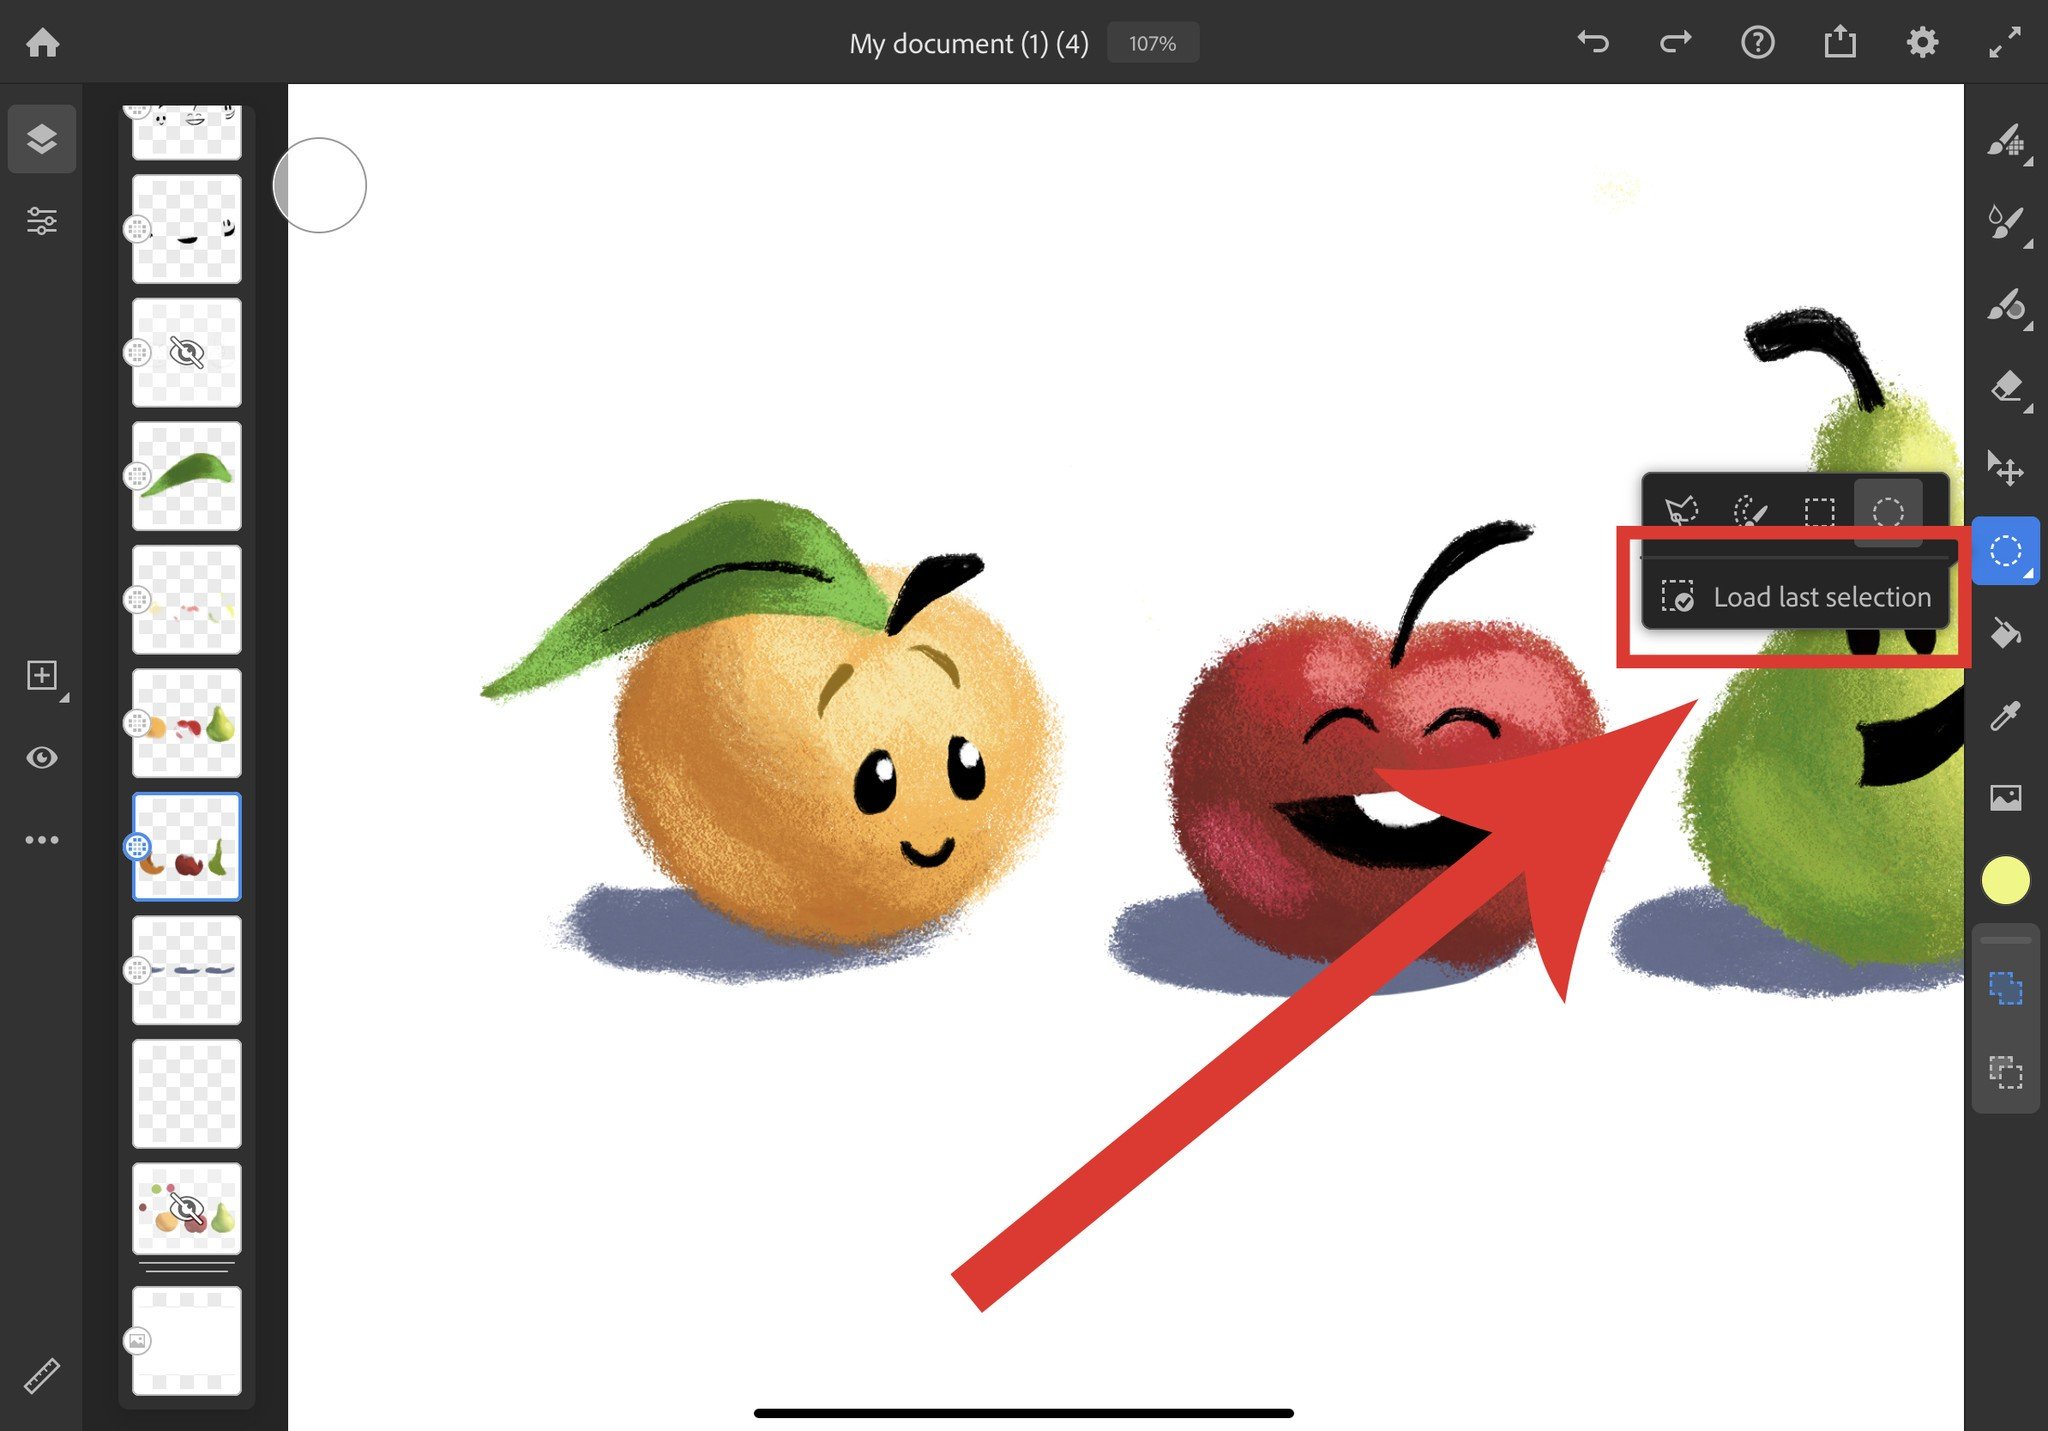
-
If you want to quickly reselect a section just tap on the Lasso tool and tap Load last selection.

Saving, importing, exporting, and sharing

Adobe Fresco automatically saves your work as you go. Simply tap the Home button in the upper left corner to close your file and save it to the cloud. However, if you want to save your work as a specific file type, you'll need to export your image.
Import
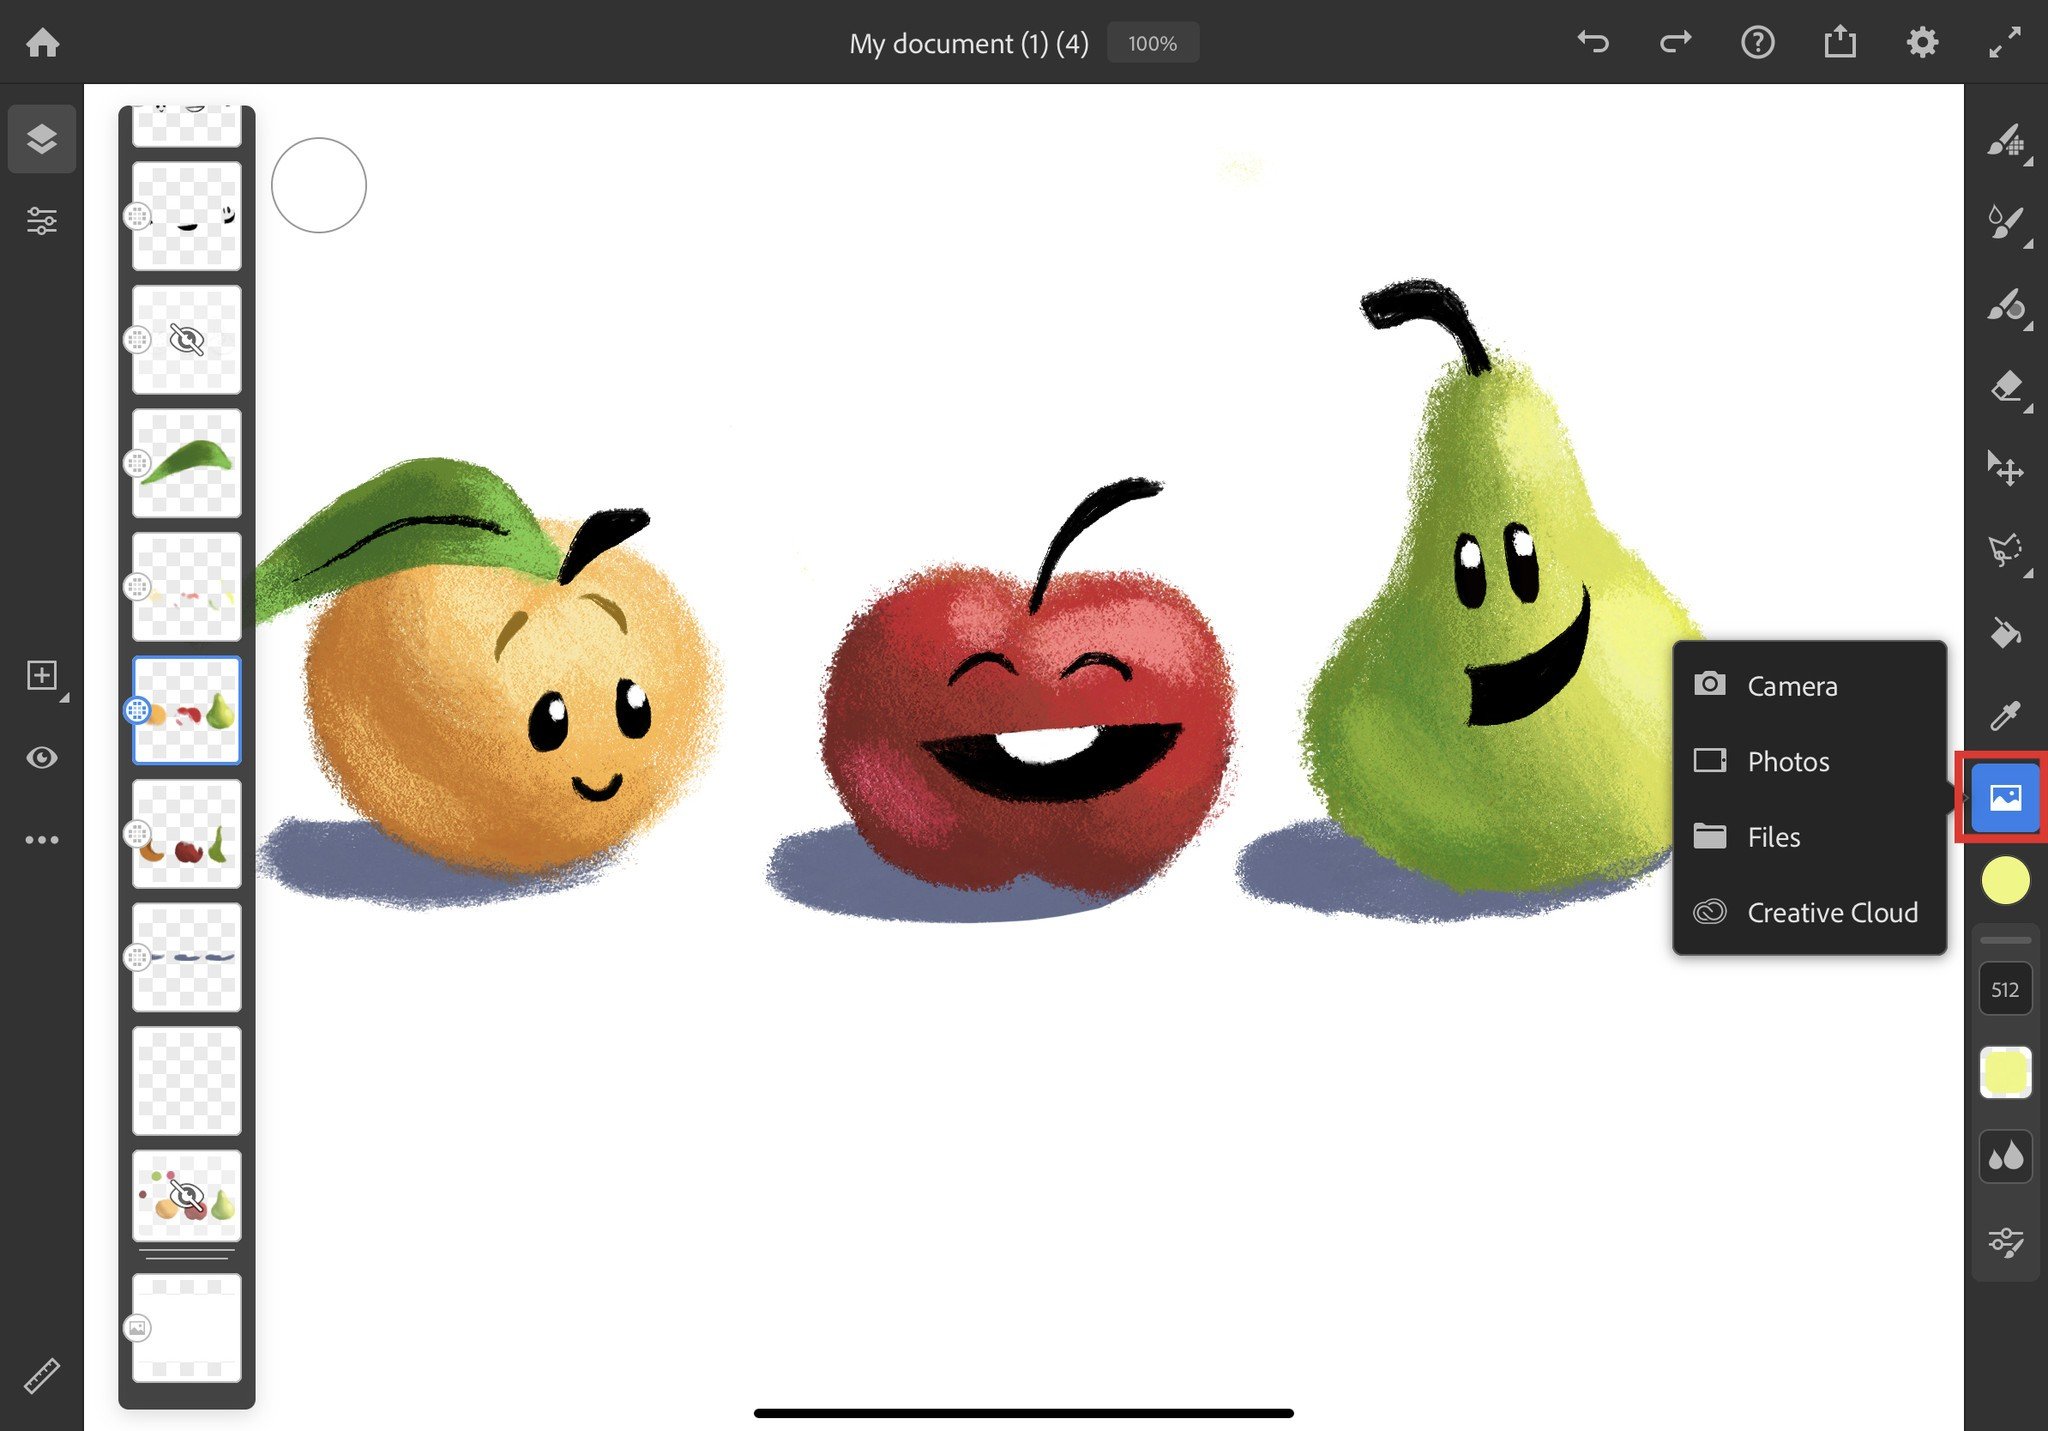
- If you want to import a pre-existing image, you simply tap the picture icon on the toolbar.
-
This allows you to pull images from your Creative Cloud account, your tablet's files, and your photos. You can even take a brand new photo and import it into Adobe Fresco.

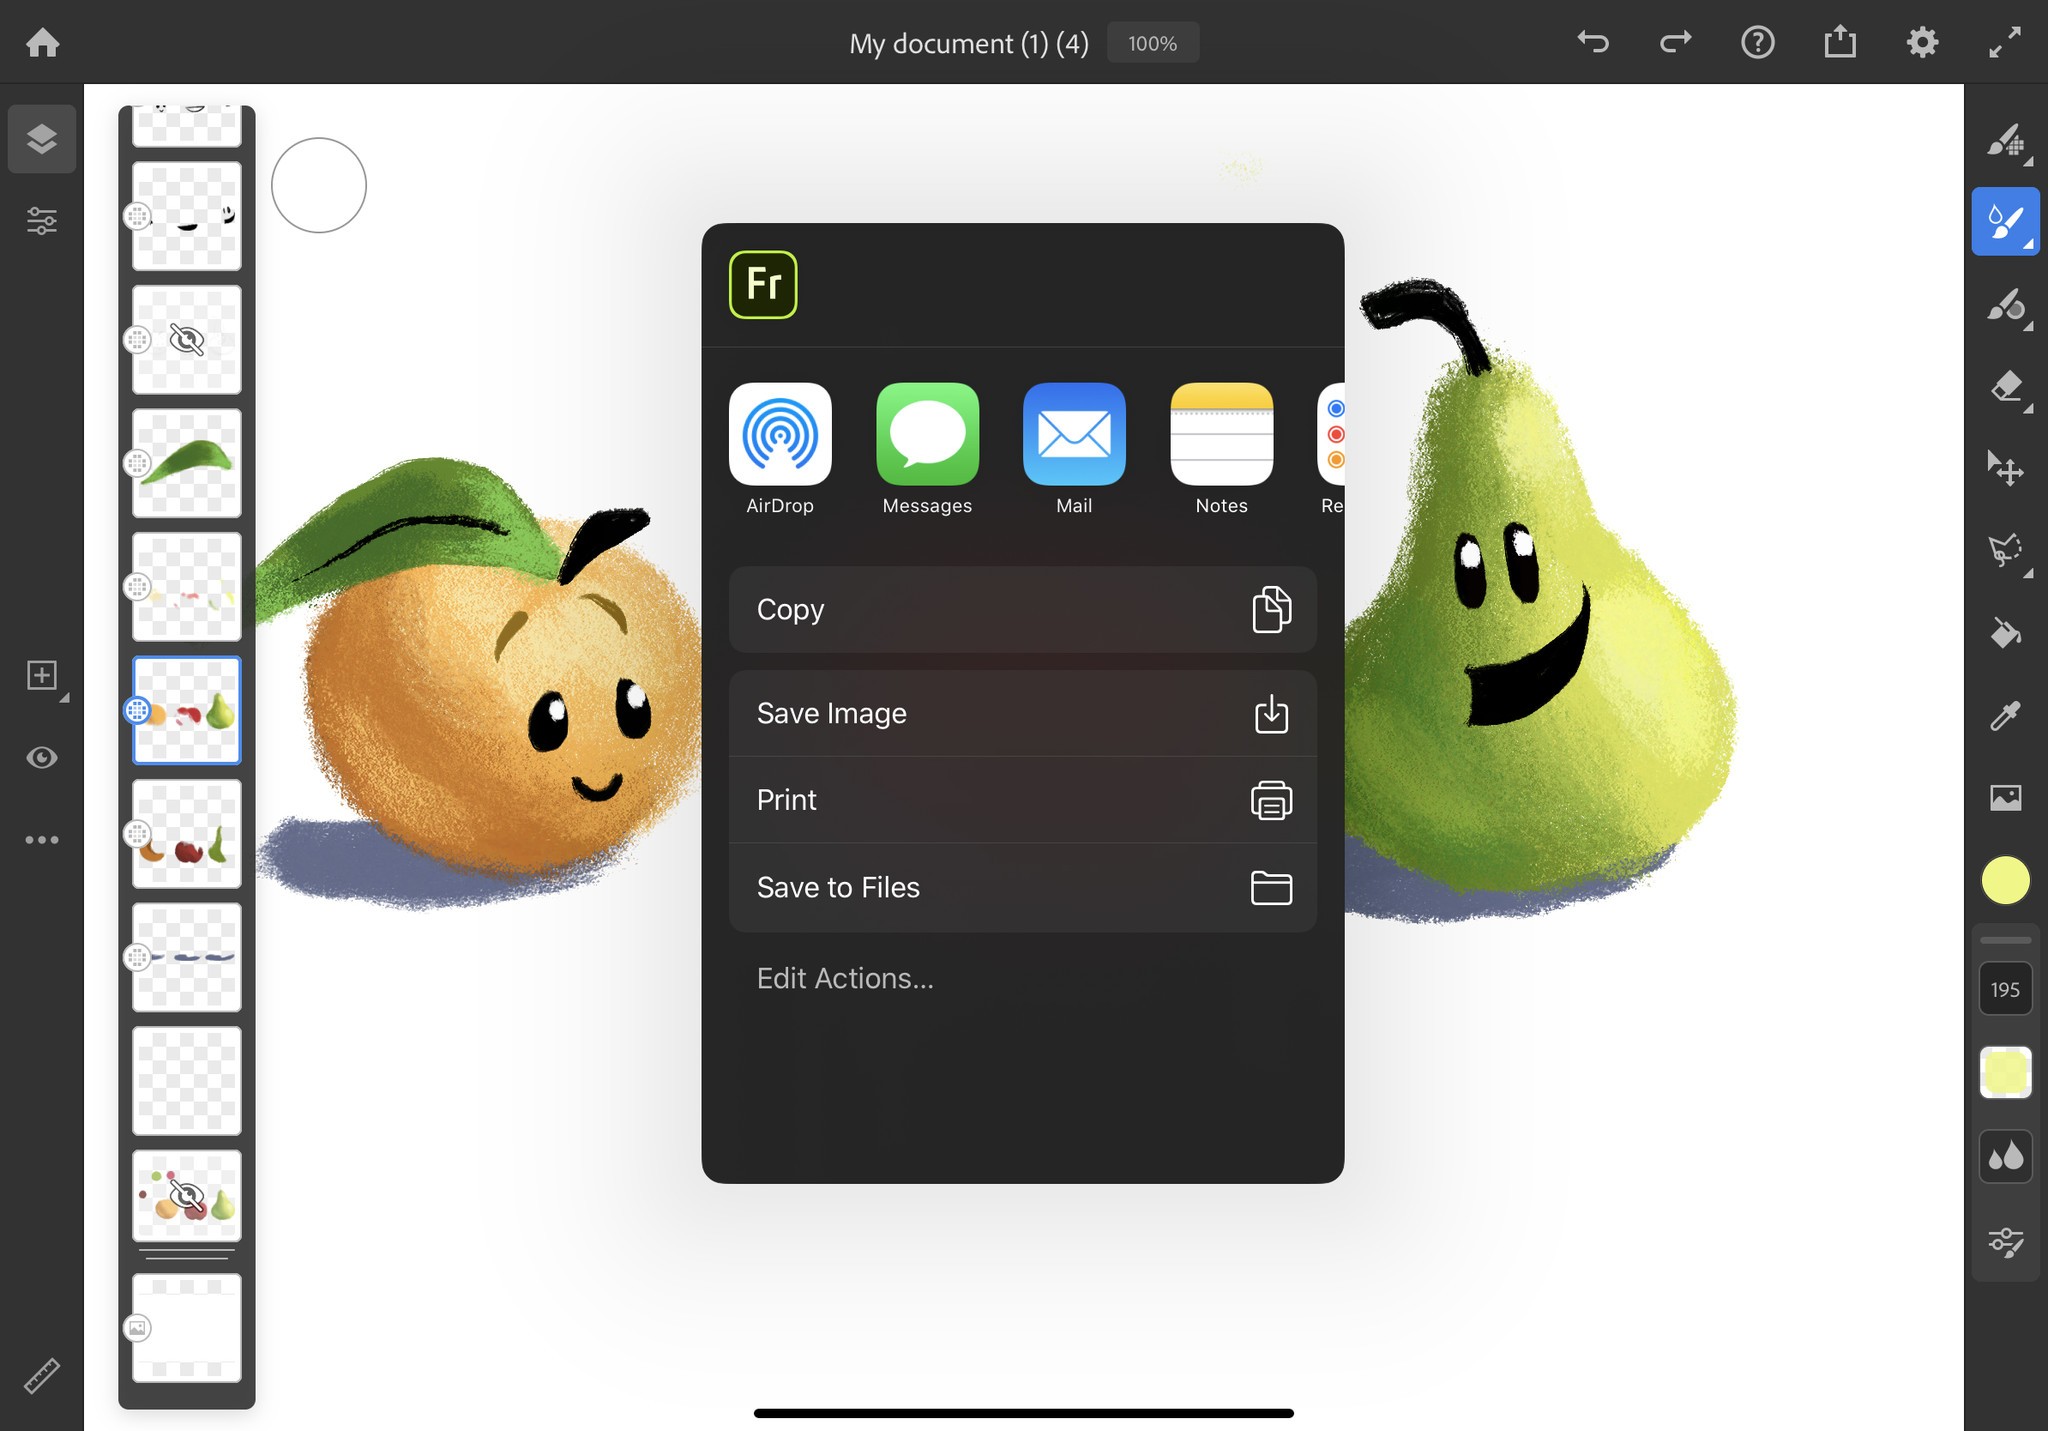
Export & Share
- When you've finished your project select the export button at the top of the screen.
- You can do a quick export of your project as an image file by selecting Quick export.
-
Select where you'd like to share or save the image to.


-
Or if you want more exporting options, select Publish & Export.
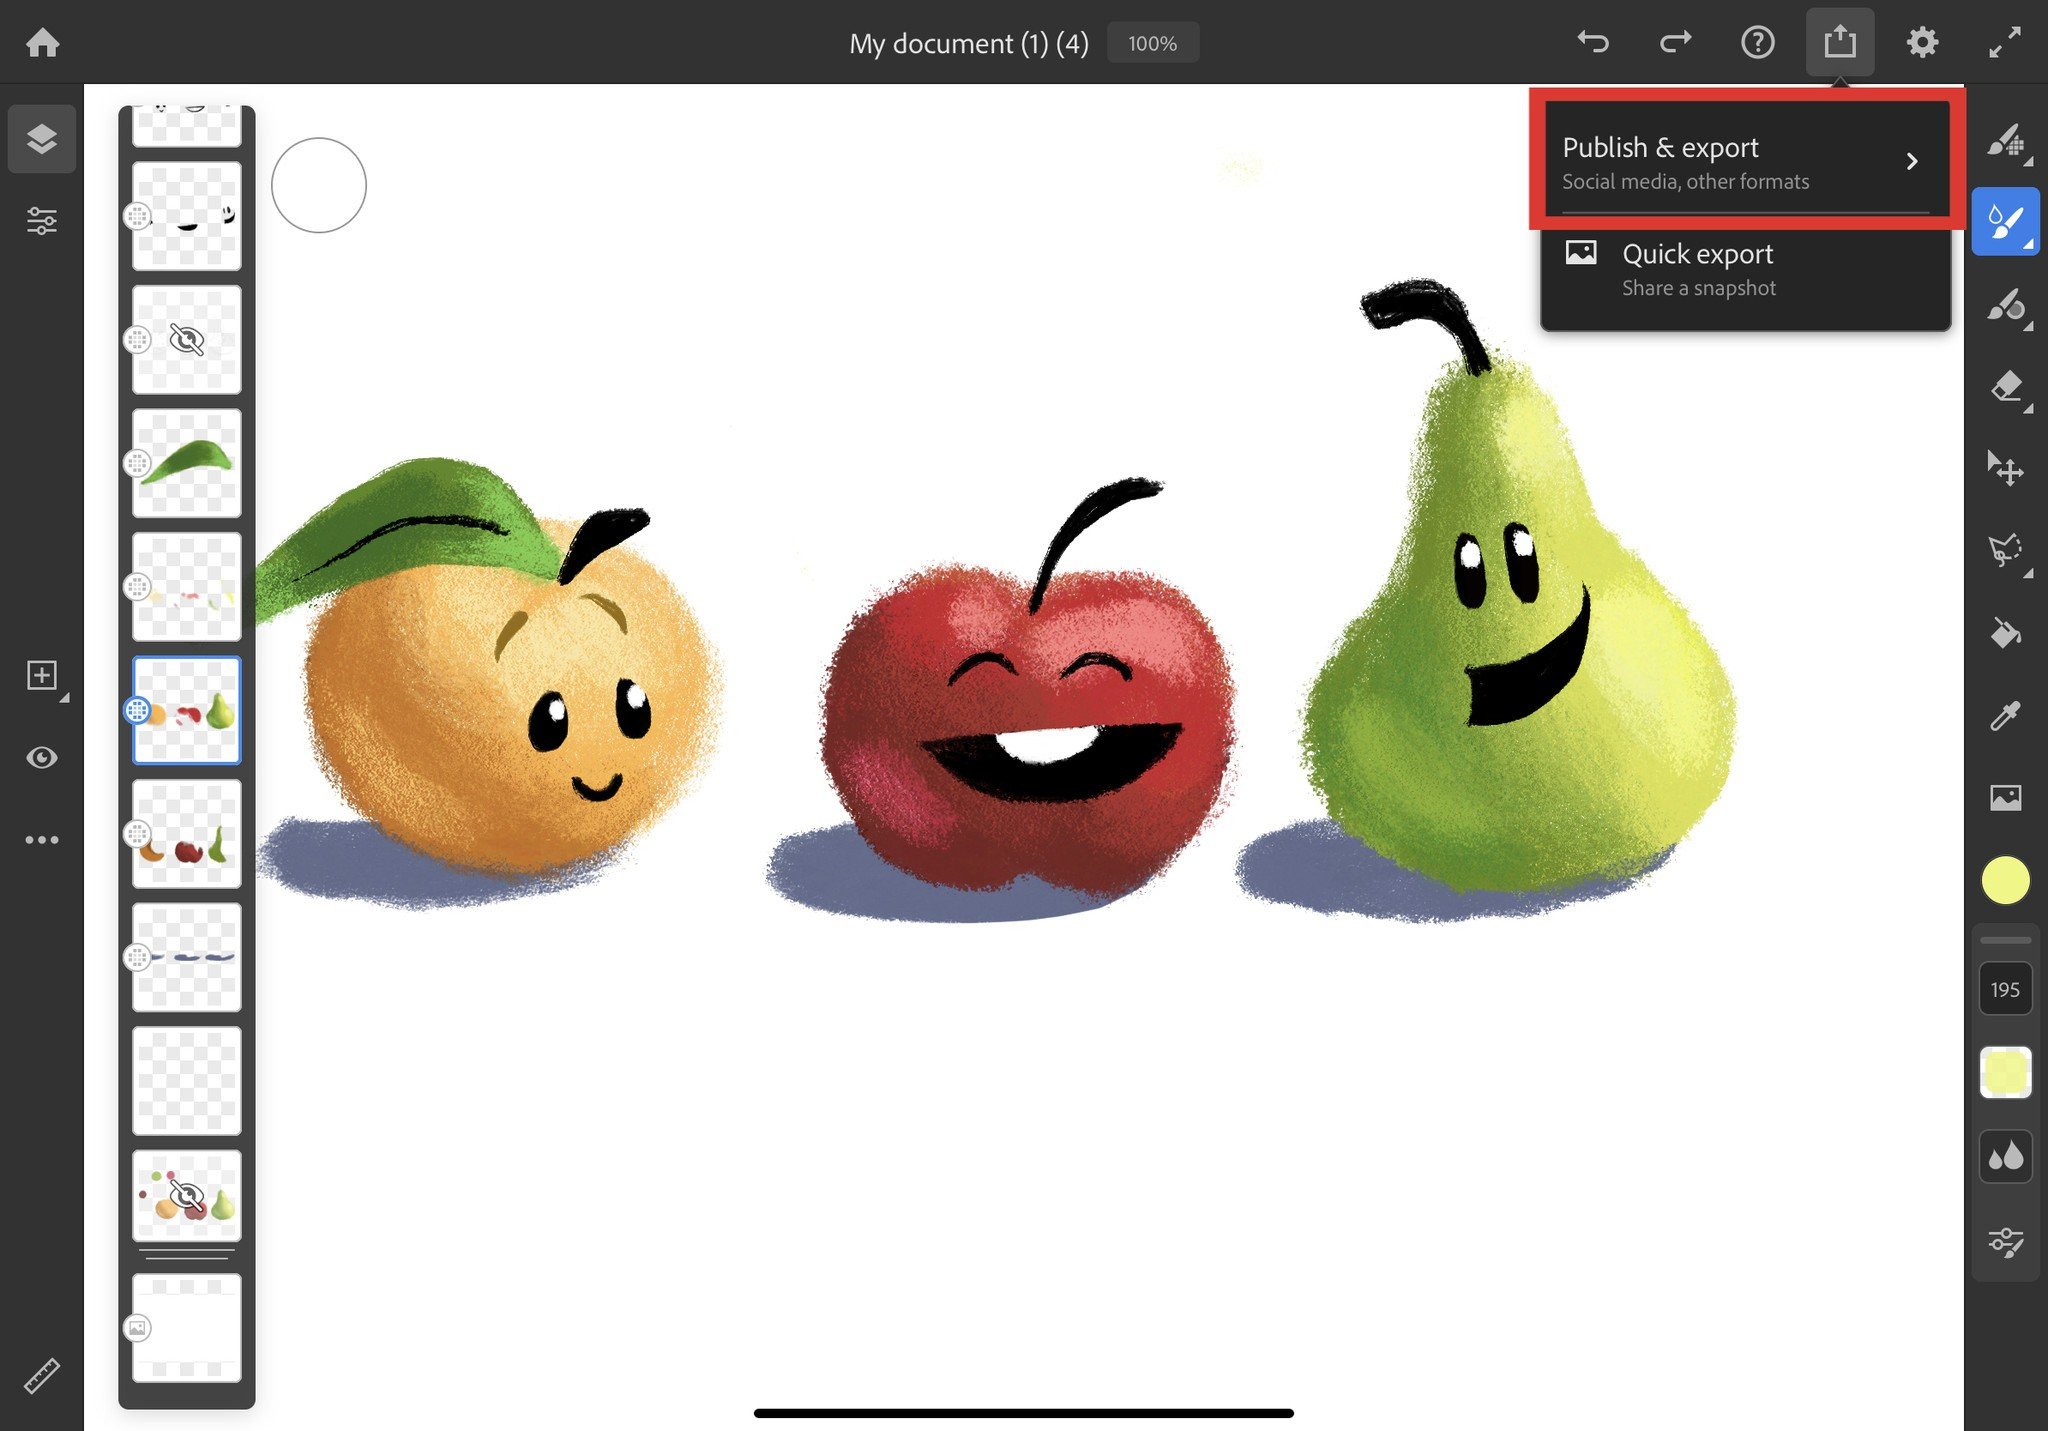

-
If you select Export as you can decide whether you export your work as a PNG, JPG, PSD, or PDF file.
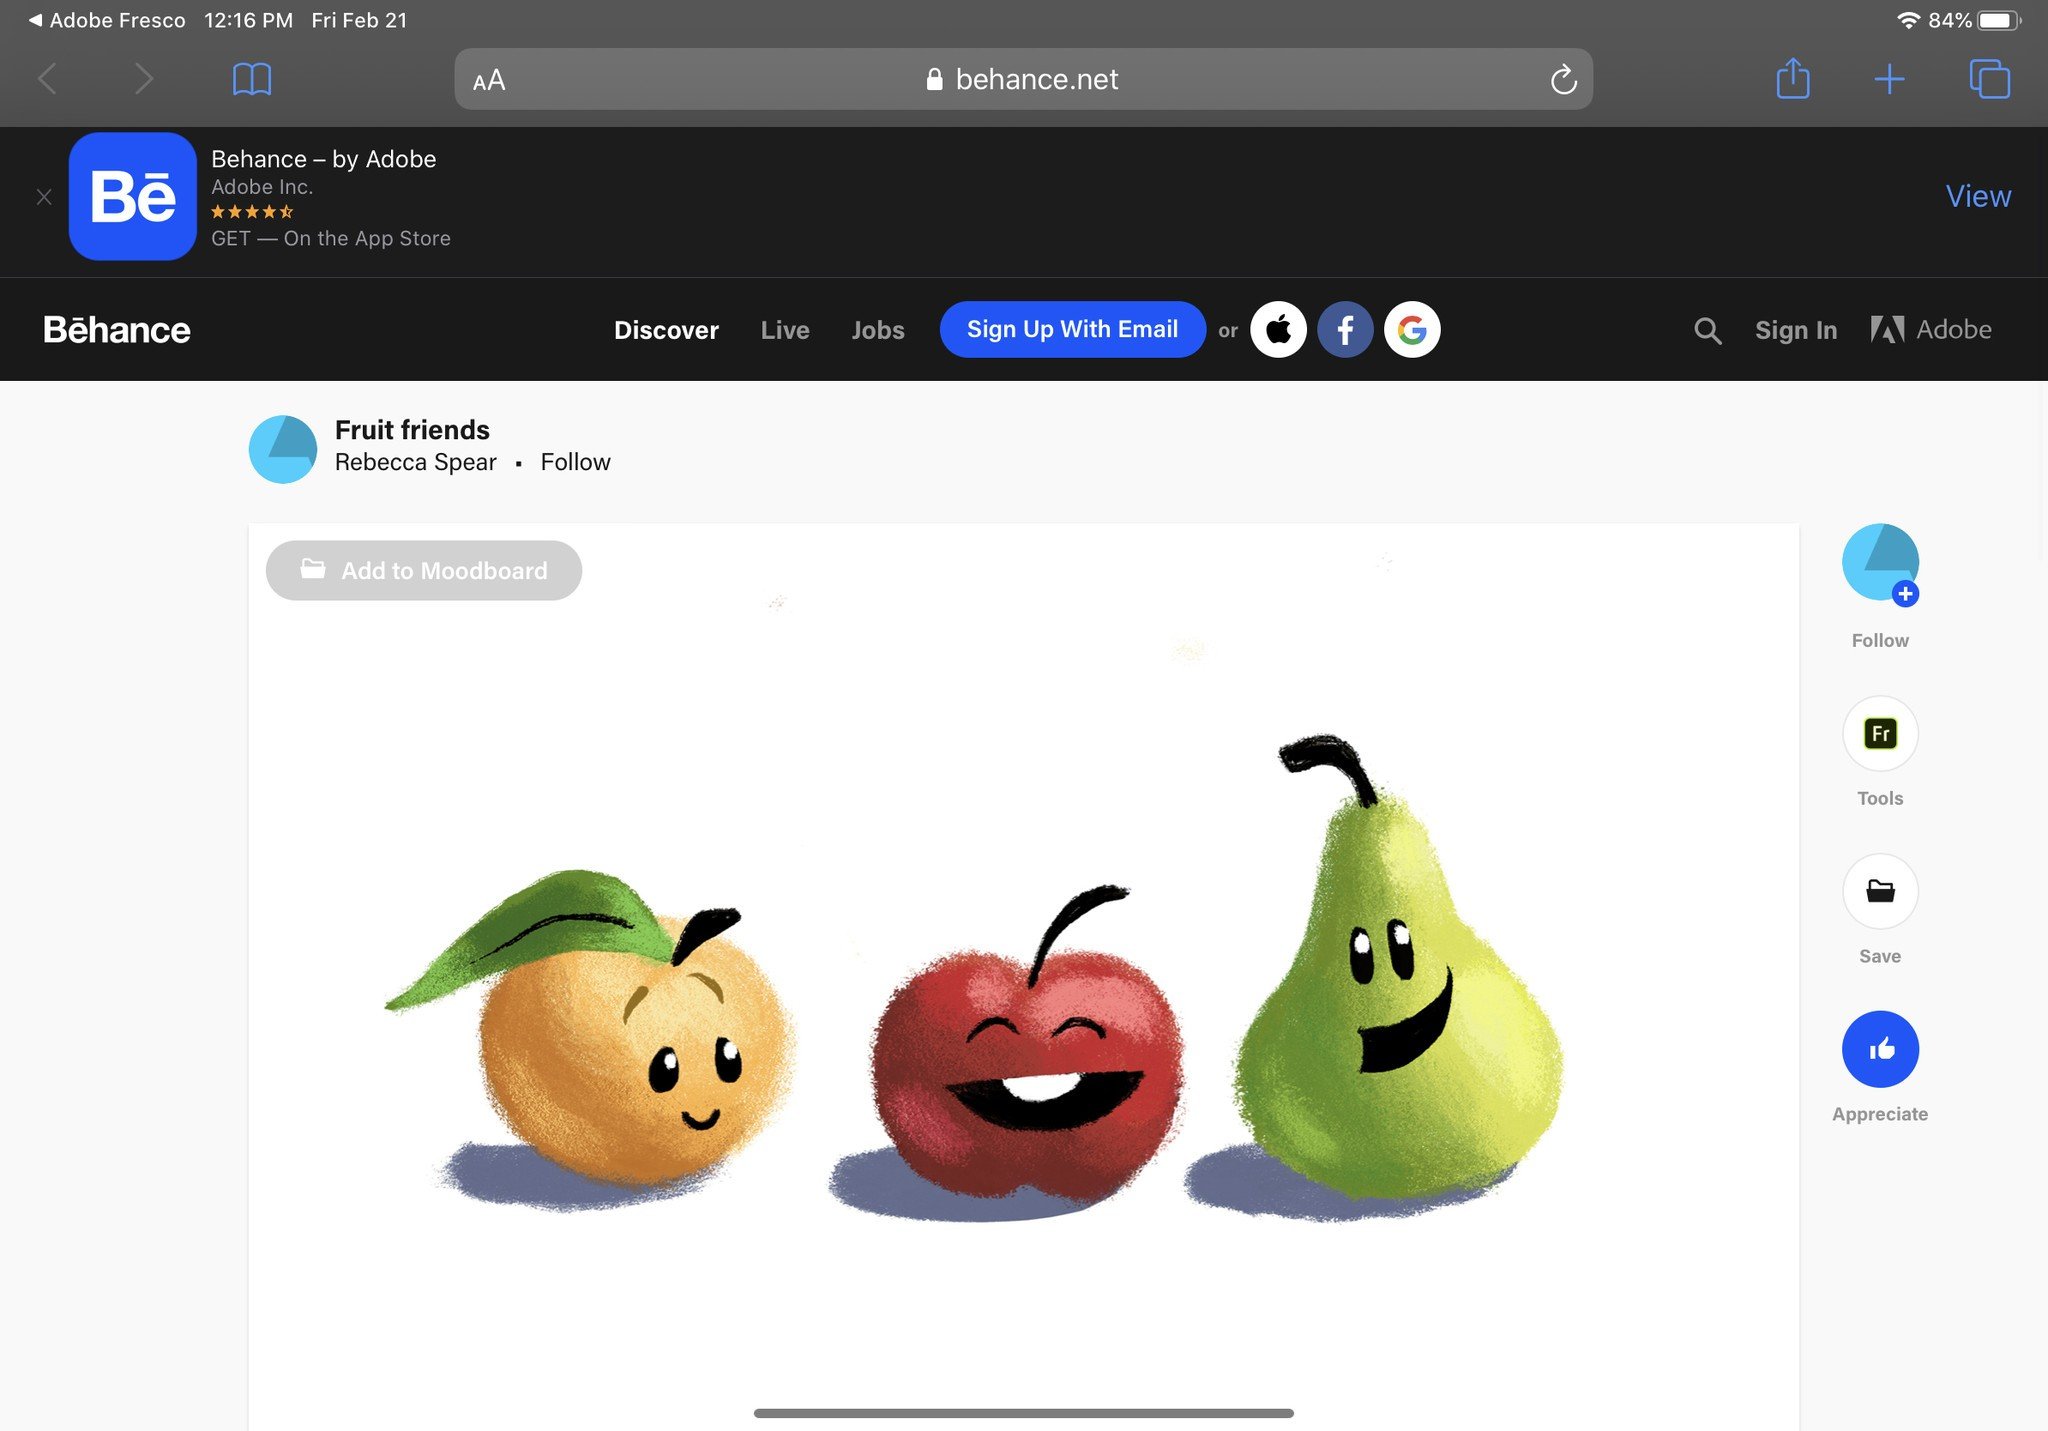
-
If you select Behance project you'll post your work to Adobe's social media platform, Behance. It's a place where artists can showcase their work and view other artists' work.

-
Adobe Fresco records every step of the creation process. If you select Timelapse export, you can send a video timelapse of your work to an email or post it on social media.
Fresh to Fresco
Now that you know all of the basic tools in Adobe Fresco, you can play around with them until you get a better understanding of how they all work. This program gives you a lot of freedom to create the projects you're envisioning, whether that be with pixel brushes, live brushes, vector brushes, or a mix of all three. Have fun creating!
Paint like a pro
Adobe Fresco
![]()
Free and easy to use
Create the digital artwork you've always imagined with this intuitive app. You'll have access to several brushes and tools and can even have both raster and vector layers within one document.
from iMore - Learn more. Be more.
via TechnW3


No comments: