You can import your DSLR photos directly to a folder in Photos on Mac - TechnW3
Want to use a specific folder for your imported photos on Mac? Here's how to get it set up.
When you use your best digital camera to take amazing photos, you're going to want to import those photos onto your Mac to edit, share, and store them. You can even set up the Photos app on Mac to import photos automatically from that specific device. In macOS, you can also select which album you want those photos to go to. If you're trying to import a bunch of pictures from a specific event, you can also create a brand new folder and move them directly to it for better organization. Here's everything you need to know about how to import photos from your camera to your Mac.
How to select a folder to add new photos from your digital camera in the Photos app on Mac
After you prepare your digital camera to import to the Photos app, here's how to select a specific folder to relocate to.
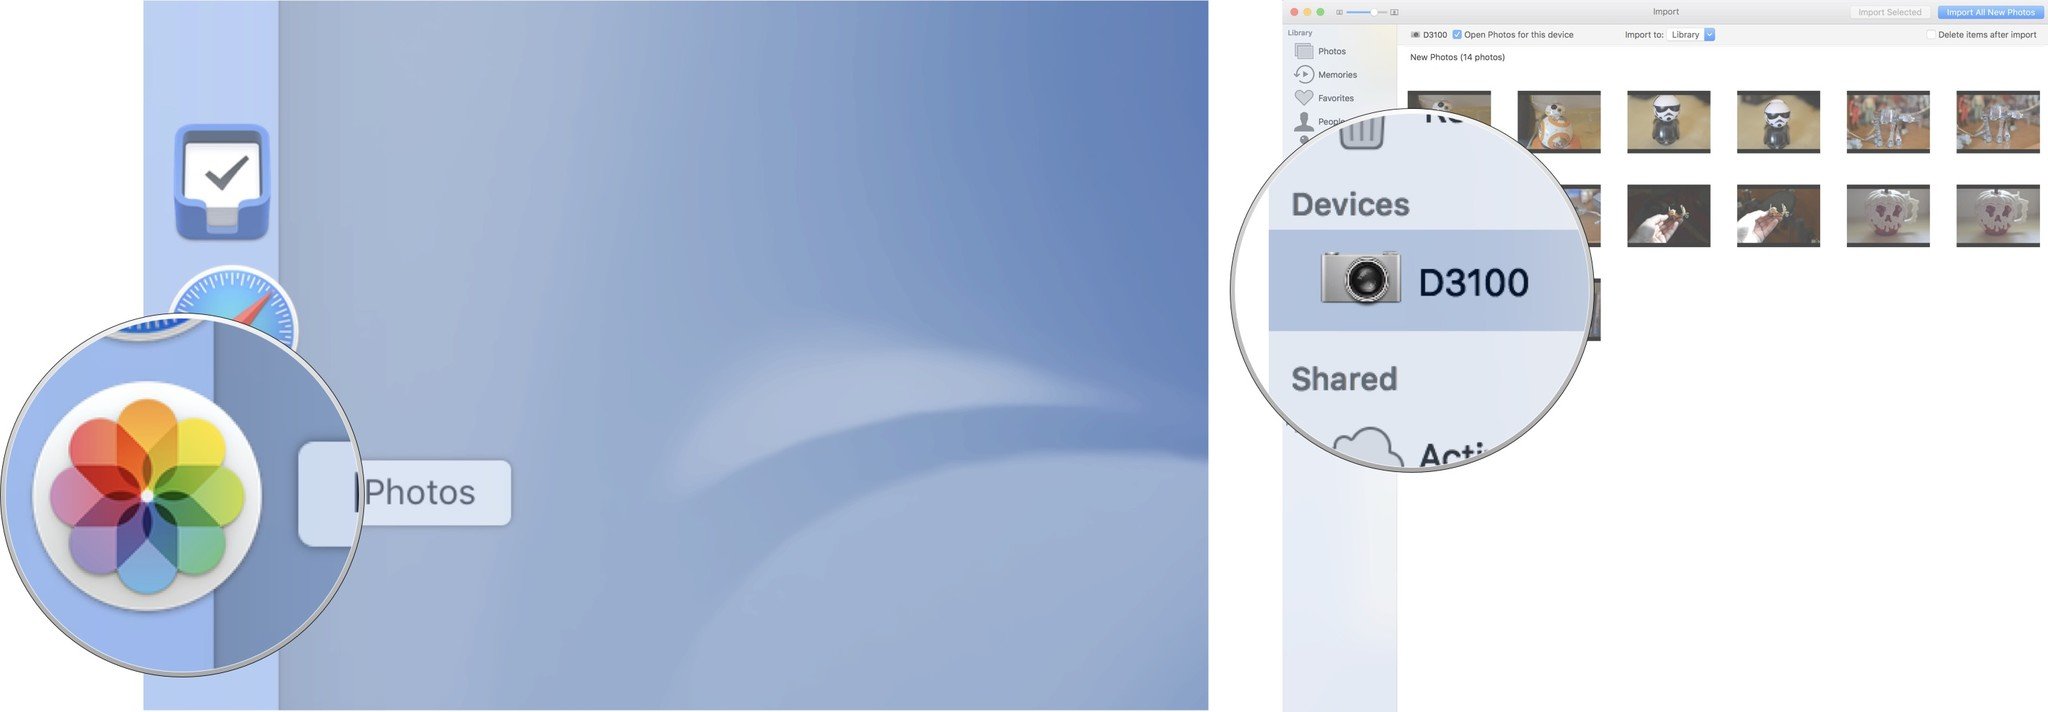
- Launch the Photos app on your Mac if it doesn't open automatically.
-
Click on your digital camera from the sidebar if it isn't already selected.
- Select the photos you want to import to a specific folder.
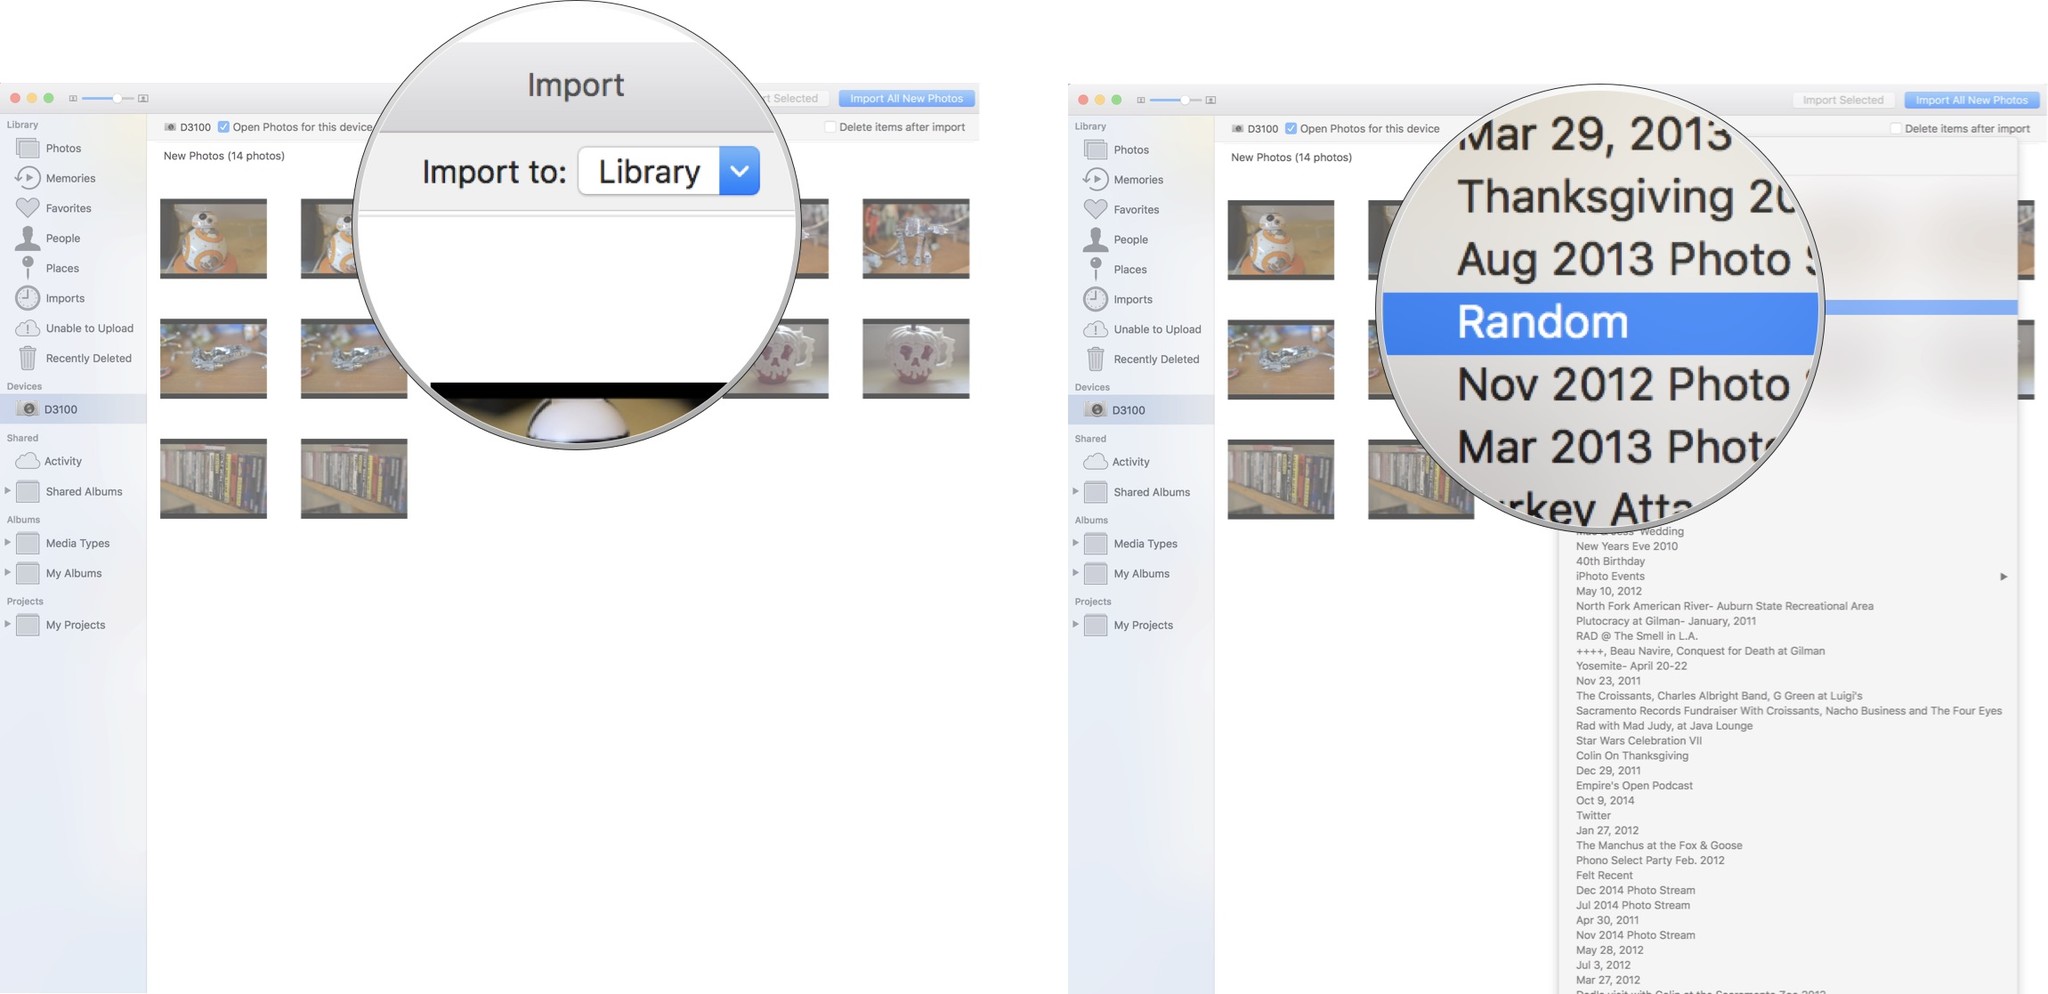
- Click on Library at the top of the Photos app window.
-
Select the folder You want to import the selected pictures directly to.
The pictures will be imported directly to the folder you selected. If you want to import multiple photos to different folders, follow the steps above and select which photos you want to import to each folder until you've imported them all.
How to create a new folder to import photos from your camera to Mac with the Photos app
If you're just about to dump all of your vacation photos into the Photos app on your Mac, but haven't created a dedicated folder for it yet, no problem, you can do so right before importing.
- Launch the Photos app on your Mac if it doesn't open automatically.
-
Click on your digital camera from the sidebar if it isn't already selected.
- Select the photos you want to import to the newly created folder.
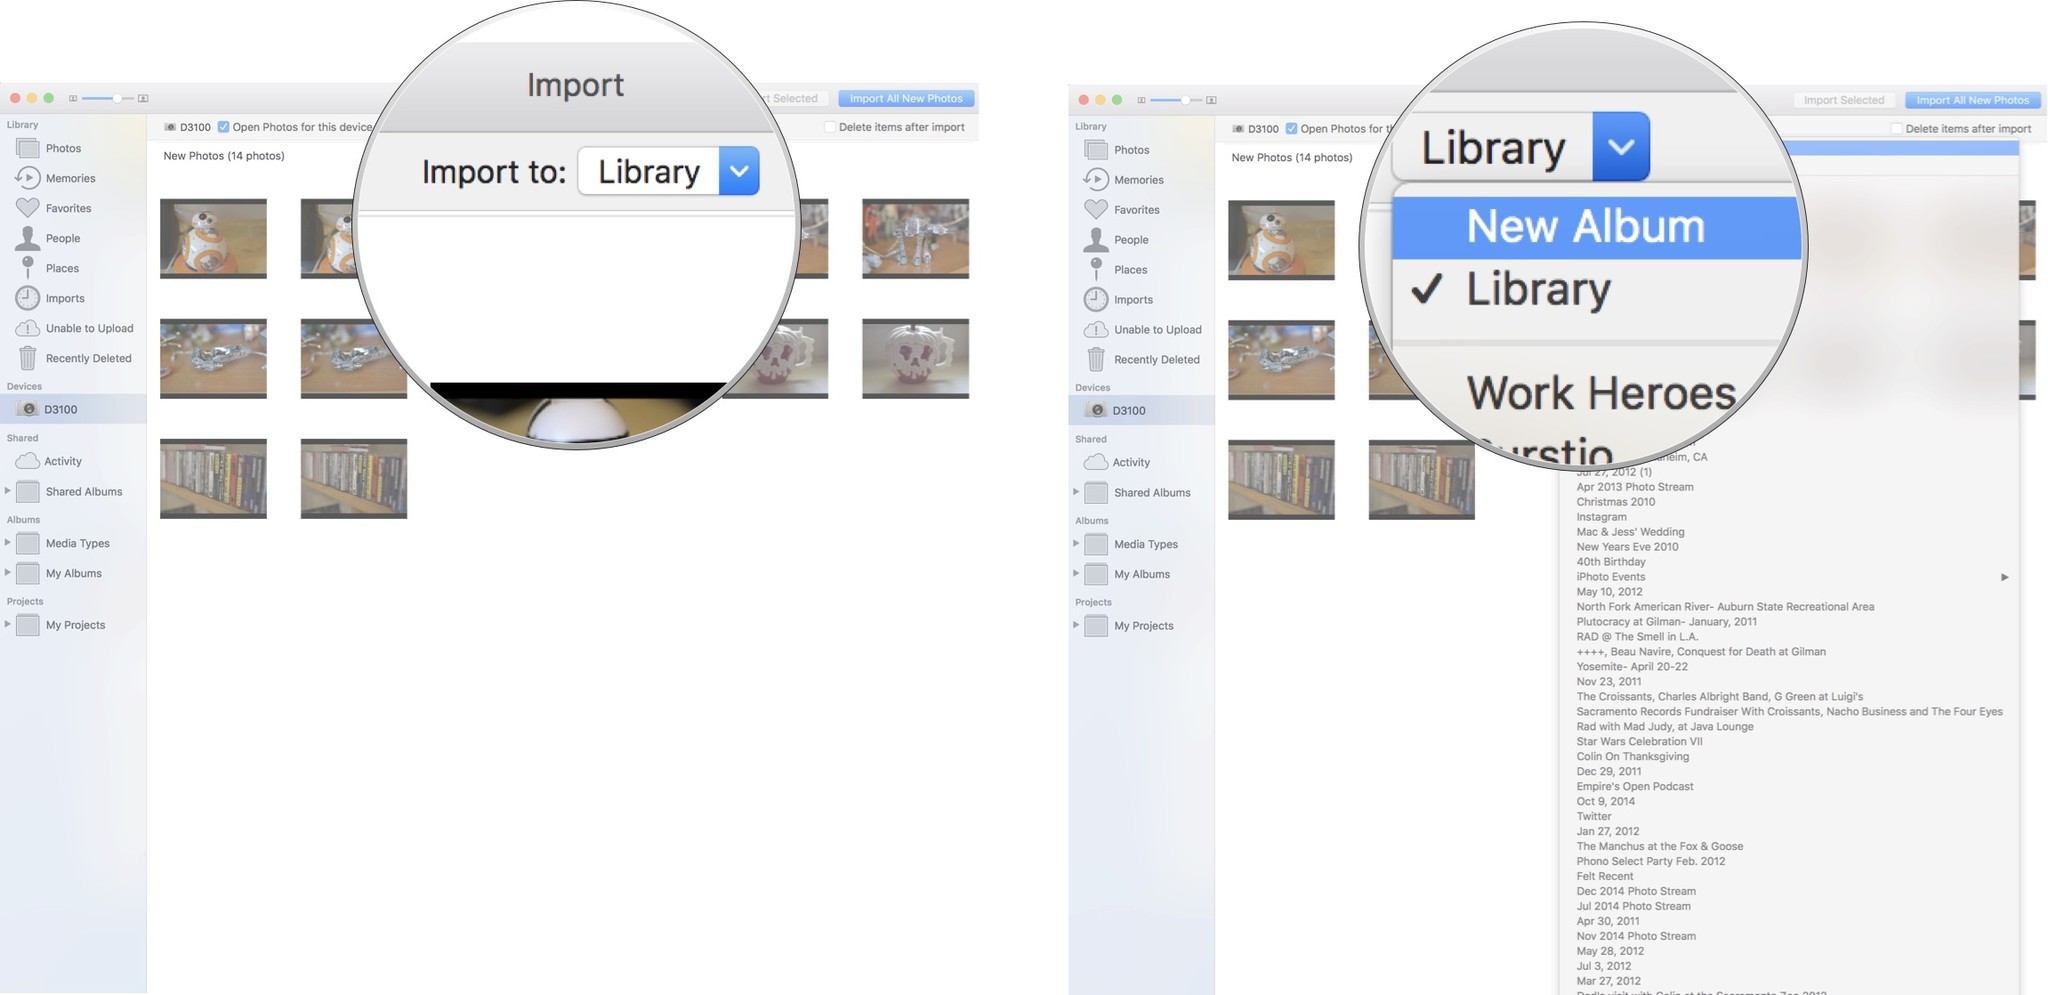
- Click on Library at the top of the Photos app window.
-
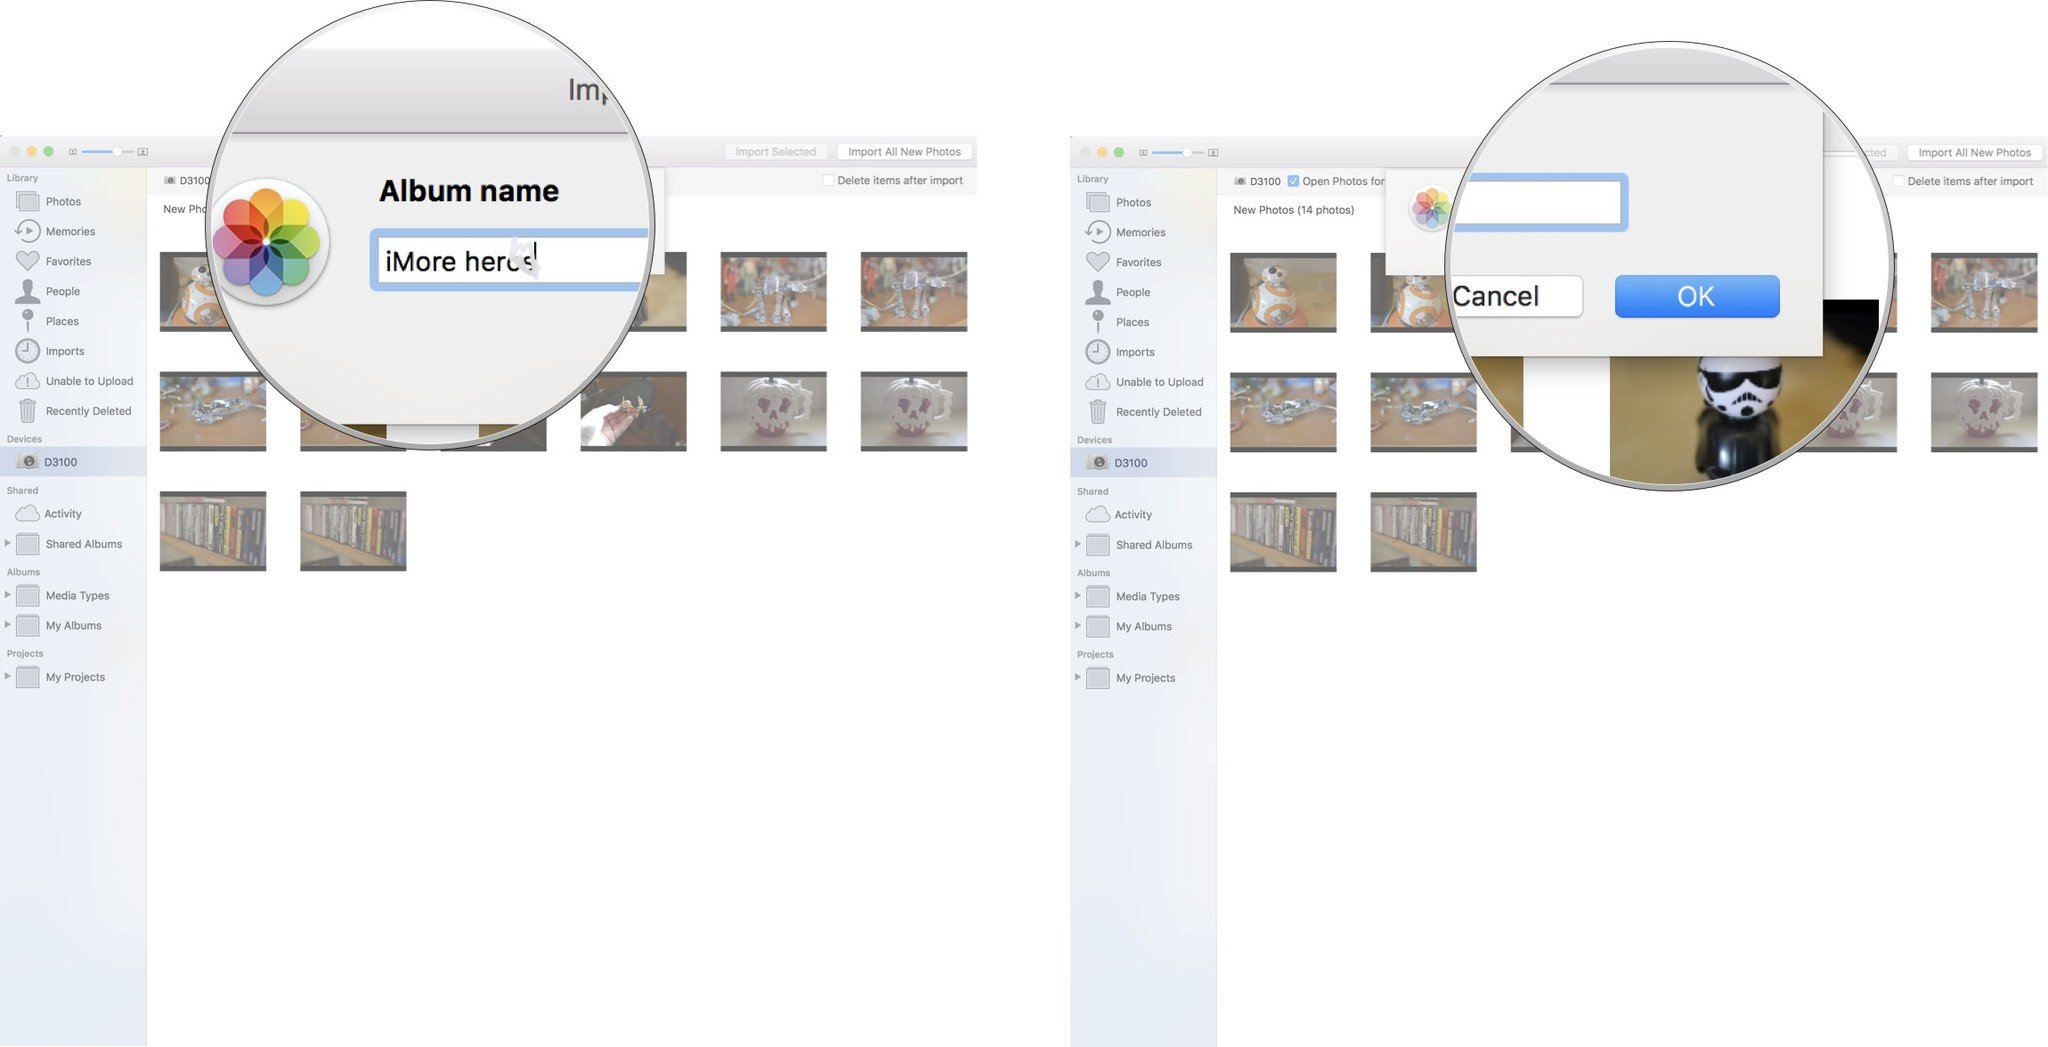
Click on New Album.
- Enter an album name.
-
Click on OK.
The pictures will be imported directly to the folder you created. If you want to import multiple photos to different folders, follow the steps above and create new folders for each until you've imported them all.
How to find the photos you've just added to a folder in the Photos app on Mac
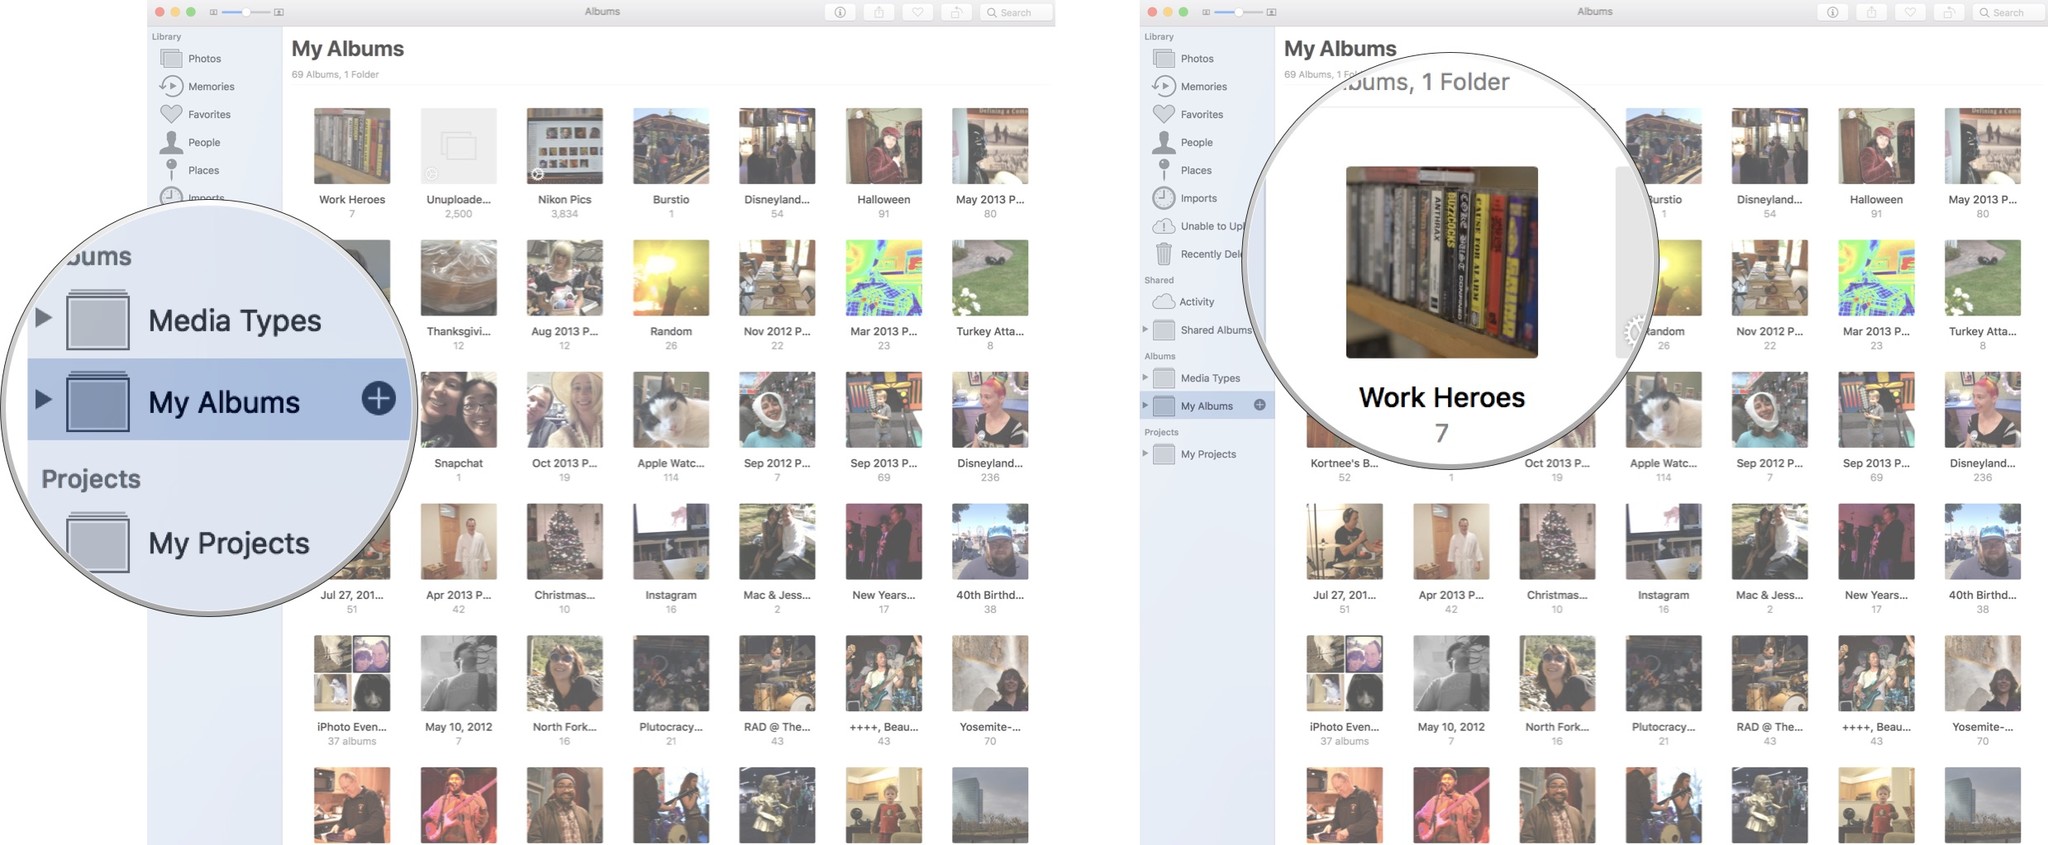
After you've created or selected a specific folder to import your photos to, you can find them under My Albums.
There they are!
Where your pictures go if you don't select a specific folder to import photos from your camera to Mac with the Photos app
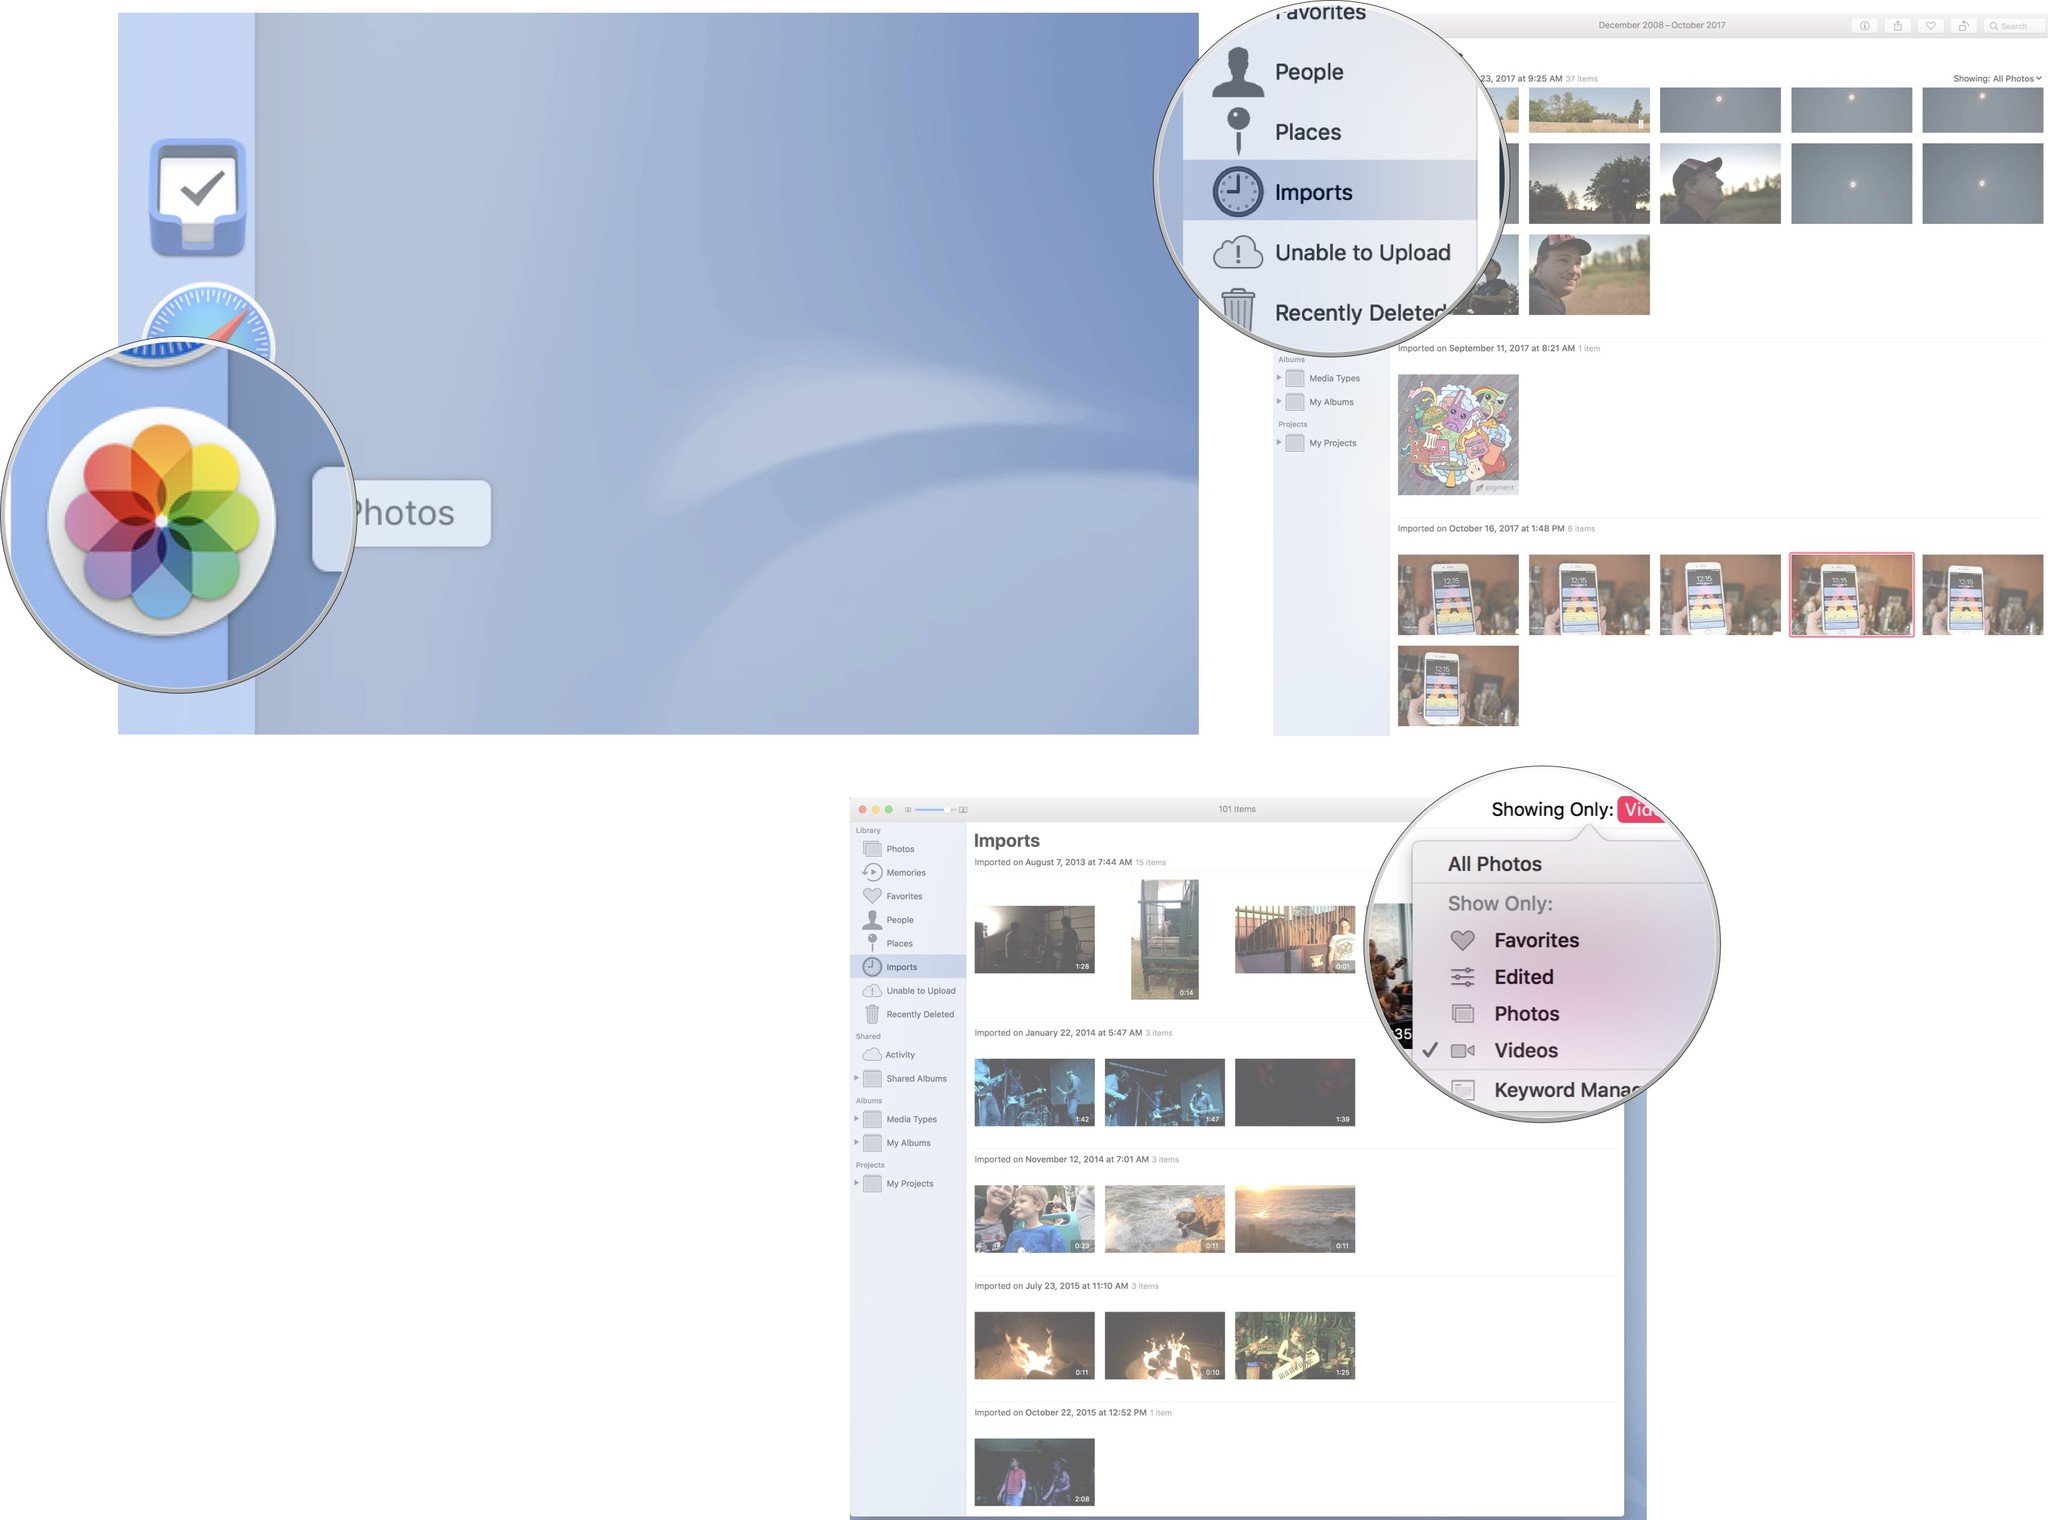
If you don't select a folder to import your photos to, you can still find them easily. They will always be delivered to your Photos library (it's the one right at the top of the sidebar) whether you send them to a specific folder or not. You can also find them in your Imports section, where you will find all of the photos that you have imported from your camera to Mac (unless you've deleted them).
- Launch the Photos app on your Mac.
- Click on Imports.
You can filter your imported content by favorited, edited, only photos, only videos, or keyword (if you've tagged your photos).
Click on Showing in the upper left and select a filter.
Any questions?
Do you have any questions about importing photos from your digital camera to your Mac with the Photos app? Put them in the comments and we'll help you out.
Updated March 2021: Updated for the latest version of macOS Big Sur.
from iMore - Learn more. Be more.
via TechnW3

No comments: