Take your iPad to the next level with Slide Over and Split View - TechnW3
Take your productivity and multitasking to the next level by using Slide Over and Split View on iPad.
The best iPad is an excellent tool for both work and leisure you can have at your disposal. In addition, it has many Multitasking features that turn a regular iPad into a productivity machine. And, thanks to iPadOS, you need to add a keyboard case, and you can even use it as a laptop replacement.
Using features like Slide Over and Split View on iPad can make your job so much easier, especially if you're on a larger model like the iPad Pro. Here's how you can use them!
How does Multitasking work on iPad?
There are four main components to Multitasking on iPad: Slide Over, Split View, Picture-in-Picture, and the App Switcher. These features have received continual improvement since their introduction onto the iPad and have only gotten better ever since.
We've included instructions towards the end of this guide specifically for the new iPadOS 15 Multitasking Menu, though the previous gesture-based methods for invoking Multitasking still work in version 15 as well as previous software versions, so we've kept those in, too.
Slide Over
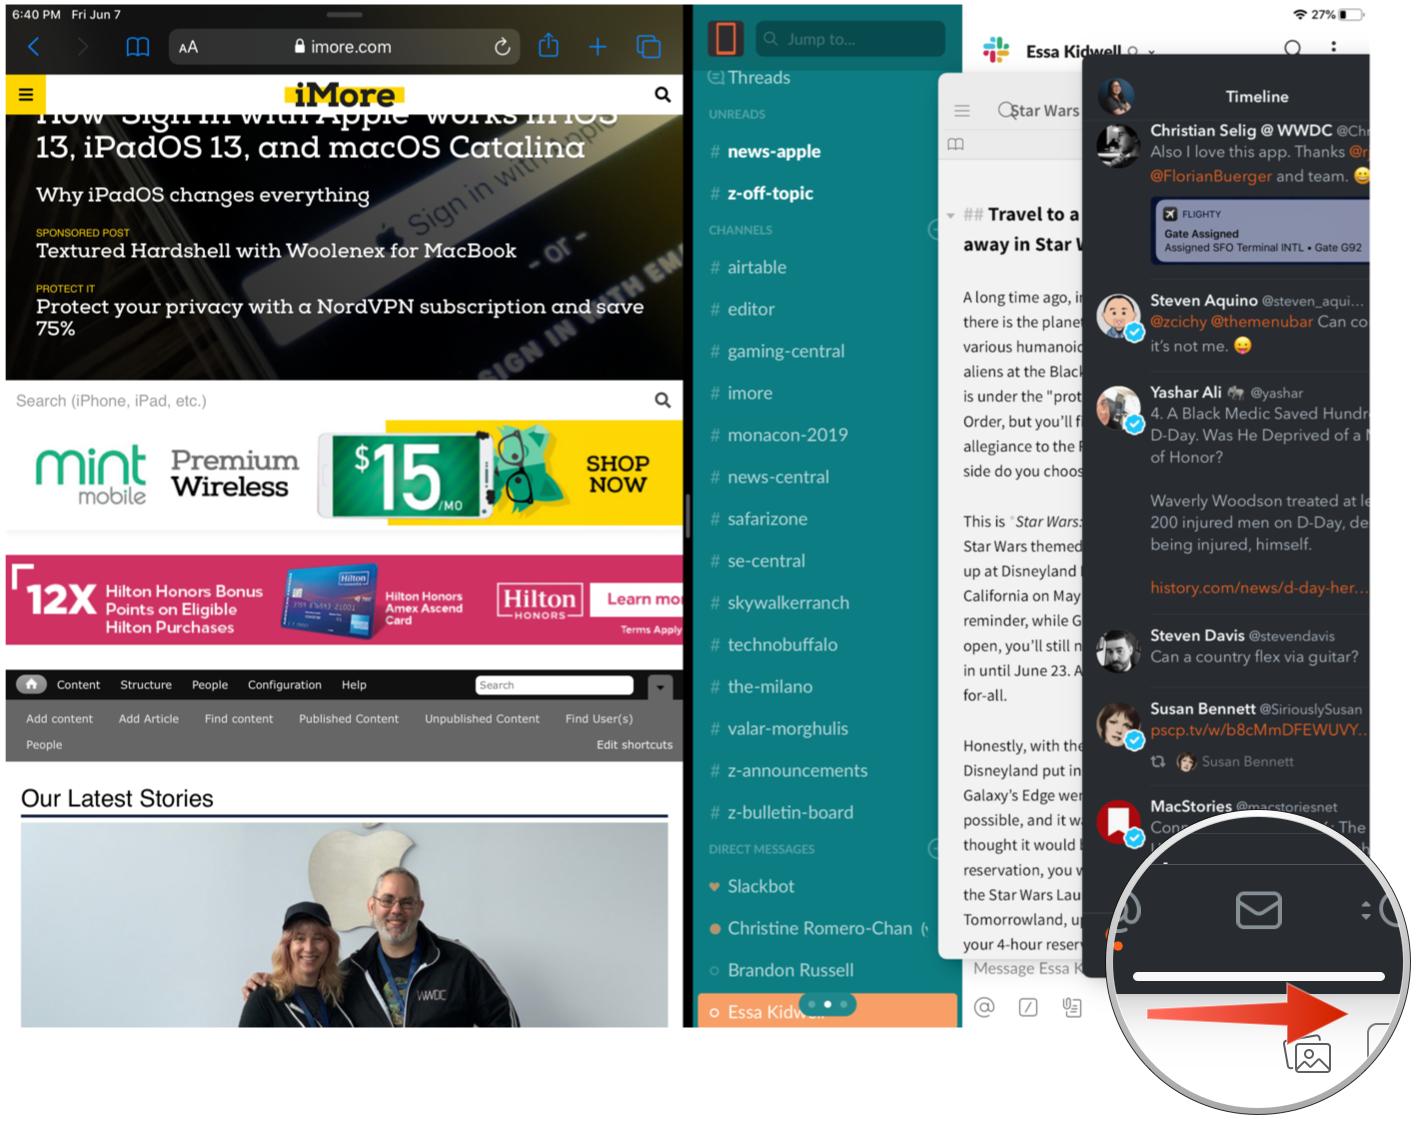
Slide Over allows you to have an additional app on the left or right side of the screen in an iPhone-sized floating pane; you can also hide it off the screen or re-summon it at any time by swiping it away (hence the "slide" portion of the name).
Slide Over doesn't have a default "app" you can slide in from the screen — after a restart, you'll need to drag one on the screen from the Dock or Home screen.
Split View
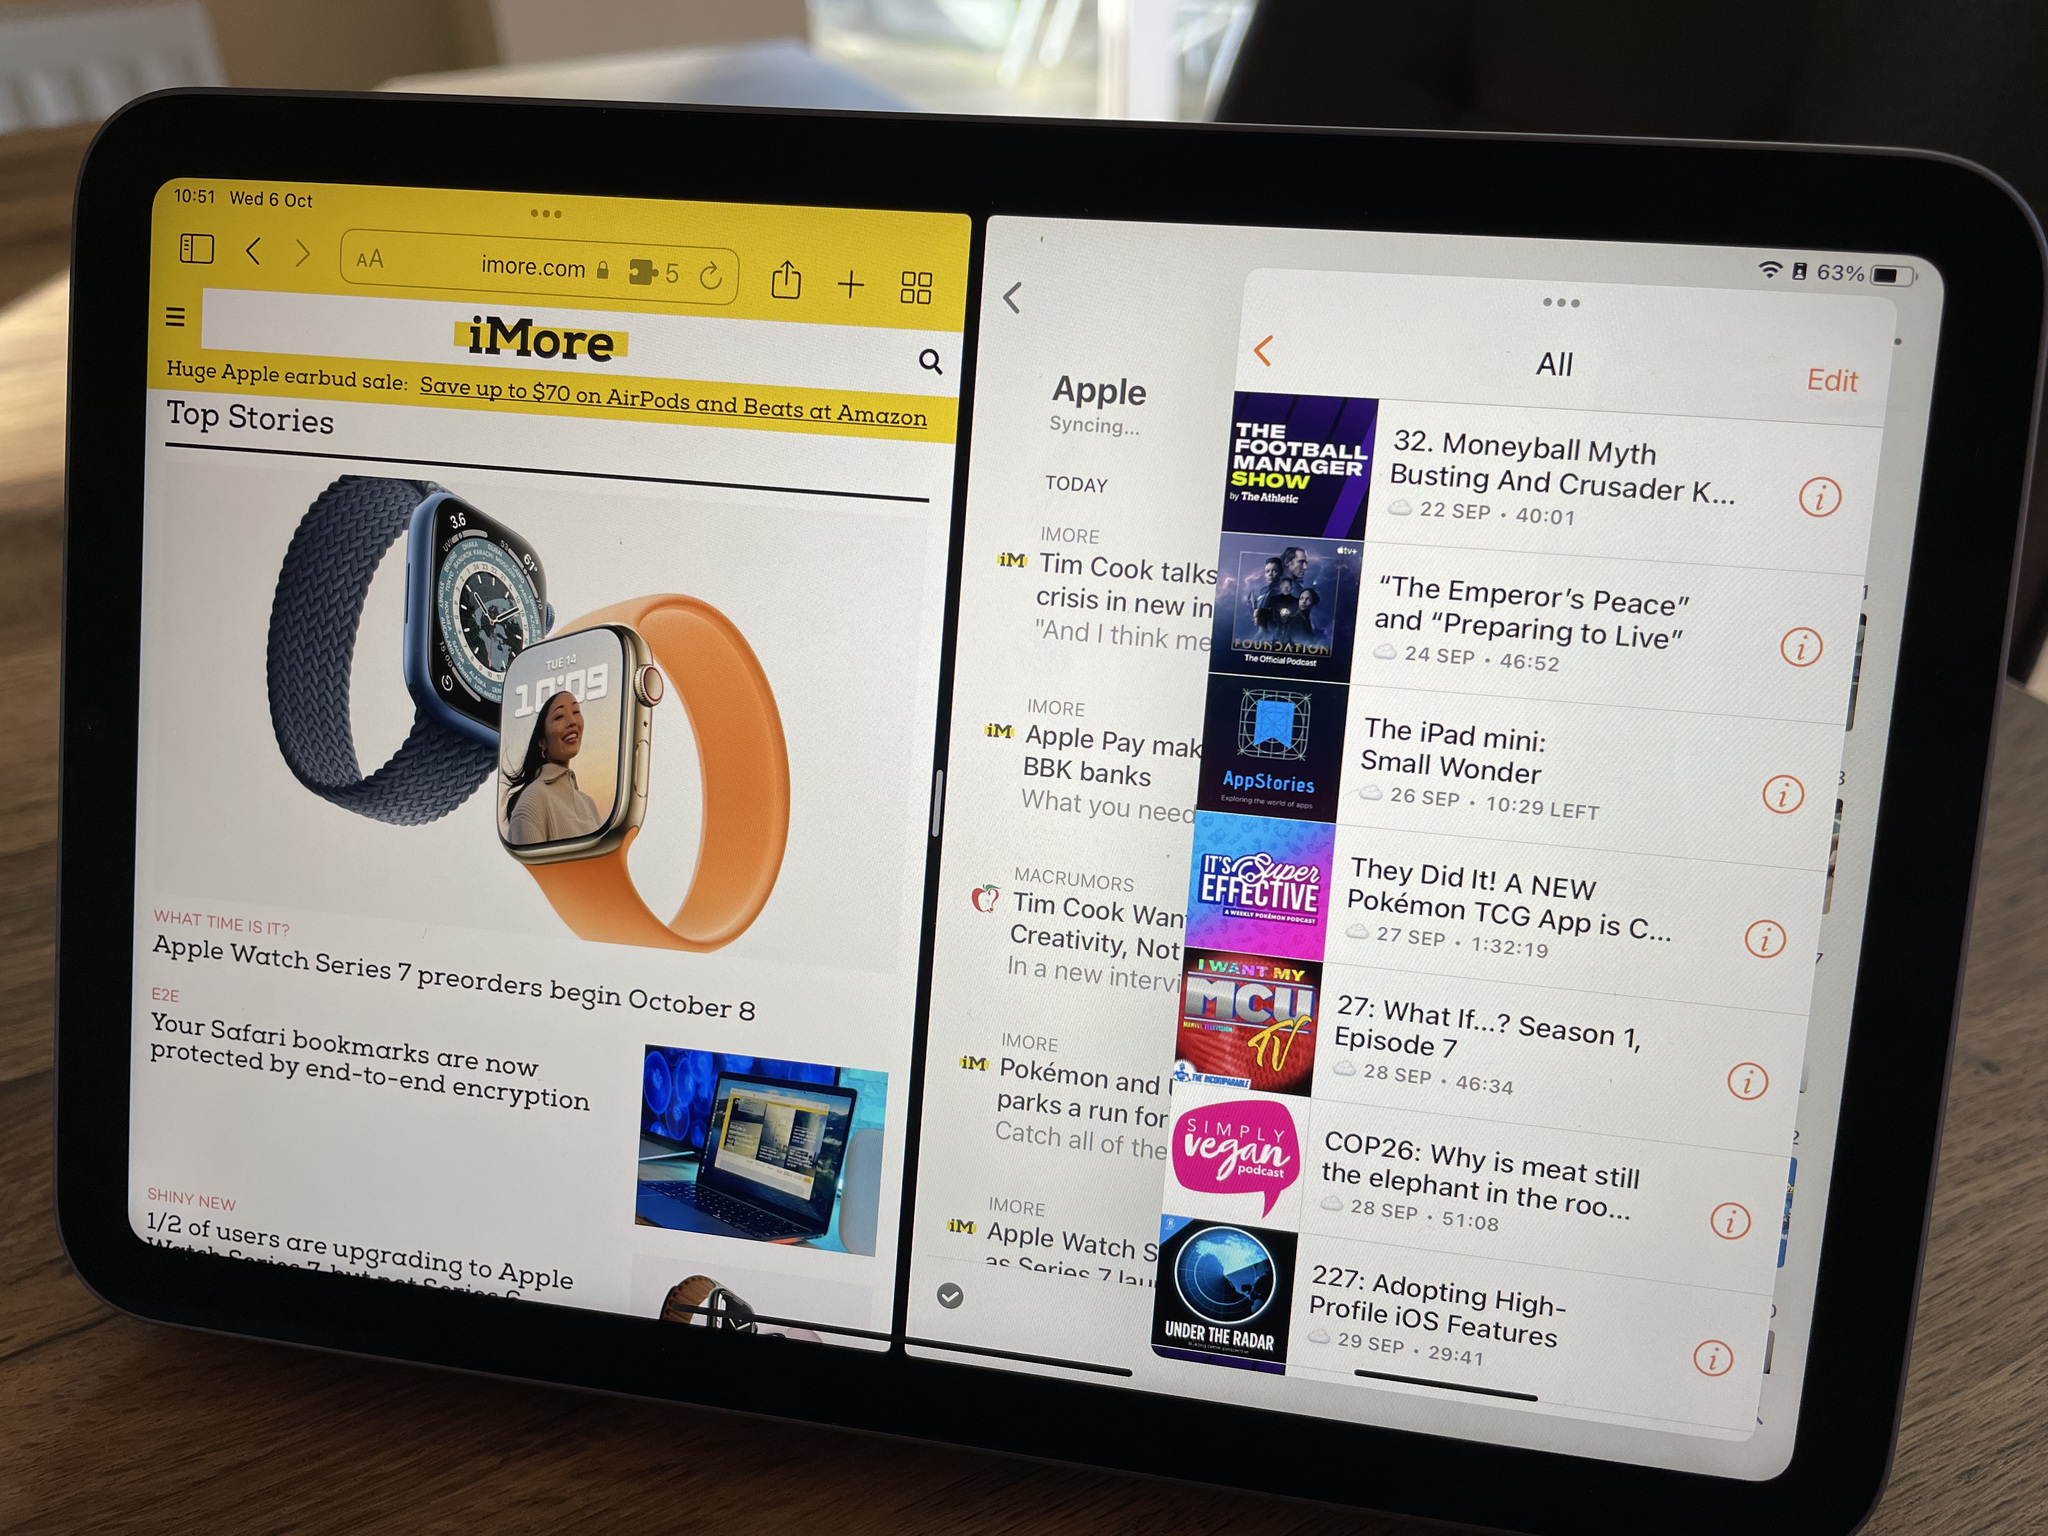
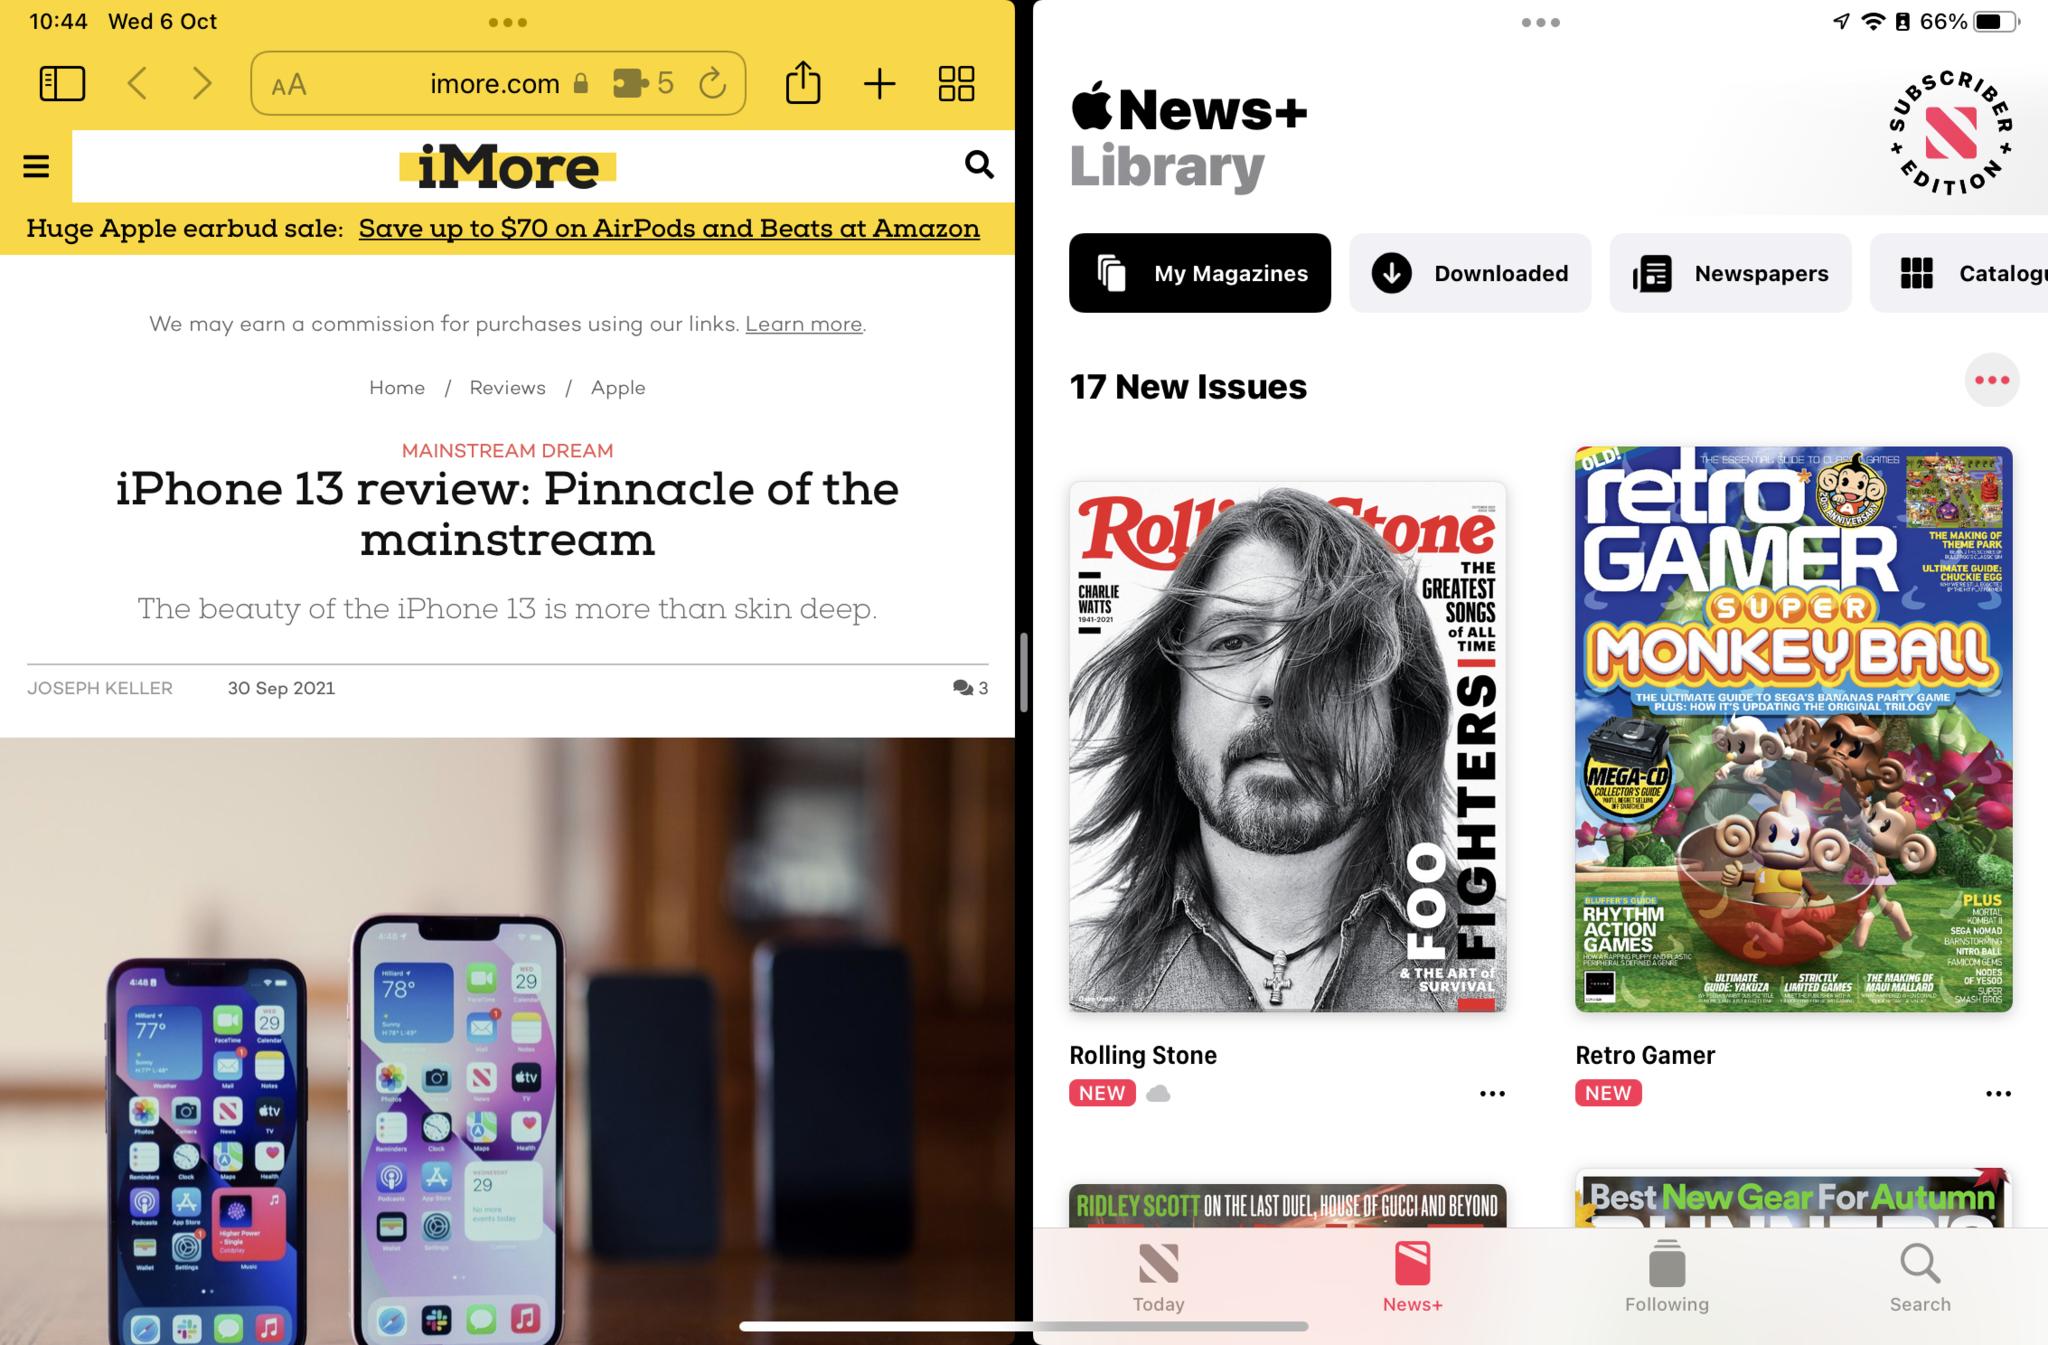
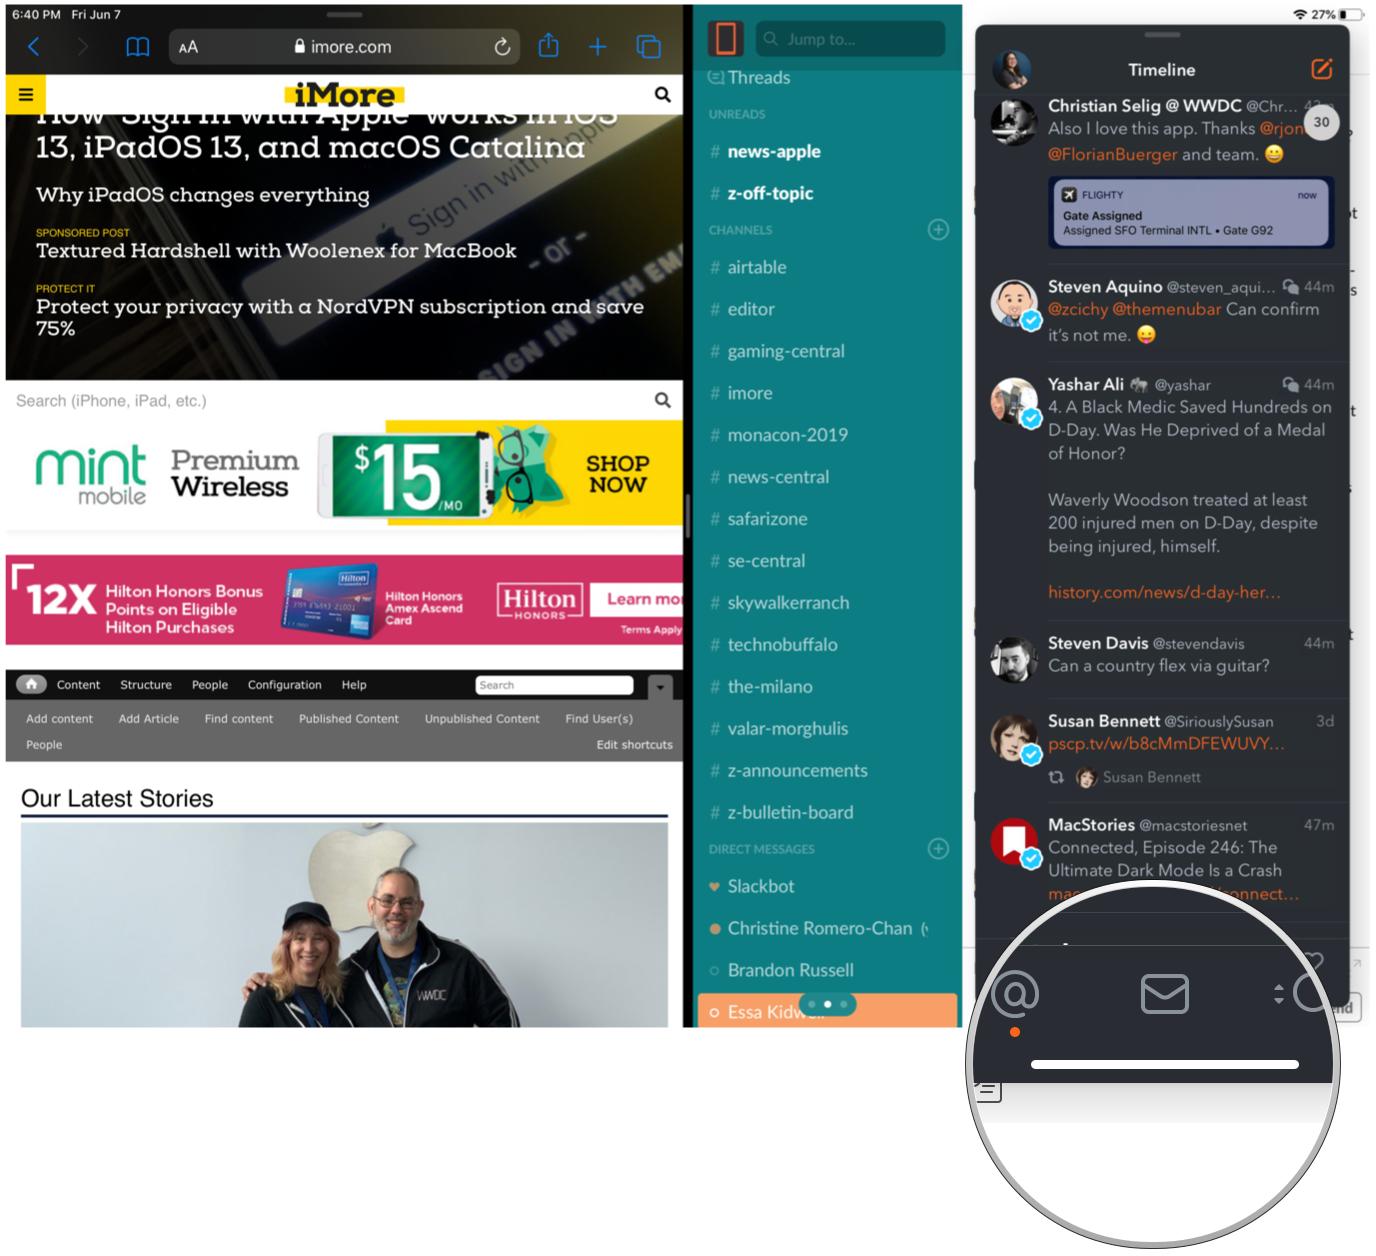
Split View lets you have two persistent apps sitting side by side on your iPad. Depending on the screen size of your iPad, those two apps may be displayed as Compact (iPhone UI) or Regular (iPad UI) next to each other.
On certain iPads, you can also resize Split View panes for a 50-50, 25-75, or 75-25 split in a horizontal orientation; when holding the tablet vertically, you'll only have the 25-75 or 75-25 options.
- 50-50: Each app takes up the same real estate on the iPad.
- 25-75: The app on the left takes up just 25% of the screen, with the right app taking up 75%.
- 75-25: The app on the left takes up 75% of the screen, with the right app taking up 25%.
When multitasking in the App Switcher, Split View apps remain conjoined until separated; Apple calls them "App Spaces." However, unlike the Mac's Spaces, you can't have multiple configurations of the same apps (i.e., an App Space that had Safari and Mail, and an App Space that had Safari and Fantastical) at this time.
Picture-in-Picture
Suppose you're watching a video in an app that supports Picture-in-Picture. In that case, you may be able to minimize the video window to float alongside your current workspace, effectively making the video a second Slide Over pane.
Once in Picture-in-Picture mode, you can pinch-to-zoom or shrink the window, position it in any corner of the screen, play/pause video, slide the video off-screen, or return it to its original app.
App Switcher
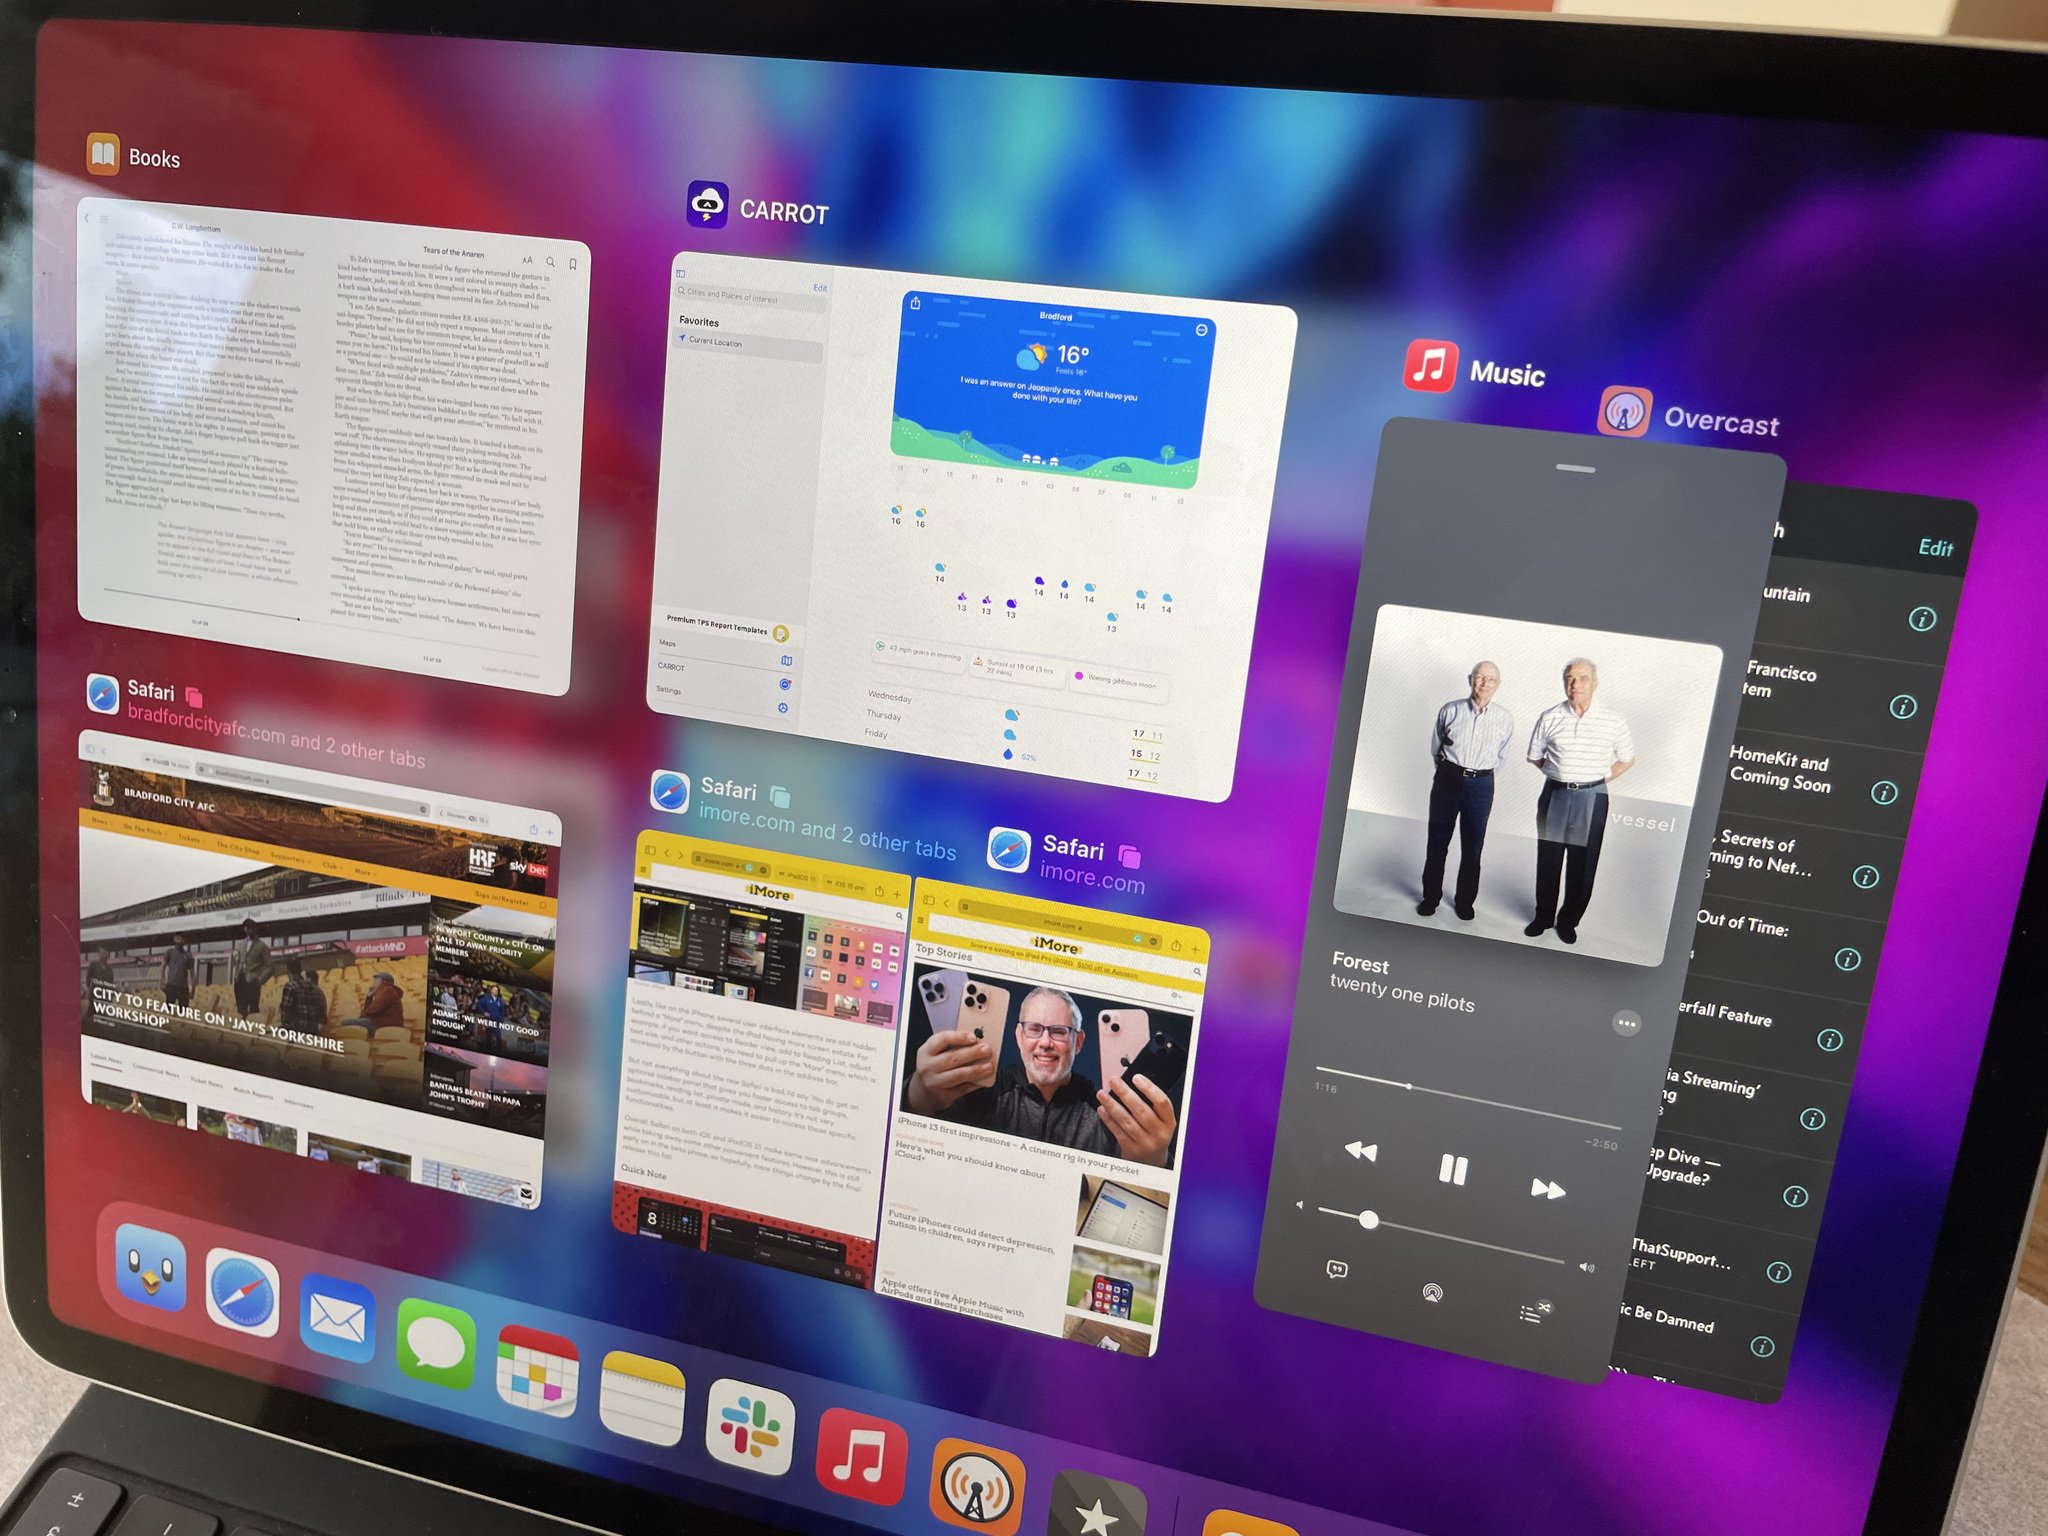
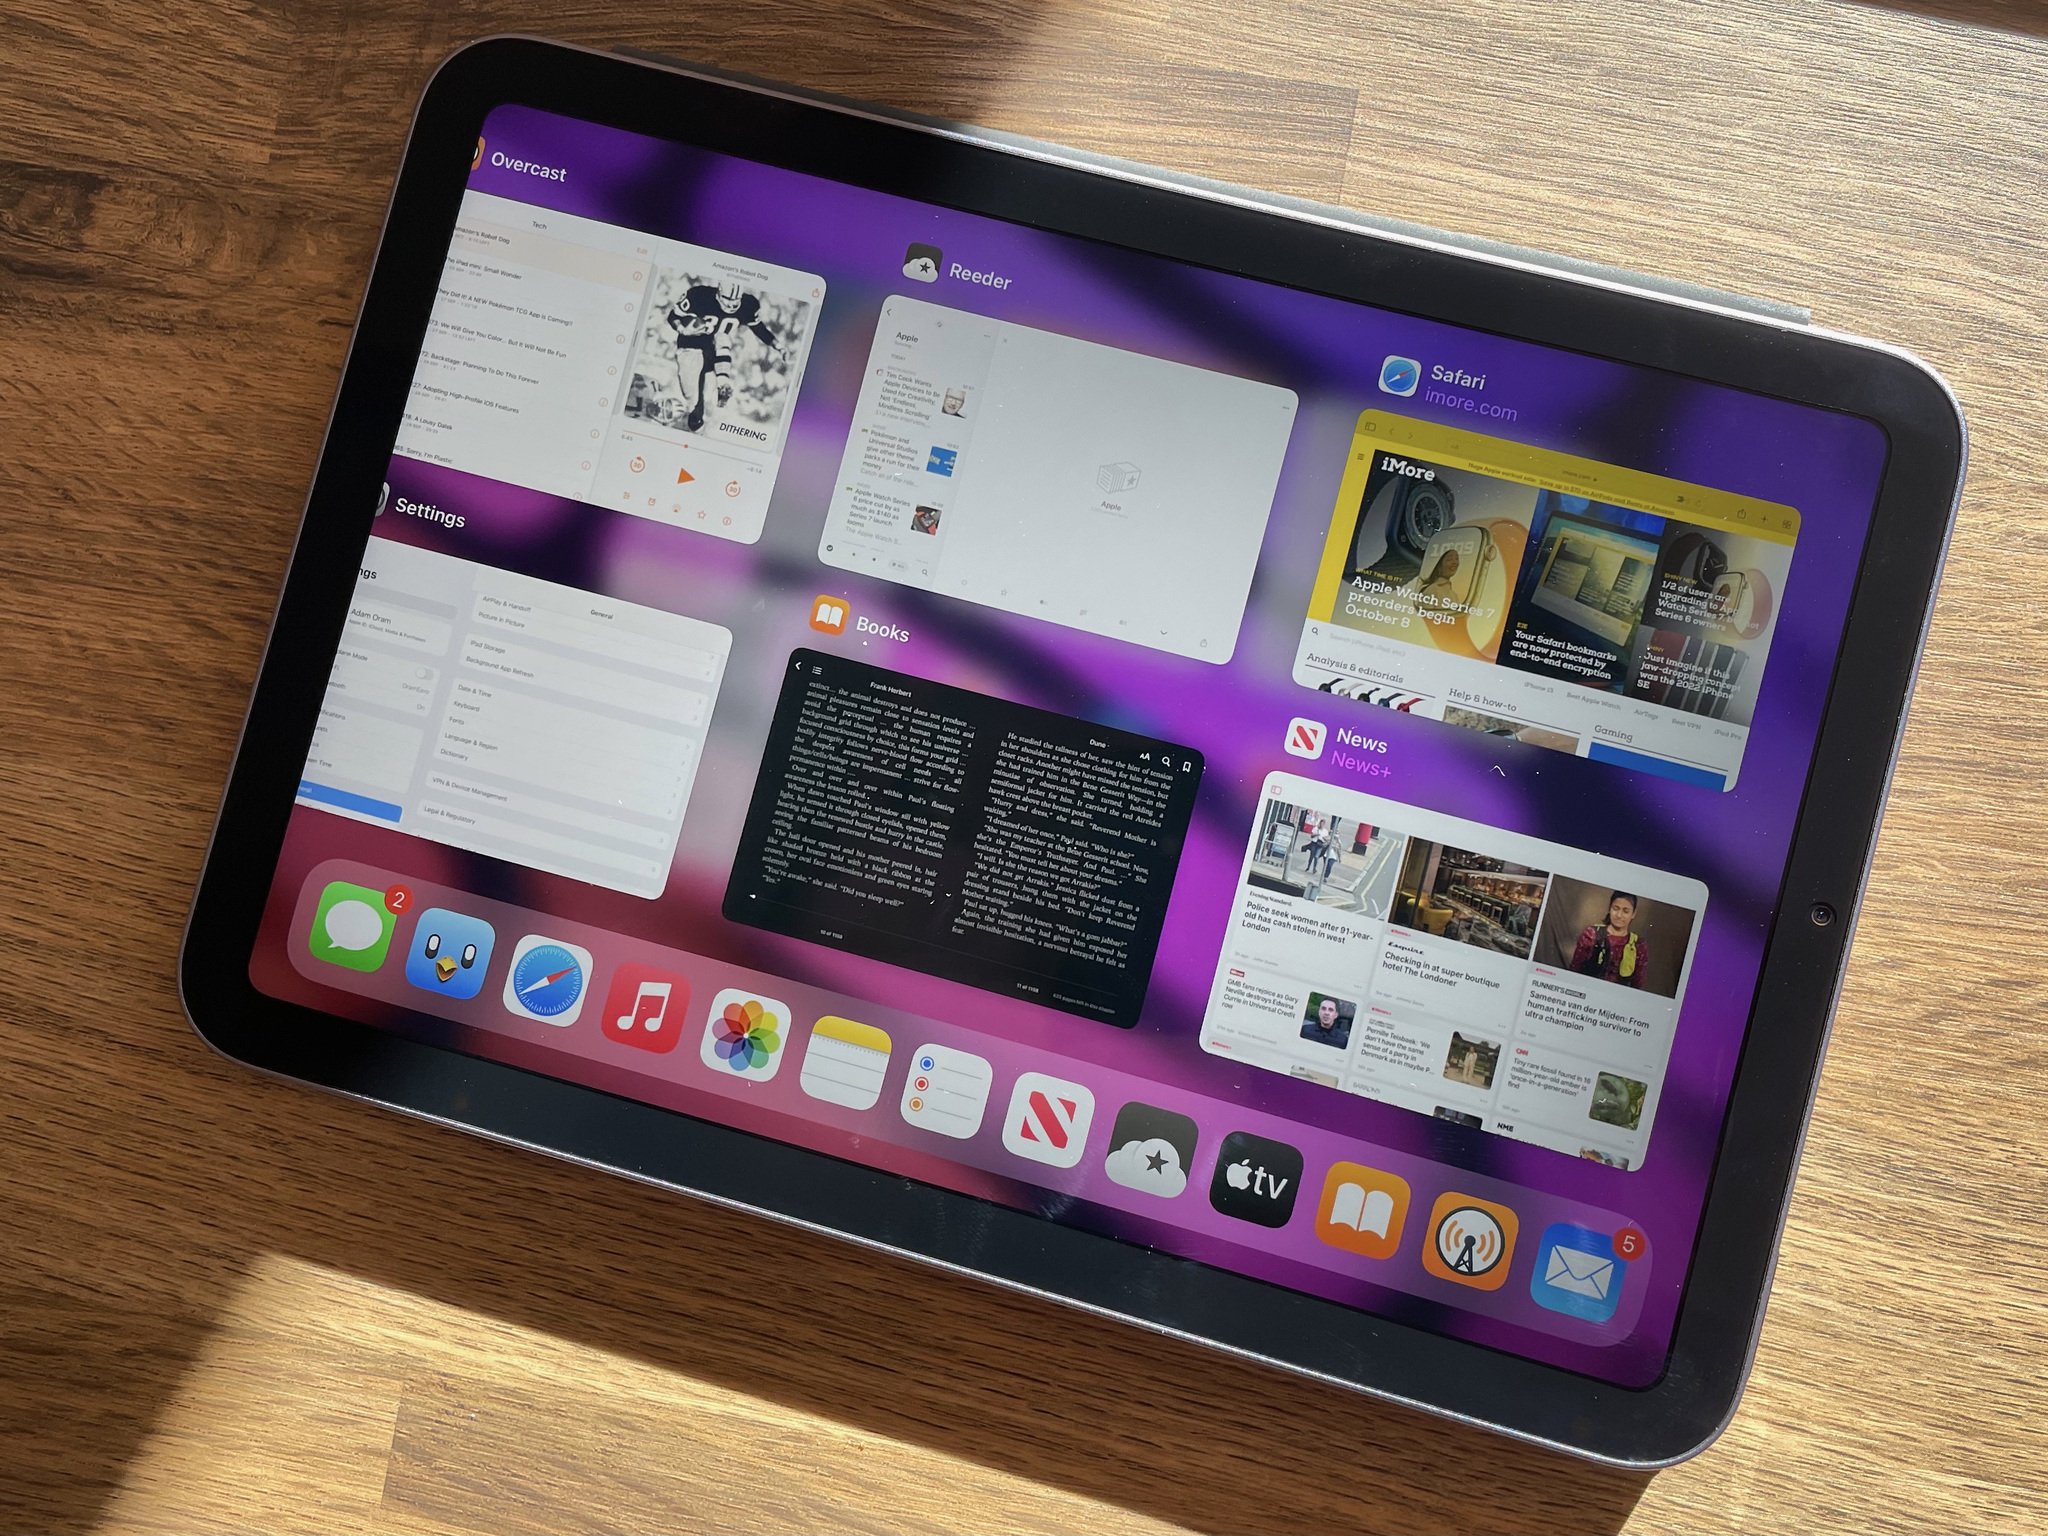
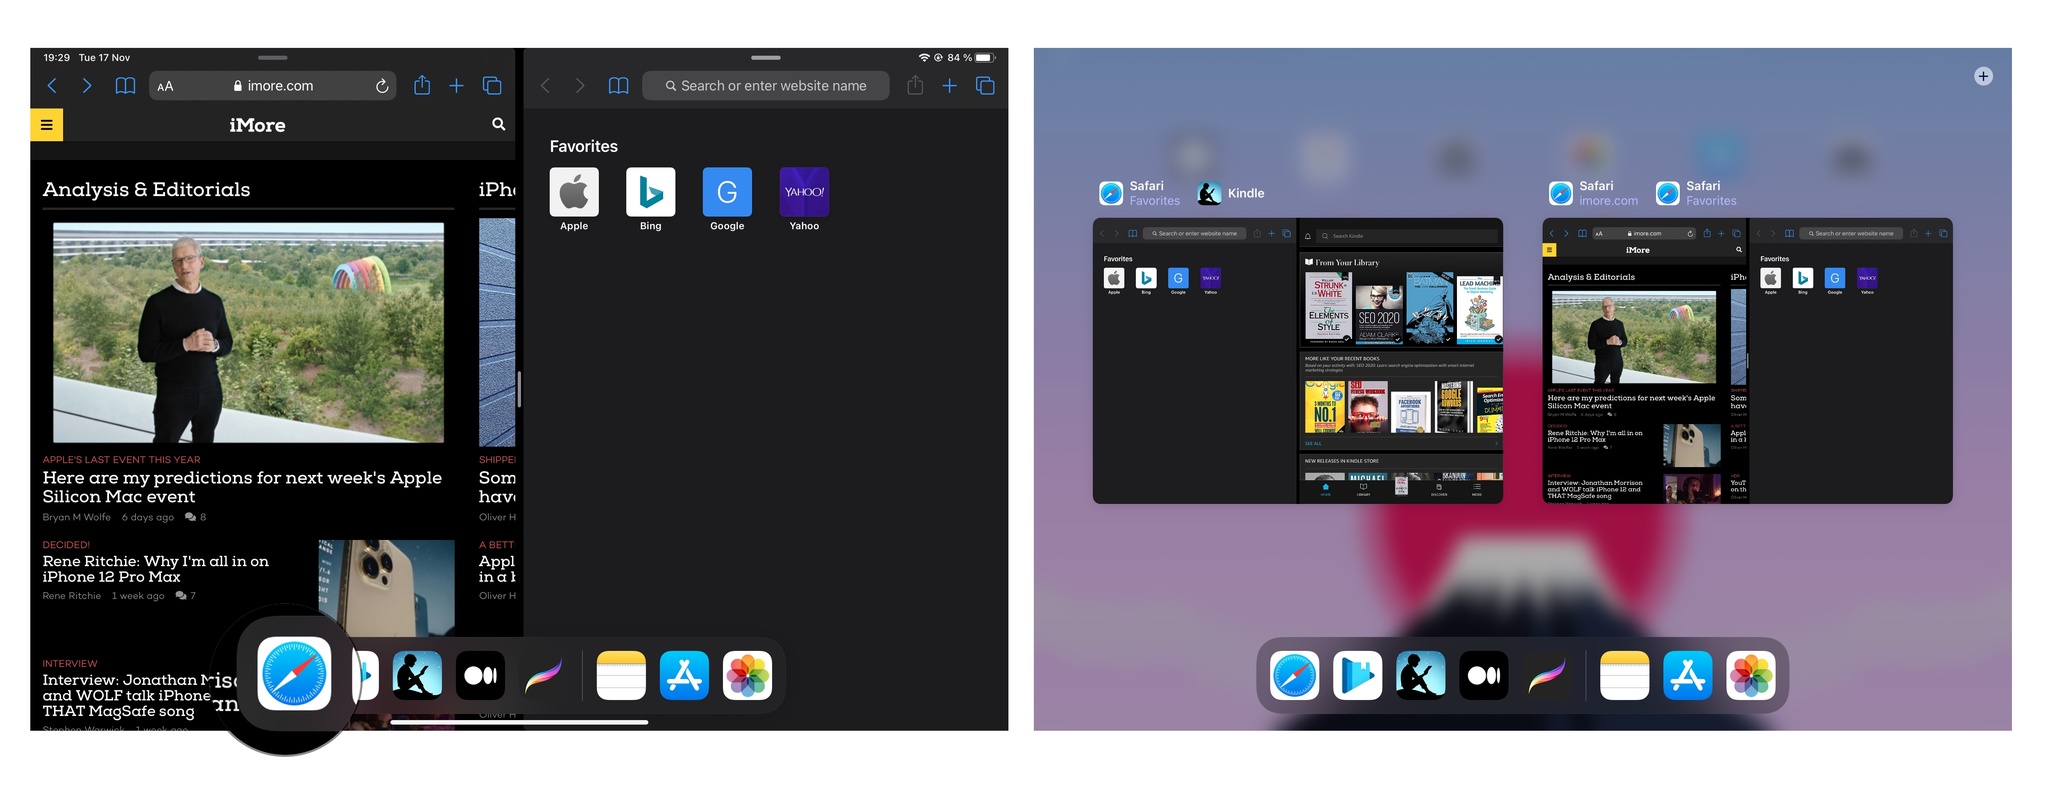
The App Switcher can be accessed by swiping up with one finger from the bottom edge of the screen and holding it in the middle until the app switcher appears. It shows you your Dock and your recently used apps, and any Split Views you have set up, making it easy to jump between different apps.
Recently used apps can be scrolled through by swiping right and tapped on to enter them; you can also force quit them by pressing and holding on a pane and moving your finger upward.
If you're running iPadOS 15, you can use the App Switcher to combine apps into Split Views and even quit one app that is already in a Split View to take the remaining app full screen. Slide Over apps also show in the App Switcher in iPadOS 15.
How to use Slide Over or Split View on iPad
Whether you want to add a Slide Over pane or enter Split View, adding an app to your workspace is pretty simple.
How to Use Slide Over on iPad
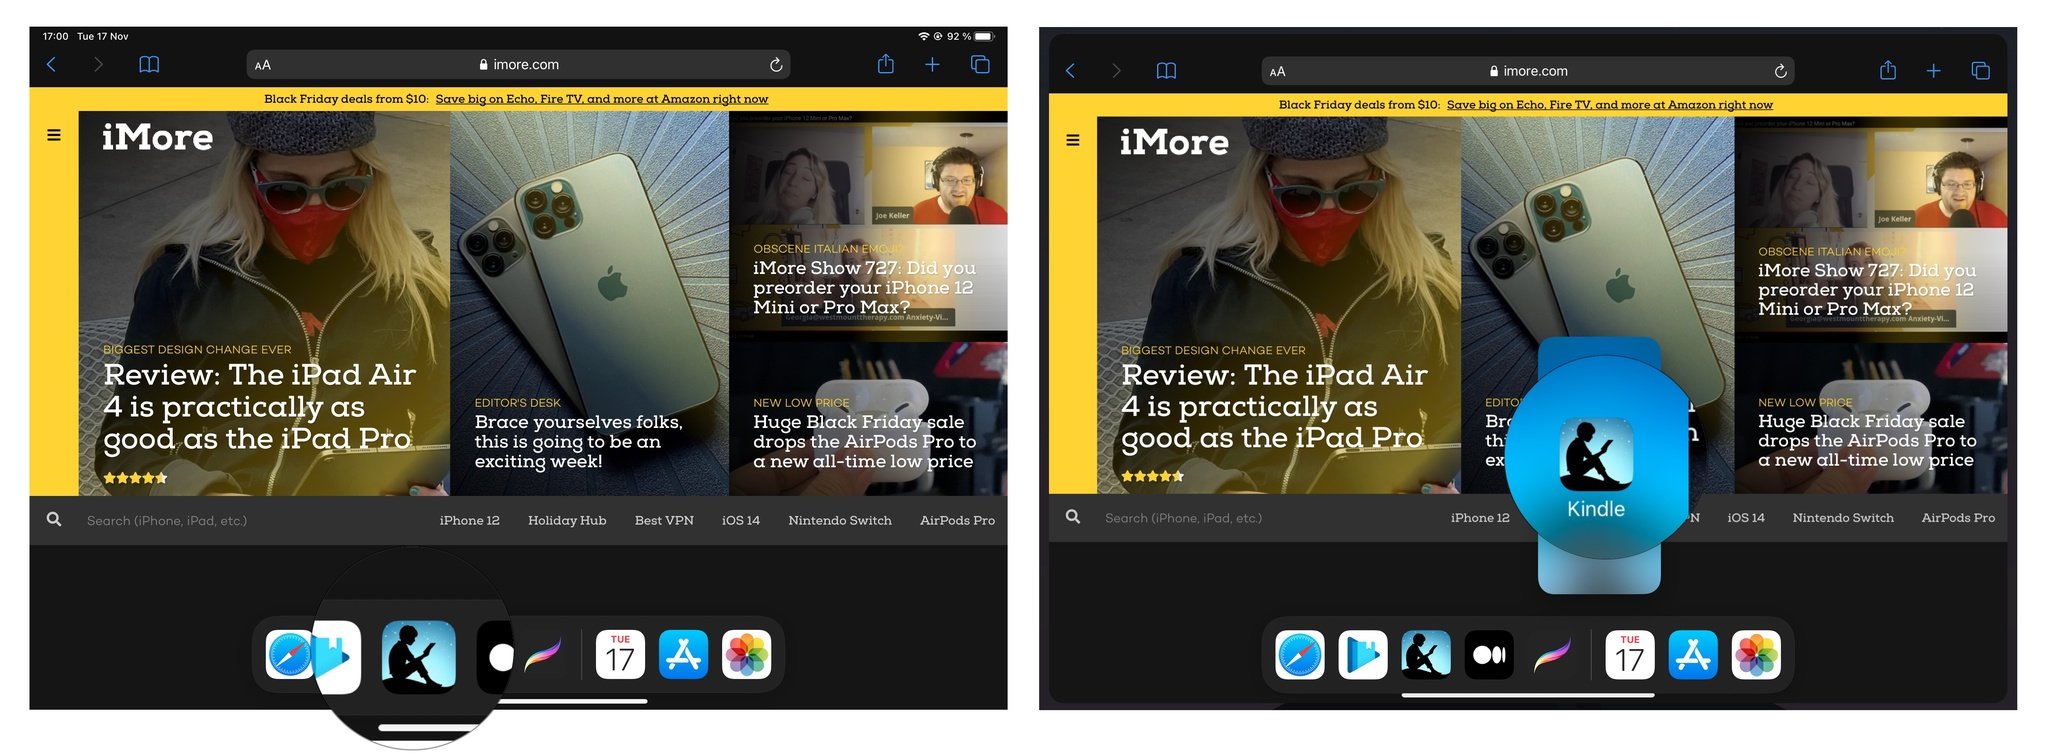
- Swipe up from the bottom of the screen to invoke the Dock.
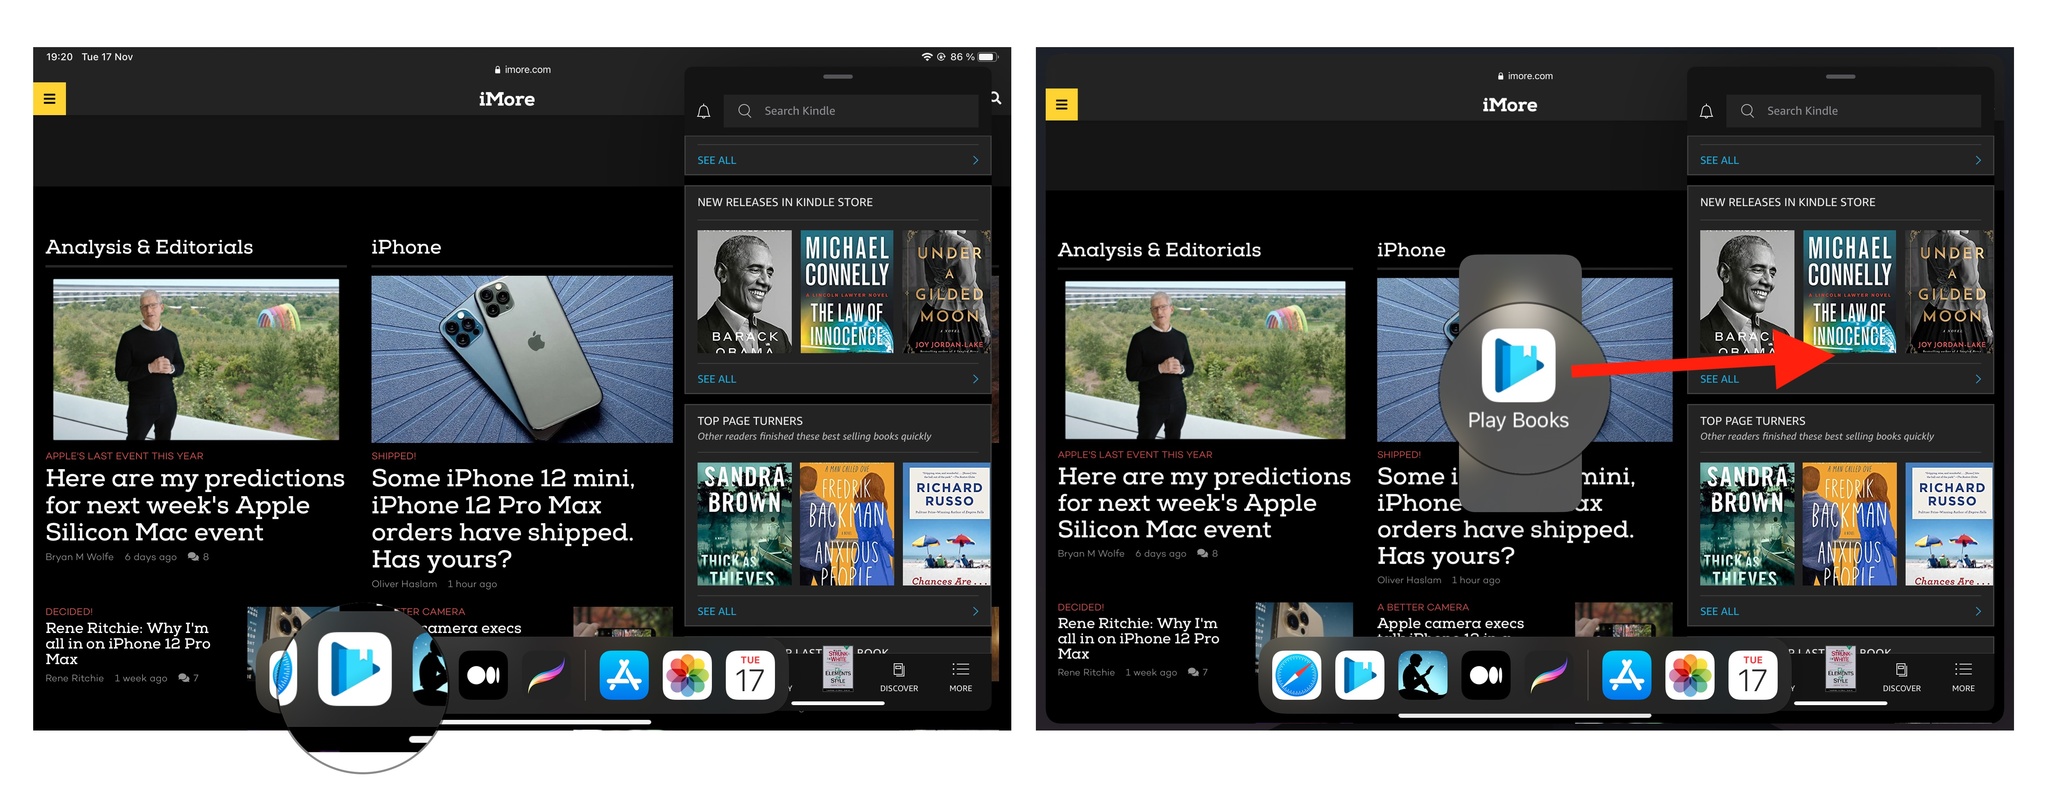
- Tap and drag on an app you want to use in the Dock.
- Drag the app to the center of the screen.
-
Release your drag.
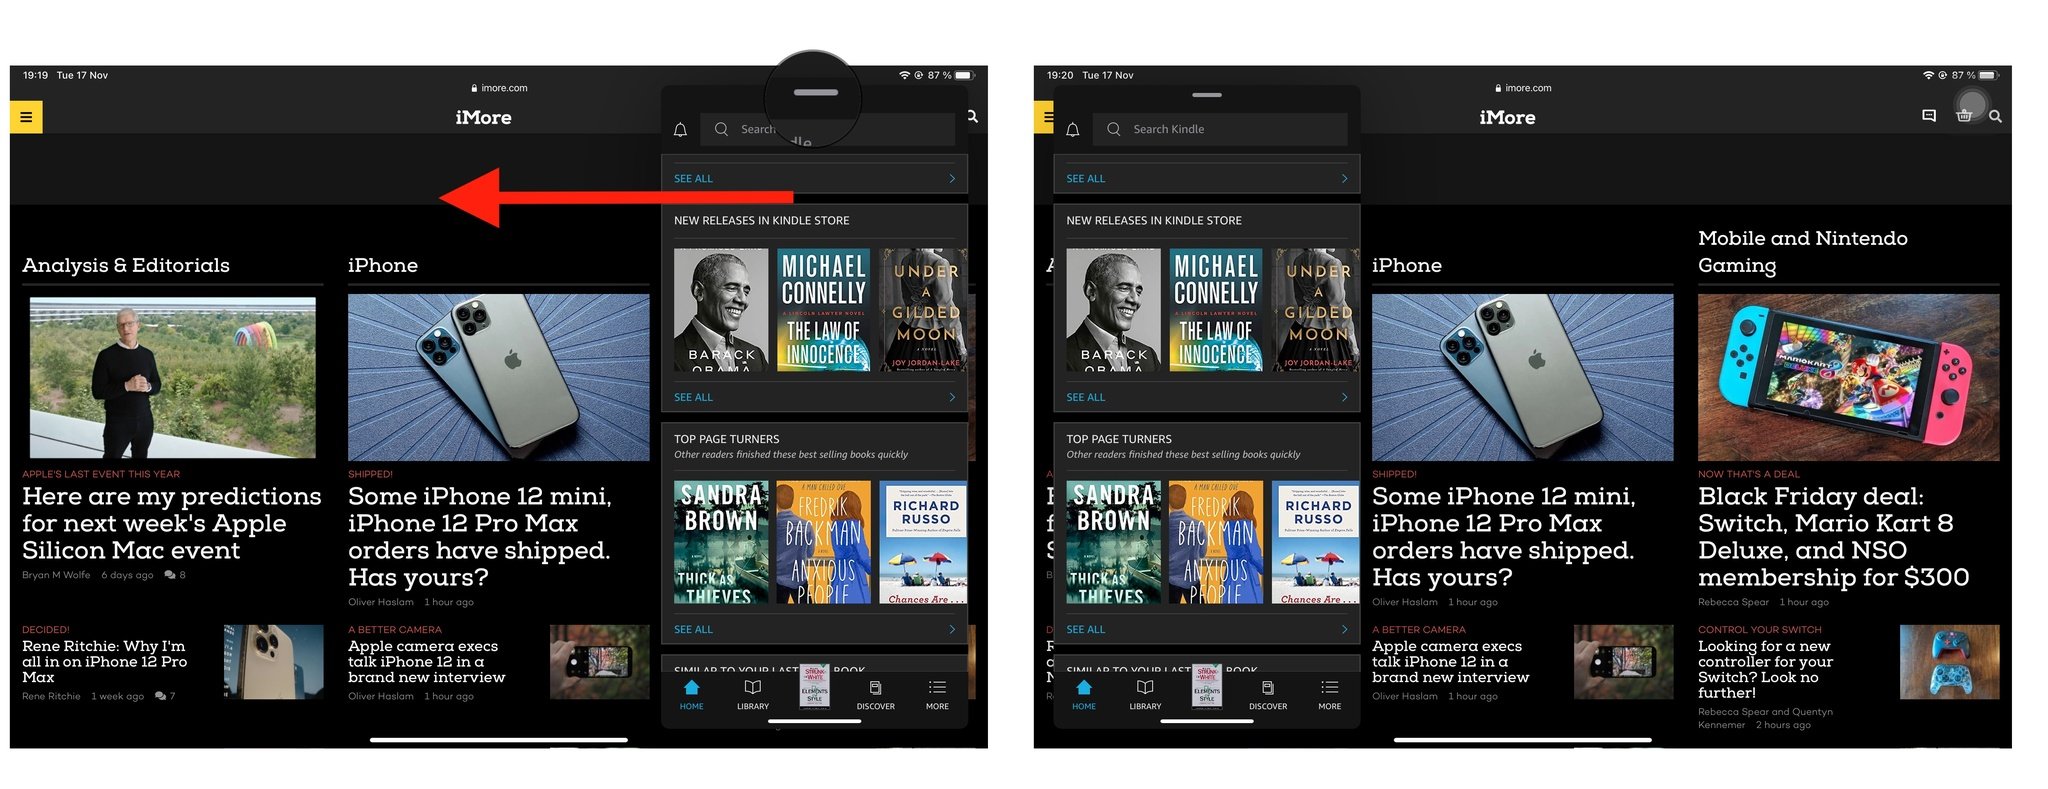
- if you want to Hide your Slide Over app, you can touch and swipe the edit handle at the top of the screen to the left or the right to hide it.
Drag a different app on top of your existing Slide Over to switch the app.
How to Use Split View on iPad
- Swipe up from the bottom of the screen to invoke the Dock.
- Tap and drag on an app you want to use in the Dock.
- Drag the app to the far left or right of the screen until you see the main app pane bump over, leaving a black space.
-
Release your drag.
Drag a different app on top of your existing Split View to switch the app.
How to turn a Slide Over pane into a Split View pane
- If the Slide Over view is hidden, swipe to the left or right side of the display to invoke the slide over window.
- Drag the Slide Over pane's Edit handle at the top of the screen to the far right or left until you see the main app pane bump over, leaving a black space.
-
Release your drag.
How to turn a Split View pane into a Slide Over pane
- Pull down on the Split View pane's edit handle at the top of the screen until you see the main app pane bump over, taking over the entirety of the screen.
-
Release your drag.
How to reposition an app in Slide Over
- Tap and drag the edit handle to position the Slide Over window on the left or right side of the screen.
-
Release your drag.
-
Drag the Slide Over window all the way to the right or left side of the display until it disappears to dismiss the window.
How to reposition an app in Split View
- To reposition the size of each Split View, drag on the vertical edit handle in the middle of the screen.
- Tap and drag the top edit handle in the middle of the screen to the left or right to reposition the Split View window.
-
Release your drag.
-
To move an app to the left or right side of the Split View window, tap on the edit handle at the top of the screen and move the app to the right or the left.
How to add multiple apps to Slide Over
In addition to adding multiple apps to the Slide Over window, you can also switch between them and even close them like you would on your iPhone. Here's how.
- When you have a Slide Over window, slide your finger up from the bottom of the screen to bring up the Dock.
- Tap-and-drag an app icon from the Dock to the Slide Over view, ensuring it's above the split line or towards the side edges where the window becomes smaller.
-
This new app will go to the forefront of the Slide Over apps.
-
Repeat steps 1-3 for all of the apps you need in a single space.
If you want another instance of an app already open in Split Screen or Slide Over views (i.e., Safari), you can choose to open up an existing instance or a fresh new slate.
How to rotate through app tabs in Slide Over view
When you have several apps open in the multiple Slide Over view, only the most recent one appears in the front. But it's easy to rotate between all of your open app tabs in a Split Screen or Full-Screen space.
- Make sure to get several apps in Slide Over view using the directions above.
-
Touch-and-hold the handle at the bottom of the frontmost app in Slide Over view.
-
Swipe to the right to bring the previous app to the front.
-
Repeat the process until you get the app you need in the front.
How to trigger the Slide Over Switcher
Earlier, we showed you how to rotate through multiple app tabs in Slide Over view. If you don't want to go through them all one by one, you can spread them out and pick the one you want to jump to with the new Slide Over Switcher.
- With multiple Slide Over apps active in a space (single or Split Screen view), touch-and-drag the handle at the bottom of the Slide Over app upwards.
- Once you see the other Slide Over views peeking through, release your finger.
-
All apps you've opened in Slide Over view will appear spread out in cards.
- Scroll through them by swiping left and right.
- Tap on the app you want to jump into.
How to remove Slide Over windows
- While you're in Slide Over view, activate the spread out app tab view (Slide Over Switcher) as described above.
- Scroll left and right to find the app that you want to remove.
-
Swipe that app's card up to remove it.
- Repeat steps 2-3 until you've removed all of the apps that you want.
How to use App Exposé on iPad
When you start opening up many apps and working with multiple instances of an app, it's easy to lose track of what you have open. Your iPad has a few ways to see everything simultaneously: App Exposé and Slide Over Switcher.
How to trigger App Exposé
App Exposé lets you view all open windows for an app. There are two ways to do this.
- When you're in Split Screen, Full Screen, or Slide Over mode, slide your finger up from the bottom of the screen to bring up the Dock.
- Tap on an app.
-
App Exposé will reveal all open instances of that app, including Split Screen and Slide Over views.
Trigger App Exposé from the home screen
- On your Home Screen, long-press on an app icon until a menu pops up.
-
Tap on Show All Windows to open App Exposé for that app.
While you're in App Exposé, you can tap on an instance of that app to open it back up. Slide Over views cannot be opened unless there is an active app or Split Screen view.
How to use Slide Over and Split View in iPadOS 15
How to use Split View and Slide Over in iPadOS 15
With iPadOS 15, Apple has made some changes to how both Split View and Slide Over work. They've made it so that it's easier to do and more fluid thanks to the new Multitasking Control button. Here's how to use Split View and Slide Over in iPadOS 15.
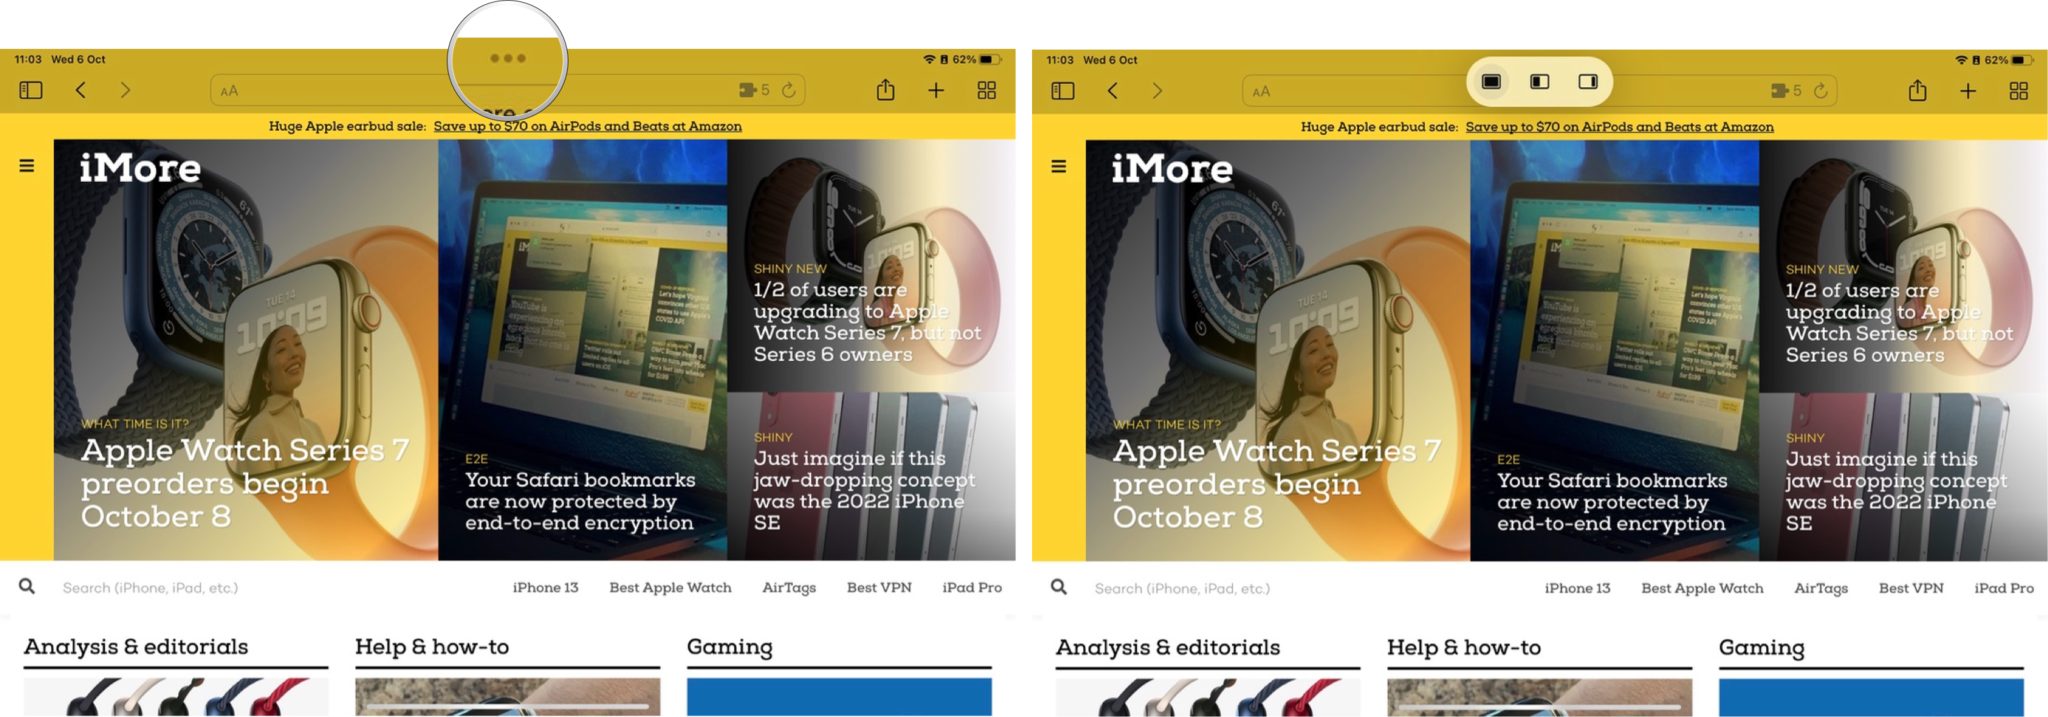
- Launch an app that you want to open on your iPad. It should take up the entire screen.
- Open the Multitasking Menu at the top of the app, near the status bar by tapping the ellipsis icon (•••).
-
Select whether you want Split View (center option, 50/50) or Slide Over (right option, looks like one-third). Either way, your current app will slide over to the side, bringing you to the Home screen and Dock.
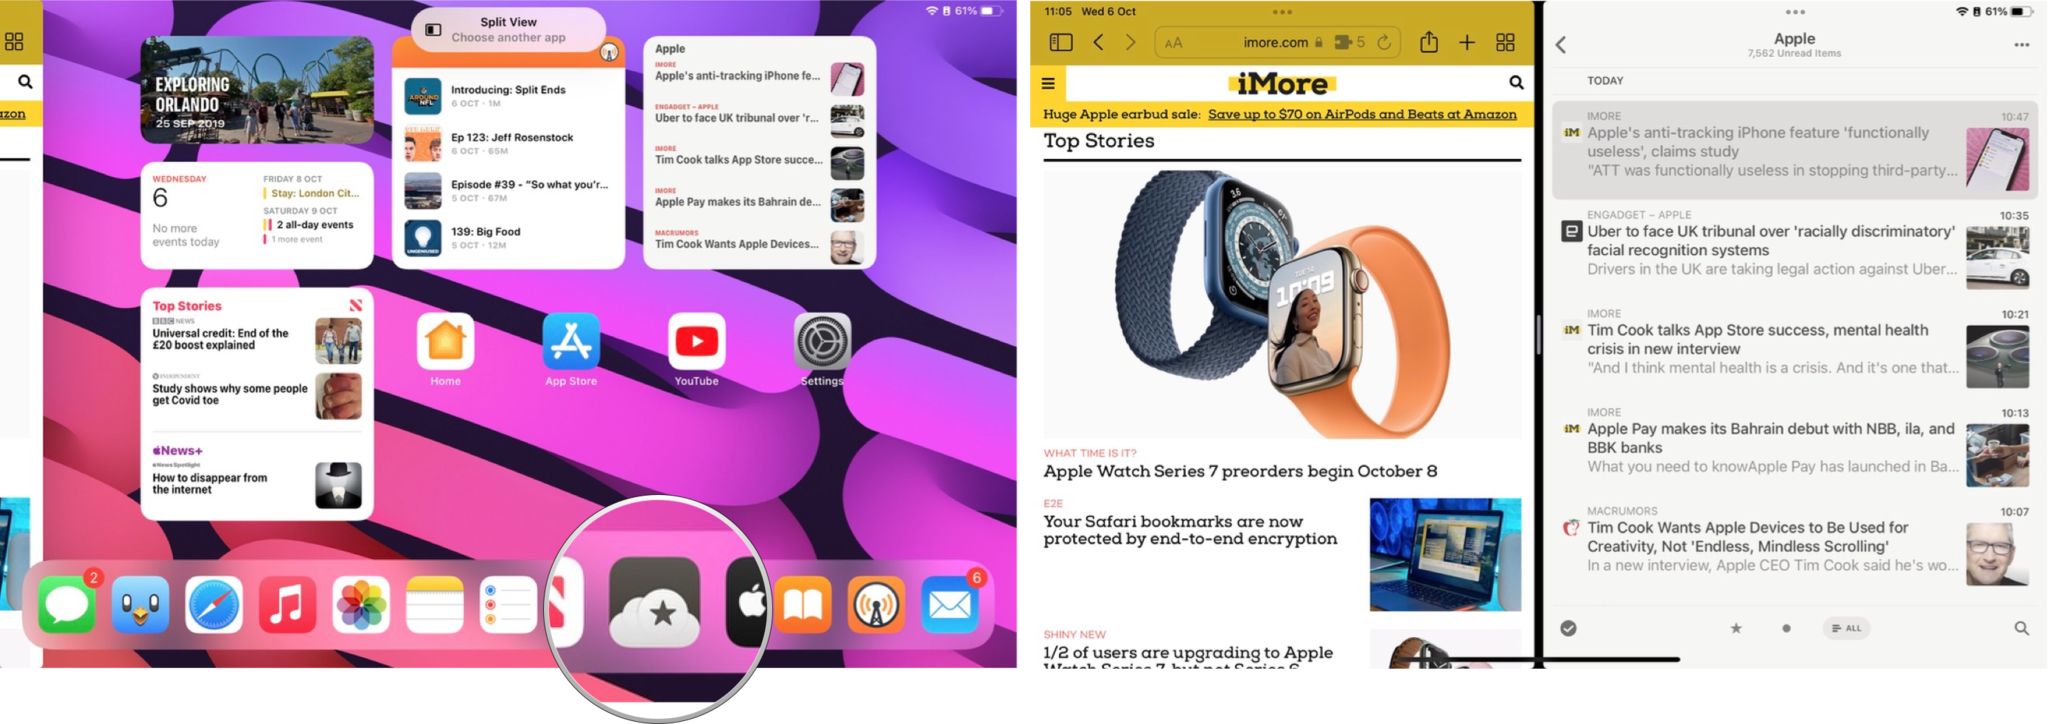
- Select another app that you want to open in either Split View or Slide Over.
-
If you went with Split View, it defaults to 50/50. You can drag the handle in-between the two apps to go 25/75 or 75/25 Split View.
- If you went with Slide Over, you can drag the app from the top bar (with the Multitasking Control button) to move it to the left or right side of the screen.
Optionally, you can still invoke an app into Slide Over or Split View by dragging it from the Dock by swiping up from the bottom of the screen. If you choose this method, drag it to the center for Slide Over or to either the left or right for Split View.
If you want to change out an app in Split View, repeat steps 3-6 above with another app of your choosing.
How to use the Shelf for apps with multiple windows
When you have an app that already has multiple windows or views open, then you can invoke the App Shelf, a new feature that builds on the App Exposé feature of previous iPadOS versions.
When you have multiple windows open, the Shelf shows automatically when you open the app, though you can prompt it to show at any time with the below method.
- In an app that supports multiple windows or views (i.e., Safari), open up a new window.
- Swipe up from the bottom of the screen to bring up the Dock.
- Tap the app from your Dock while you're still in the app.
-
The Shelf lets you view your current open windows, and you can even open a new window if needed.
- You can tap the Multitasking Control button on these windows to bring them into Split View or Slide Over mode.
How to use Quick Note in iPadOS 15
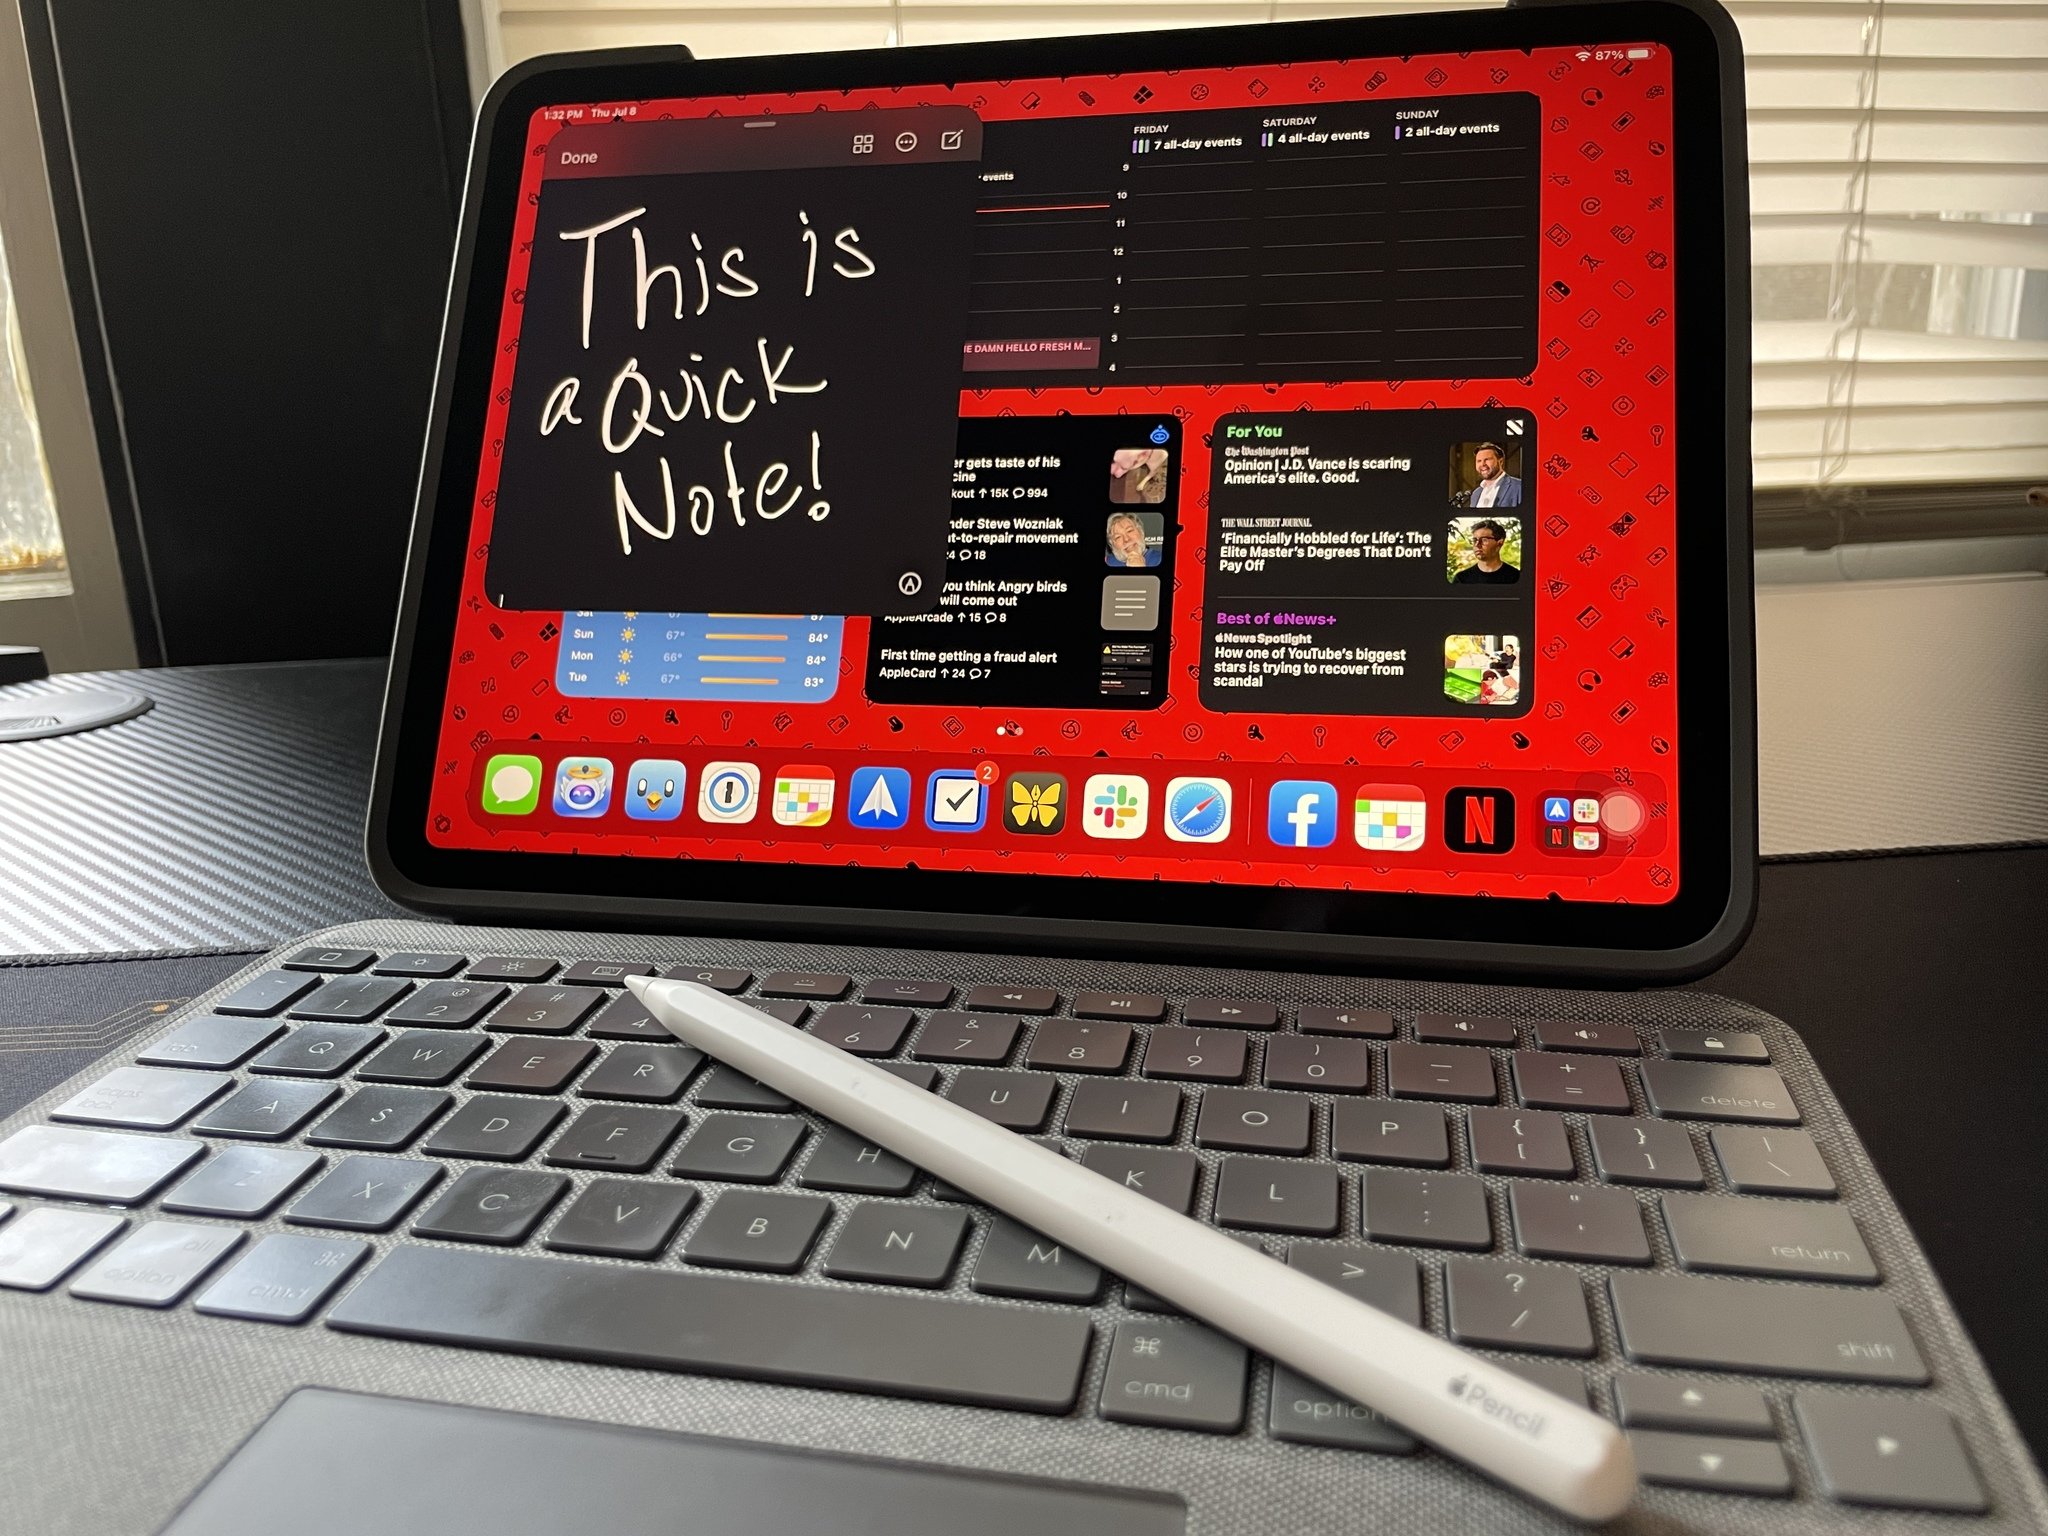
In addition to regular multitasking methods and the new Multitasking Menu, Apple also added an all-new feature with iPadOS 15 in the form of Quick Note. It allows users to quickly jot down ideas, save links, write something with Apple Pencil, and more in the Notes app without disrupting your current multitasking setup.
We've got a dedicated guide showing you how to use Quick Note that is well worth checking out.
Updated October 2021: Updated with steps for new iPadOS 15 multitasking.
from iMore - Learn more. Be more.
via TechnW3











No comments: