Add some order with tags and Smart Folders in the Notes app on Mac - TechnW3
Isn't it time to better organize your thoughts?
Apple's native Notes app for Mac tends to improve each year. Tags is one of the newest features. The function has two primary purposes: to categorize notes and create custom Smart Folders to organize your content better.
Here's how to use tags in Notes on all the best Macs.
Creating tags
To begin using tags in Notes on Mac:
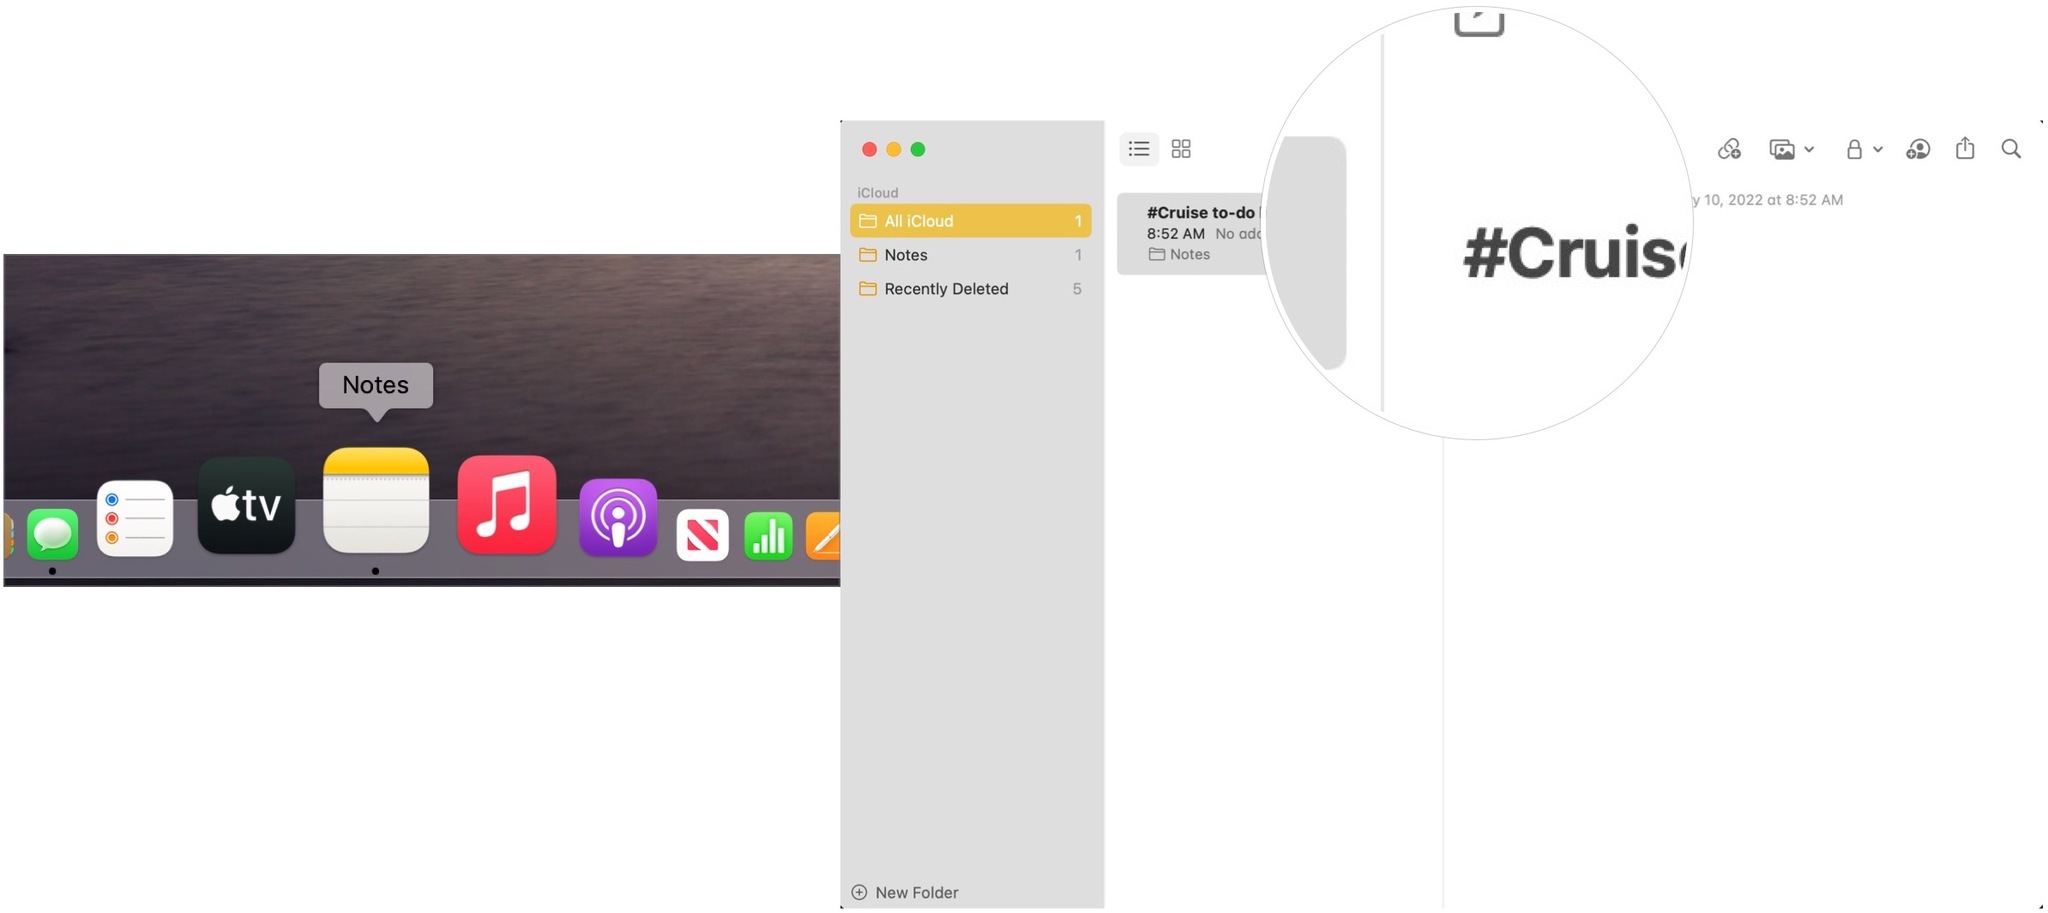
- Open the Notes app on your Mac.
- Create a new note or open an existing one.
-
Type the number sign (#) followed by a word to create a new tag. For example, #cruise or #grocery. Tags can be created anywhere in a note. Once you have tags in Notes, you'll see suggested tags appear. Tags must be a single word, but you can use hyphens and underscores such as #cruise-trip or #grocery-list.
- Click the return key or spacebar to create the tag.
-
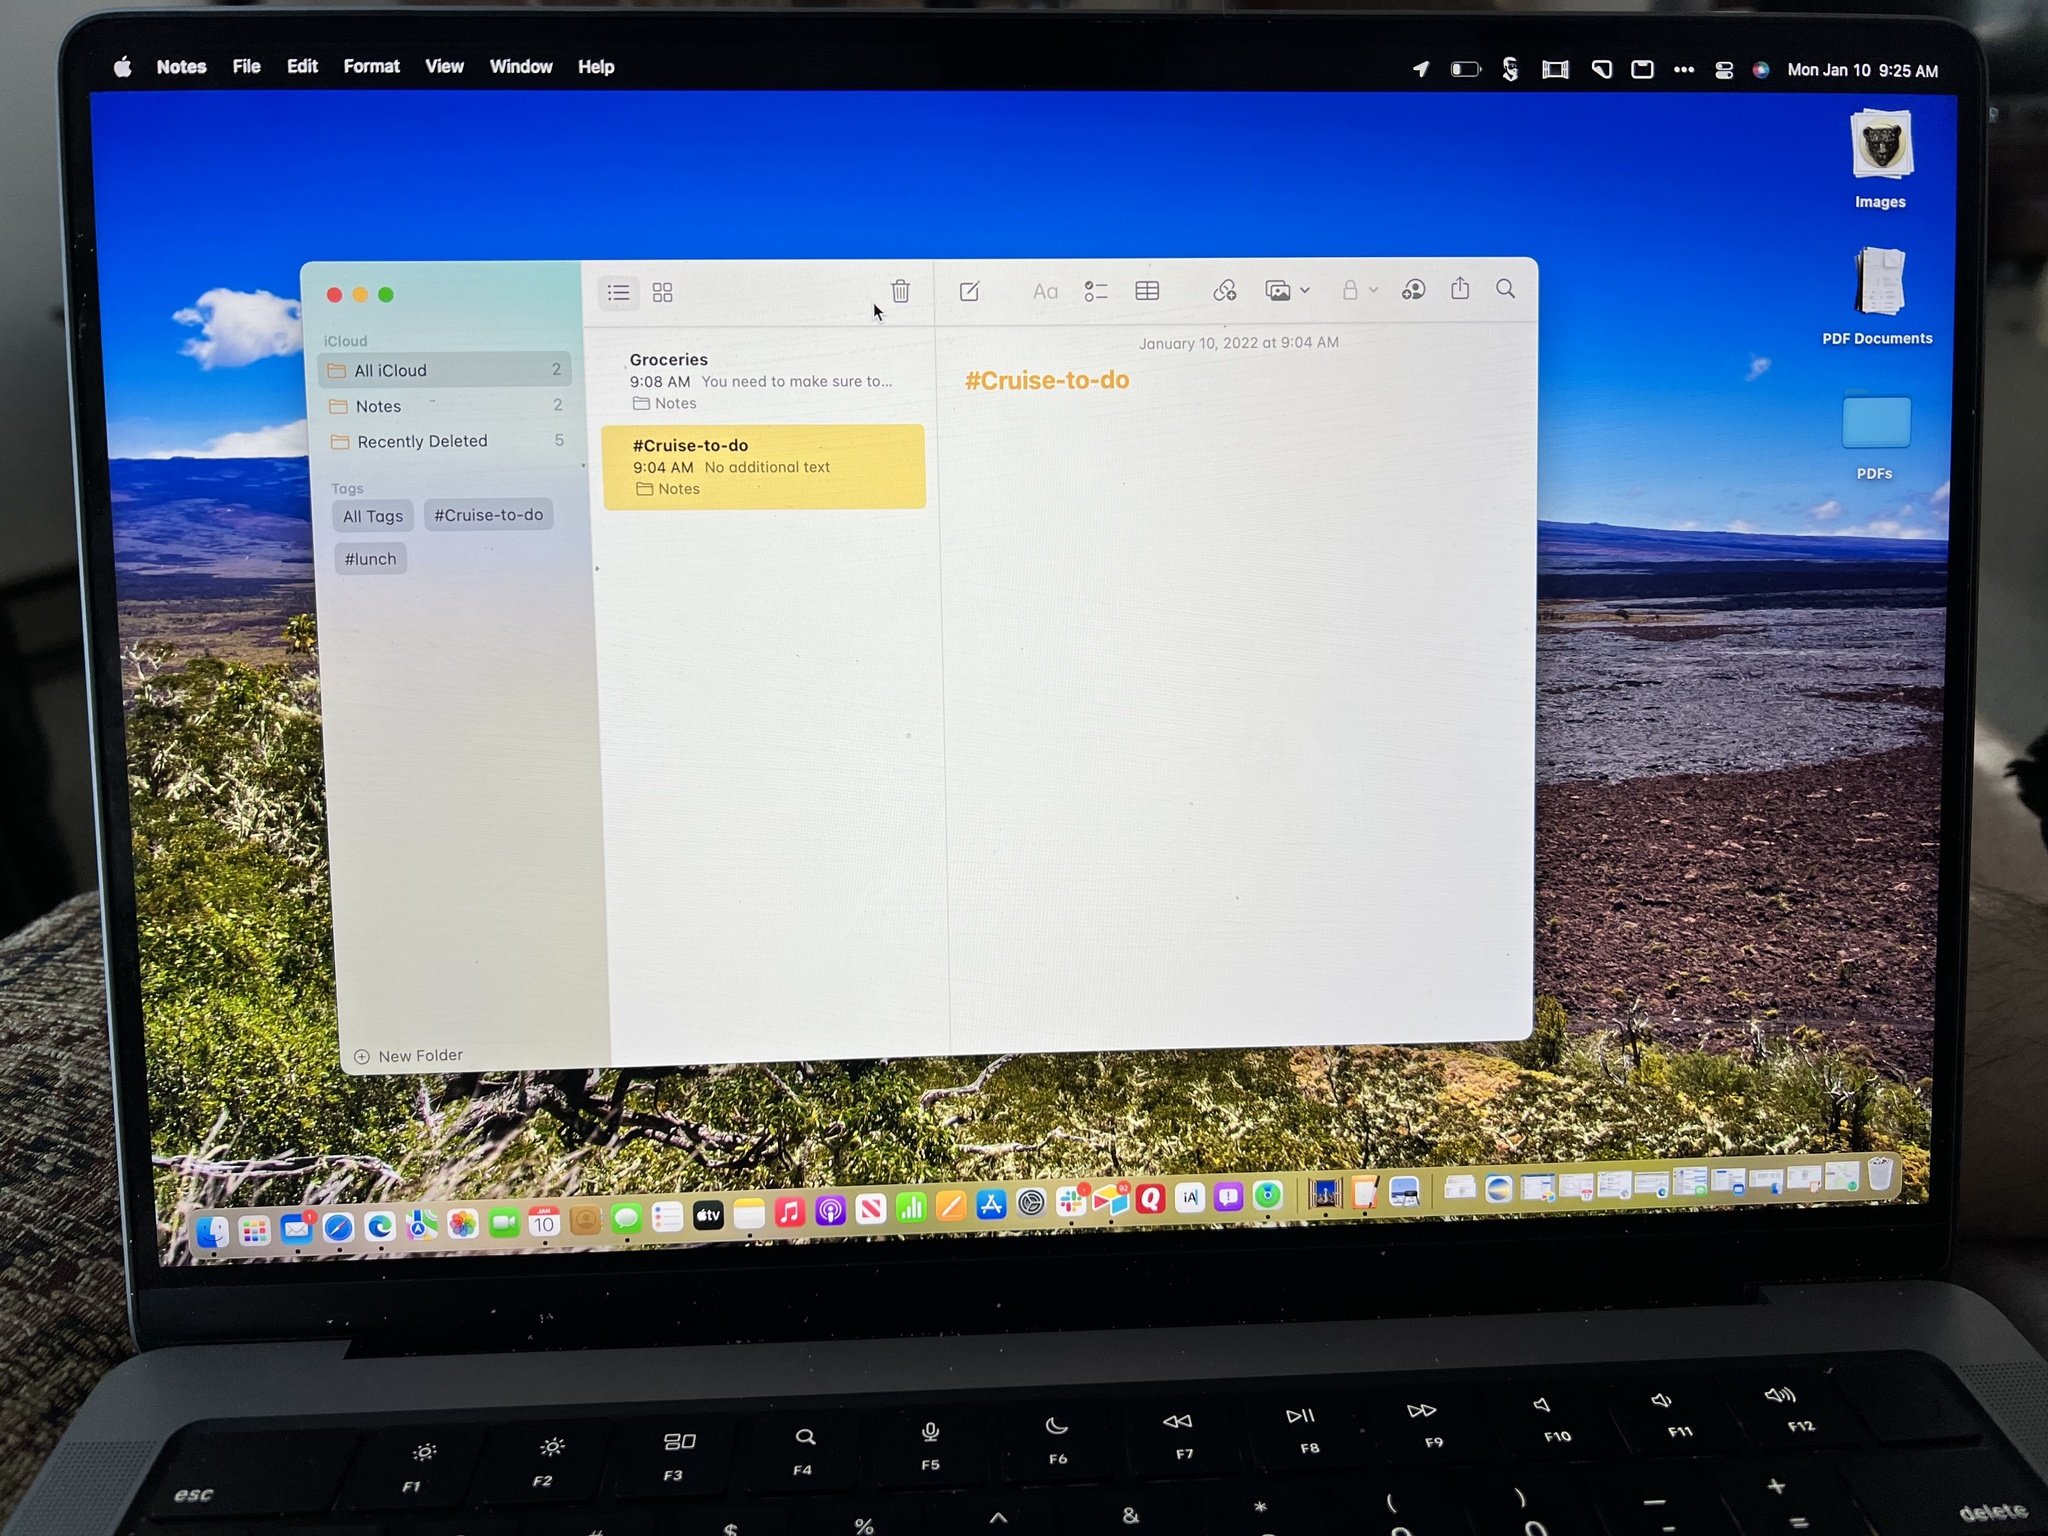
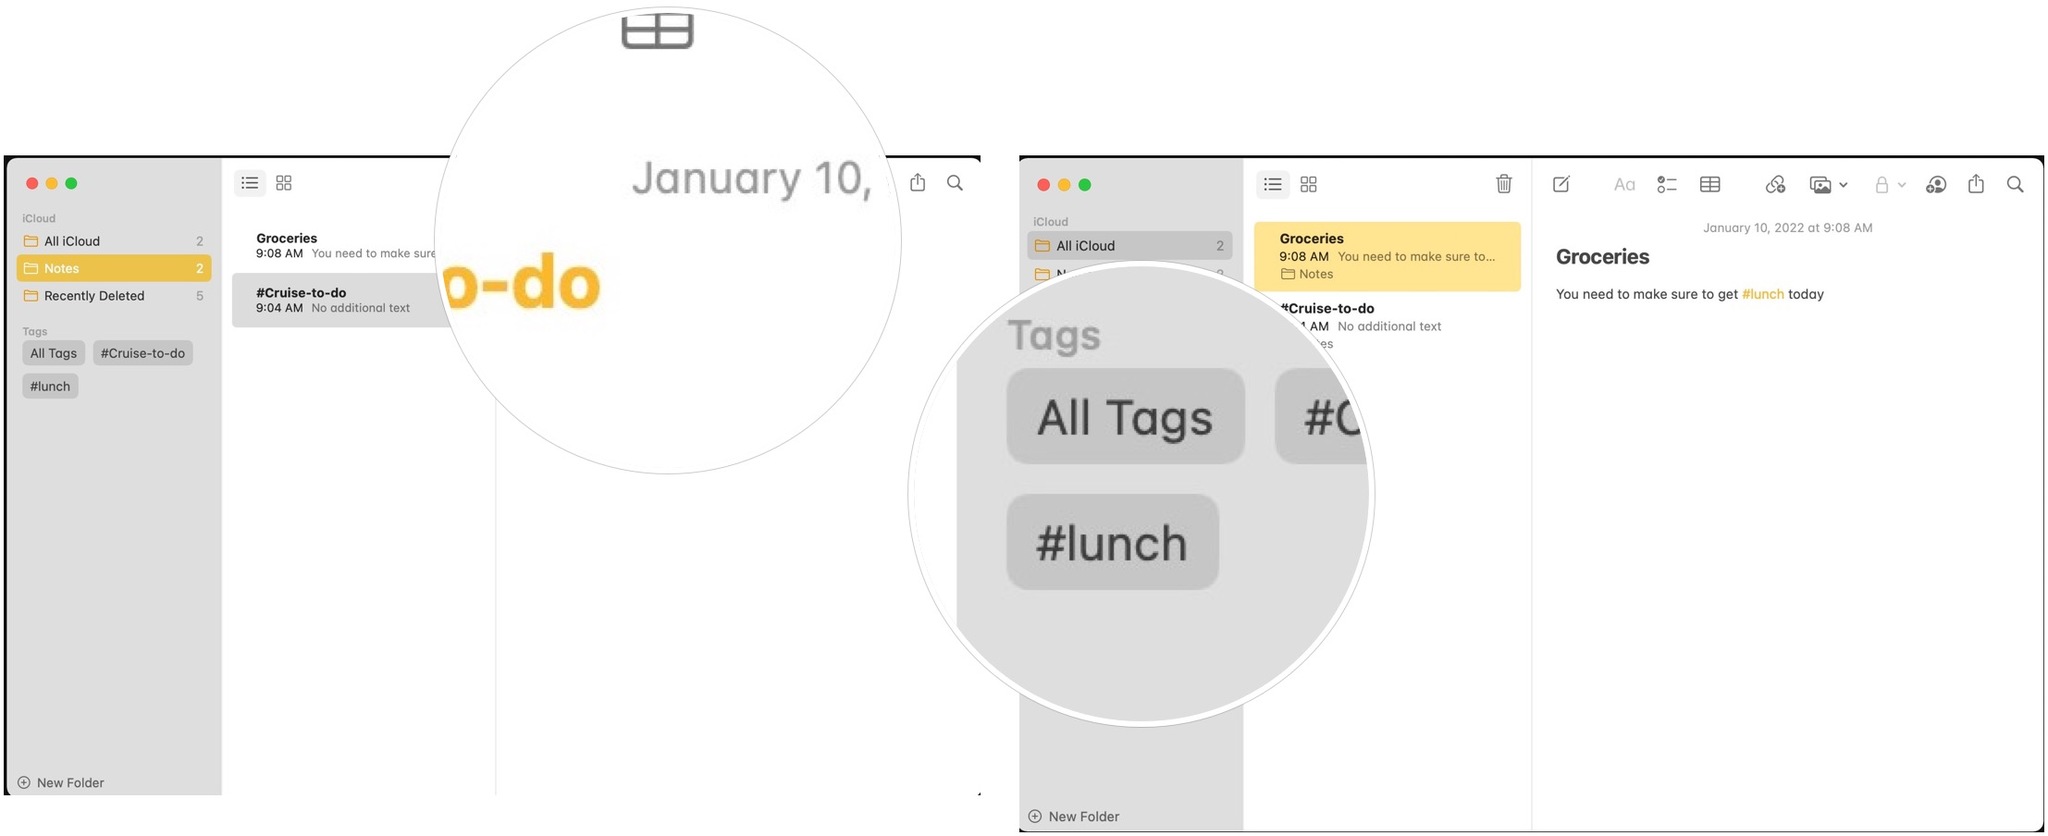
See tags in the Tag Browser in the Notes app sidebar.
As Apple explains, if you add a tag to a shared note, it appears as dimmed text to other participants who don't have the tag in their Tag Browser. They can Control-click the tag, then choose to Add to Tags.
To search for which notes contain which tags:
- Click the tag in the Tag Browser in the sidebar or
- Select multiple tags at the same time in the Tag Browser.
Renaming tags
You can rename a tag at any time by following these directions:
- Open the Notes app on your Mac.
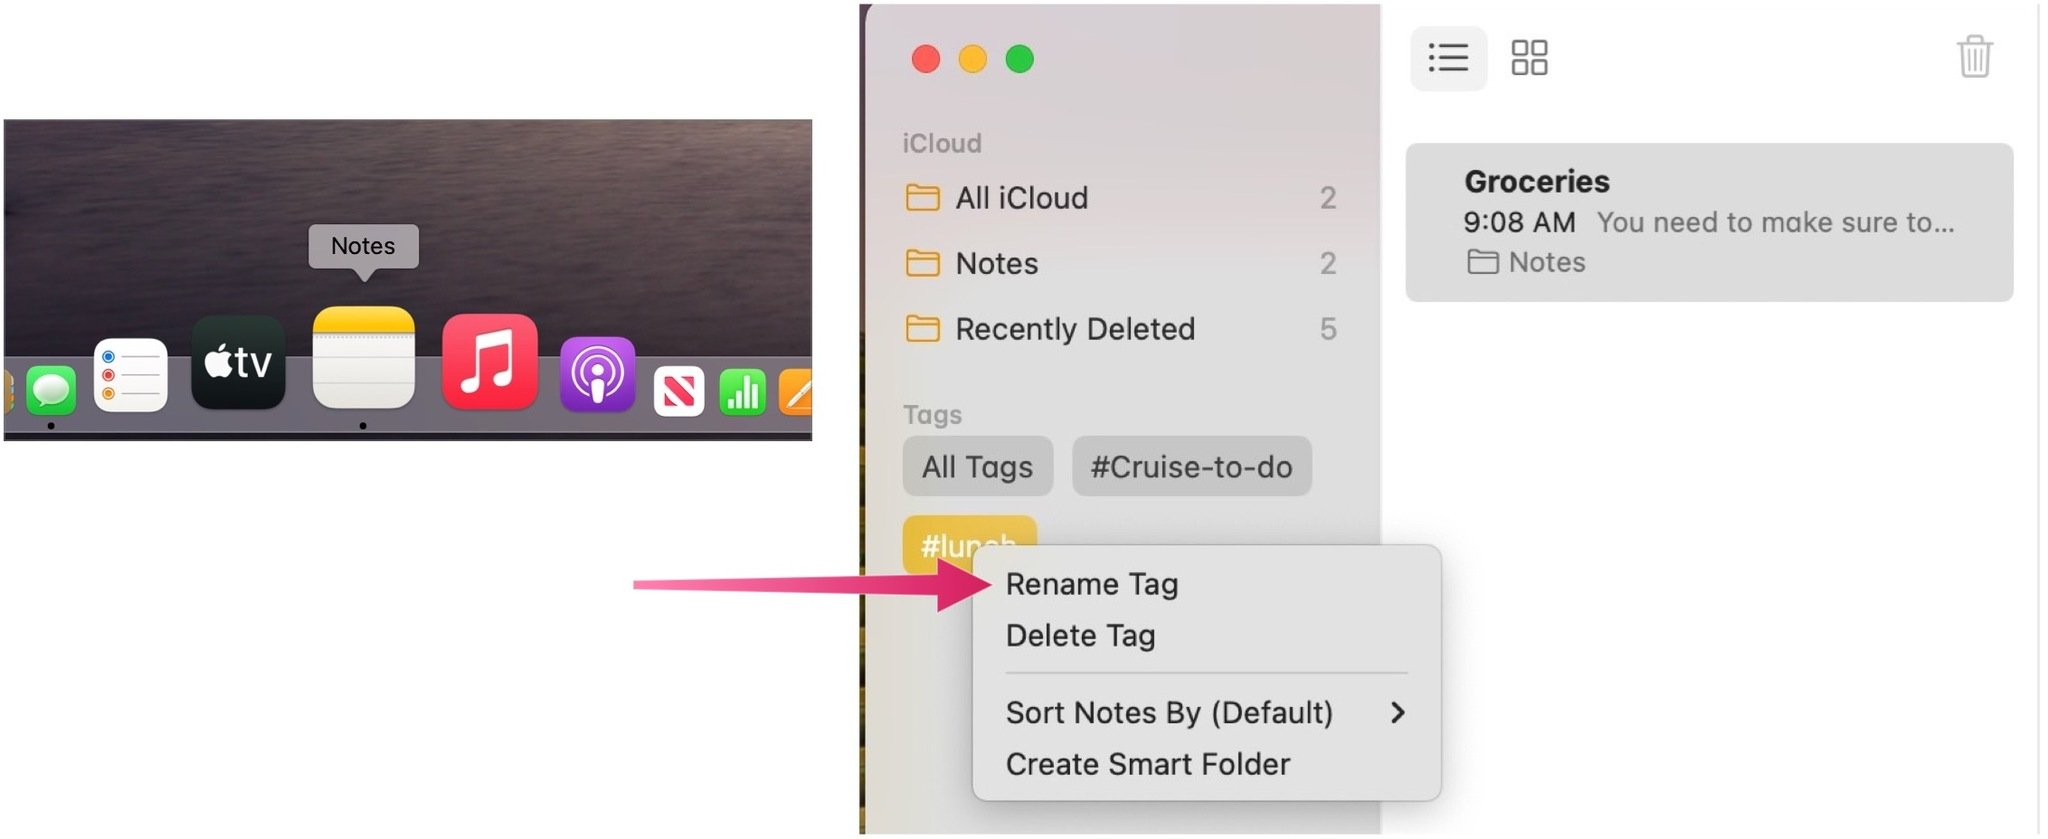
- Control-click a tag in the Tag Browser on the sidebar.
-
Select Rename Tag.
- Rename the tag.
-
Click Rename to confirm.
The altered tag is changed everywhere within Notes.
As Apple explains, if you rename a tag in a shared note, it appears as dimmed text to other participants who don't have the tag in their Tag Browser. They can Control-click the tag, then choose to Add to Tags.
Deleting tags
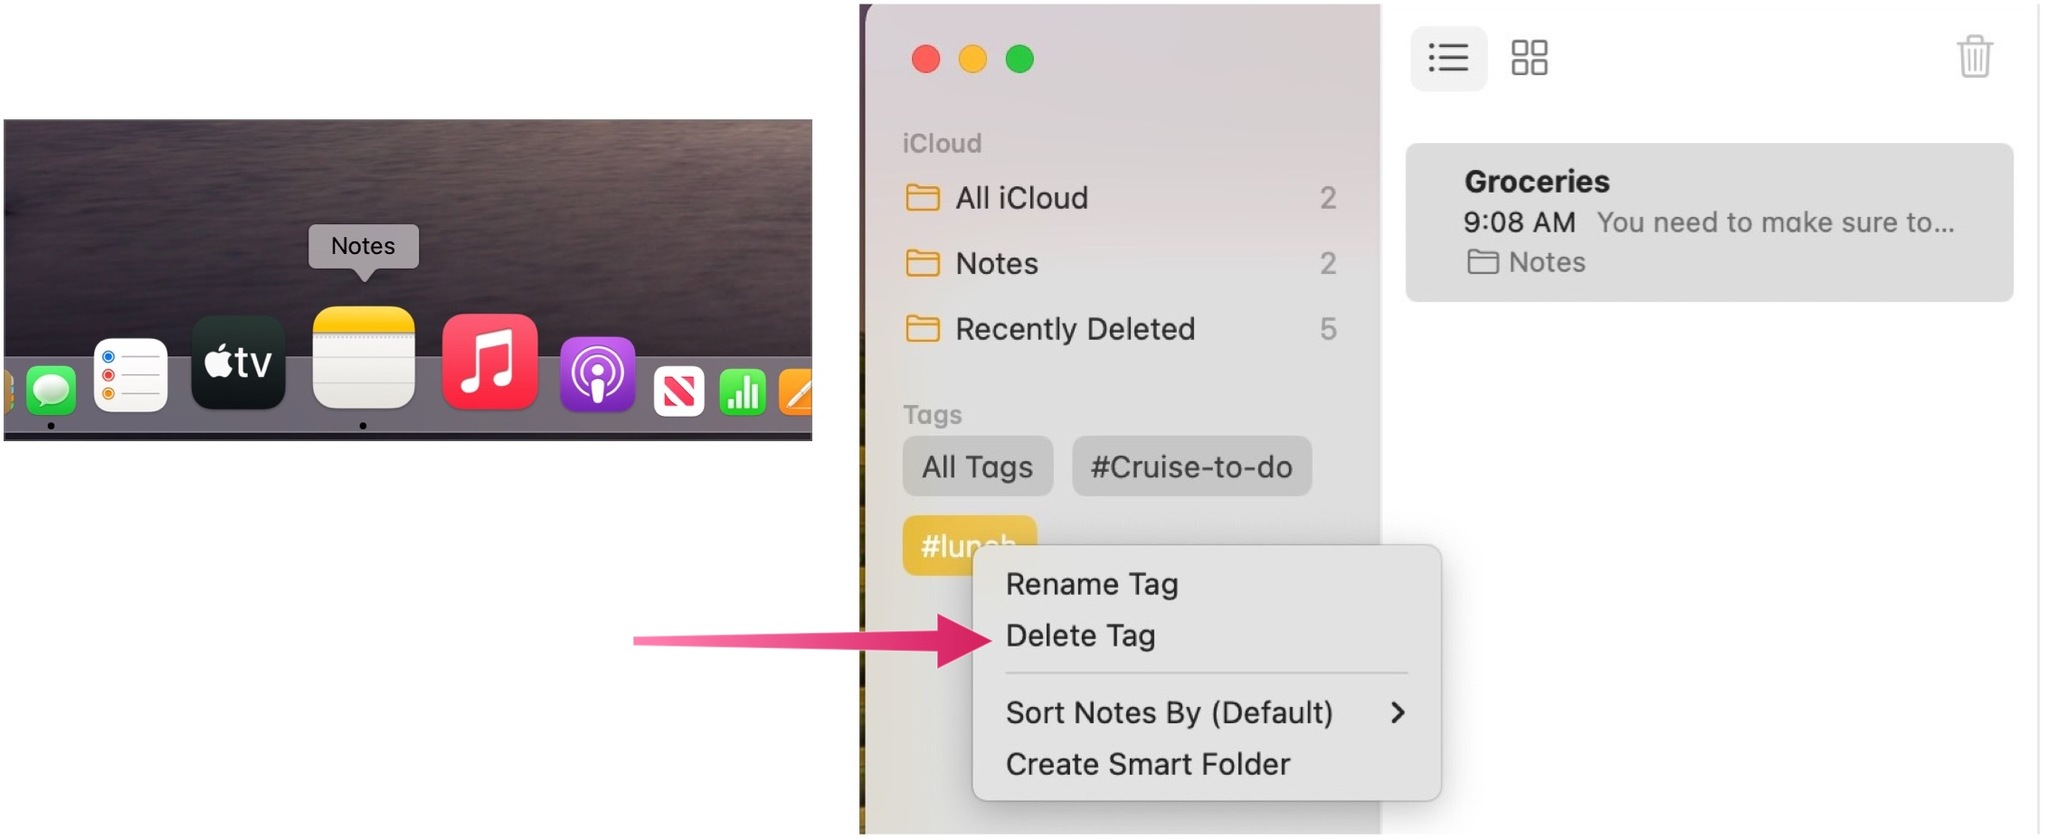
If you no longer want a tag in Notes, you can delete it by following these directions:
- Open the Notes app on your Mac.
- Control-click a tag in the Tag Browser on the sidebar.
-
Select Delete Tag.
-
Click Delete to confirm. Your tag has been deleted from the Tag Browser. However, the text will remain in the notes; it just won't serve as a tag any longer.
Creating Smart Folders
Another new option in the Notes app on Mac is Smart Folders. Use these folders to organize your notes with one or more tags. Keep in mind that Smart Folders don't contain notes in this case. Instead, they have references to notes in other folders. Smart Folders can't be locked, turned into subfolders, or shared.
After opening the Notes app, to create a Smart Folder:
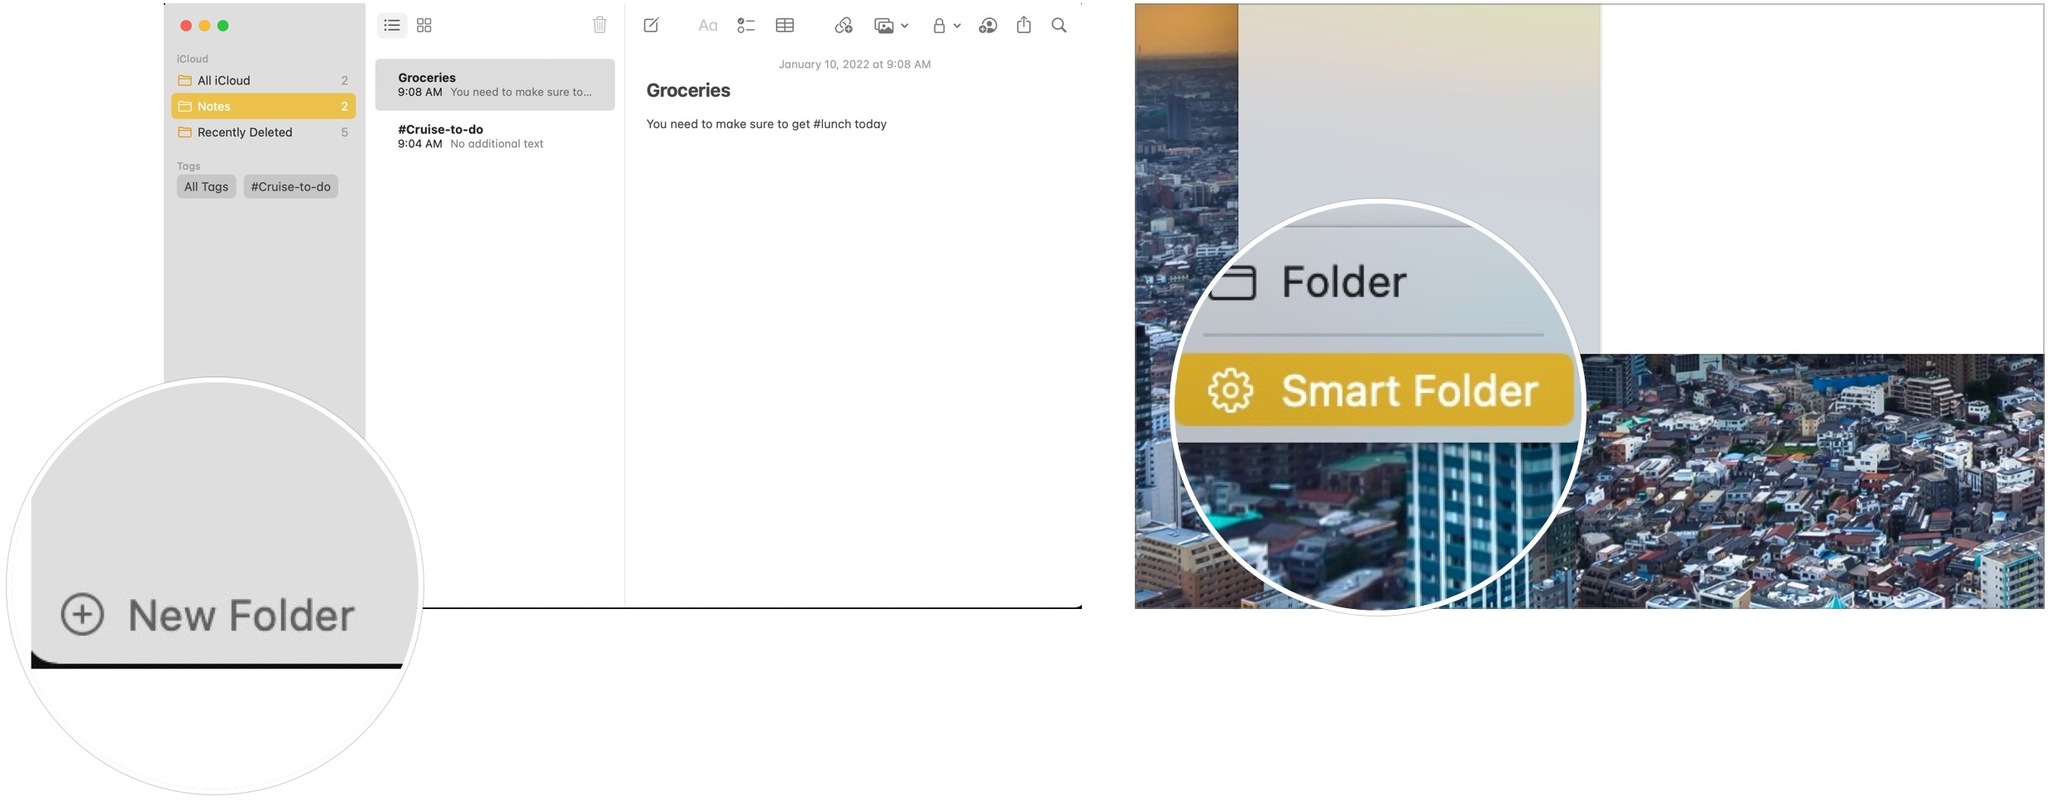
- Click New Folder in the sidebar.
-
Choose Smart Folder from the pull-down menu.
- Change the name of the Smart Folder in the pop-up menu.
- Add the tag(s) you wish to include for the Smart Folder. You can create new tags or select from the list of existing ones. More than one tag is allowed. When you have more than one tag, all the tags must be included in a note for it to show up on the Smart Folder.
-
Click OK.
Edit Smart Folders
You can adjust the rules for Smart Folders by opening the Notes app on Mac then:
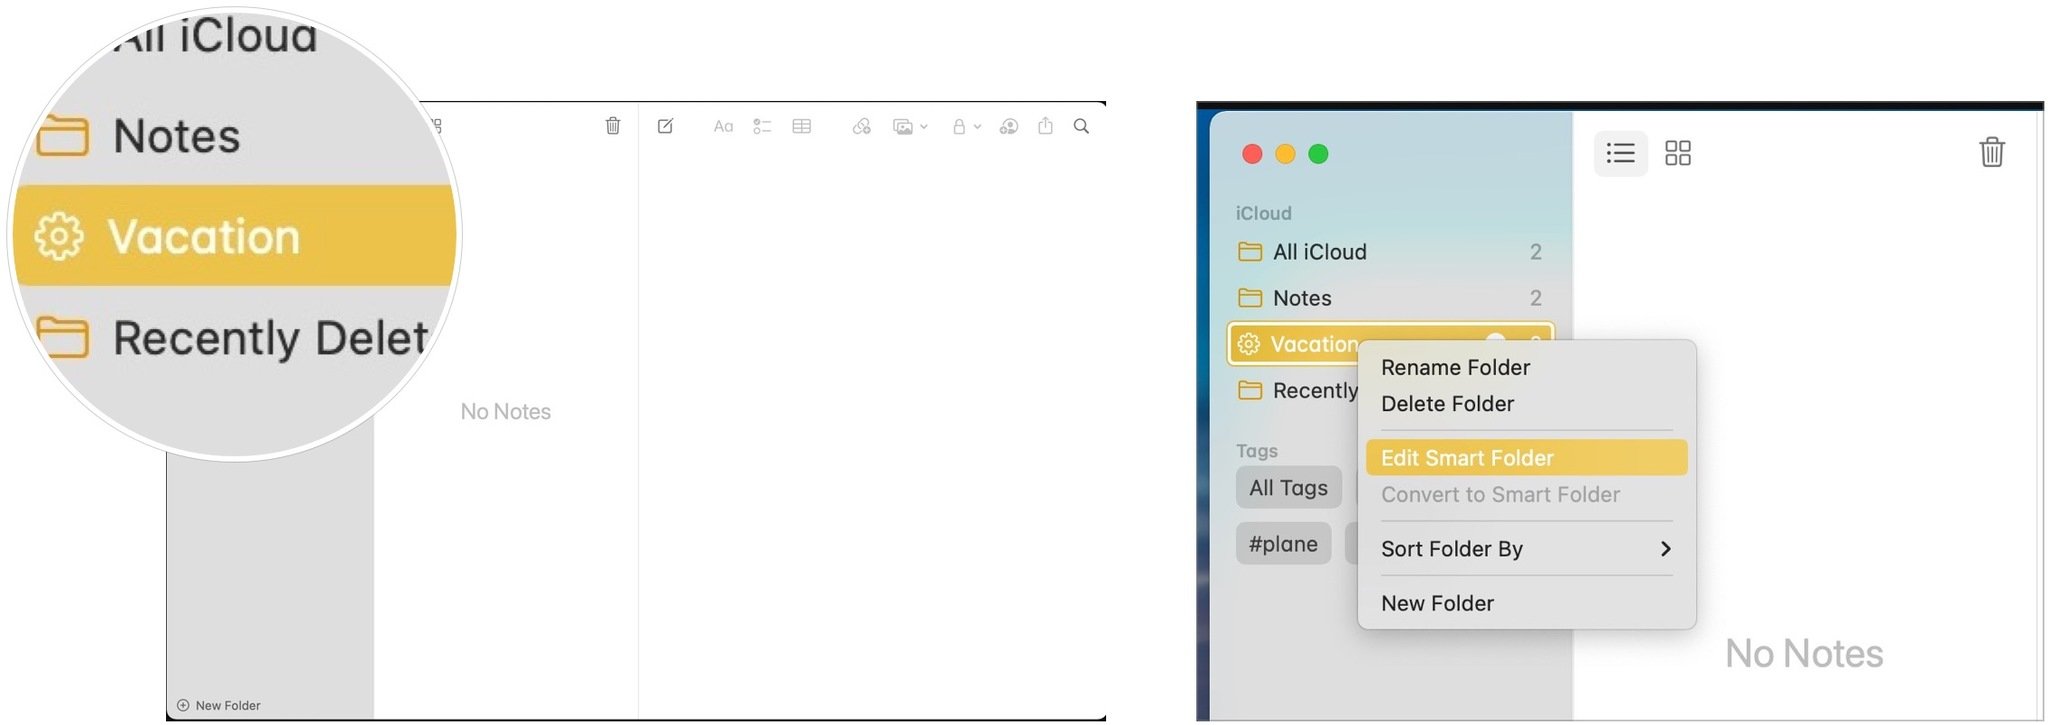
- Right-click on a Smart Folder on the sidebar.
-
Choose Edit Smart Folder from the pull-down menu.
- Make changes. For example, you can adjust the name or tags included in the Smart Folder.
-
Click OK.
Delete Smart Folders
If you no longer want a Smart Folder, you can delete it after opening the Notes app on Mac:
- Right-click on a Smart Folder on the sidebar.
- Choose Delete Smart Folder from the pull-down menu.
-
Select Delete to confirm.
Convert folders to Smart Folders
Folders in the Notes app on Mac can easily be converted into Smart Folders. The notes are moved to the general Notes folder when a folder gets converted and tagged with "#Name." This process can't be undone.
After opening the Notes app:
- Right-click on a regular folder in the Notes apps.
-
Select Convert to Smart Folder from the pull-down menu.
Make your life easier
Though Quick Notes is the primary new Notes feature in macOS Monterey, there's also the addition of tags.
Tags and Smart Folders in the Notes app on Mac make it easier to organize and find your content. The steps involved are intuitive and don't take much time to set up and complete. Use both tools to improve your workflow.
Updated June 2022: With slight changes.
from iMore - Learn more. Be more.
via TechnW3





No comments: